Introduction
This section guides user to setup Zebra IoT Connector for various deployment modes discussed at section.
Setting up Zebra IoT Connector is three step process:
Add endpoint configuration.
Configure interfaces to appropriate endpoints.
Start IoT Connector Service.
ZIoT Connector Web Interface
The Zebra IoT Connector can be configured using the reader web UI.
Open a web browser to connect to the reader using the host name or IP address.
The configuration page is used for configuring ZIoTC endpoints and interfaces.
Click Communication > Zebra IoT Connector > Configuration.
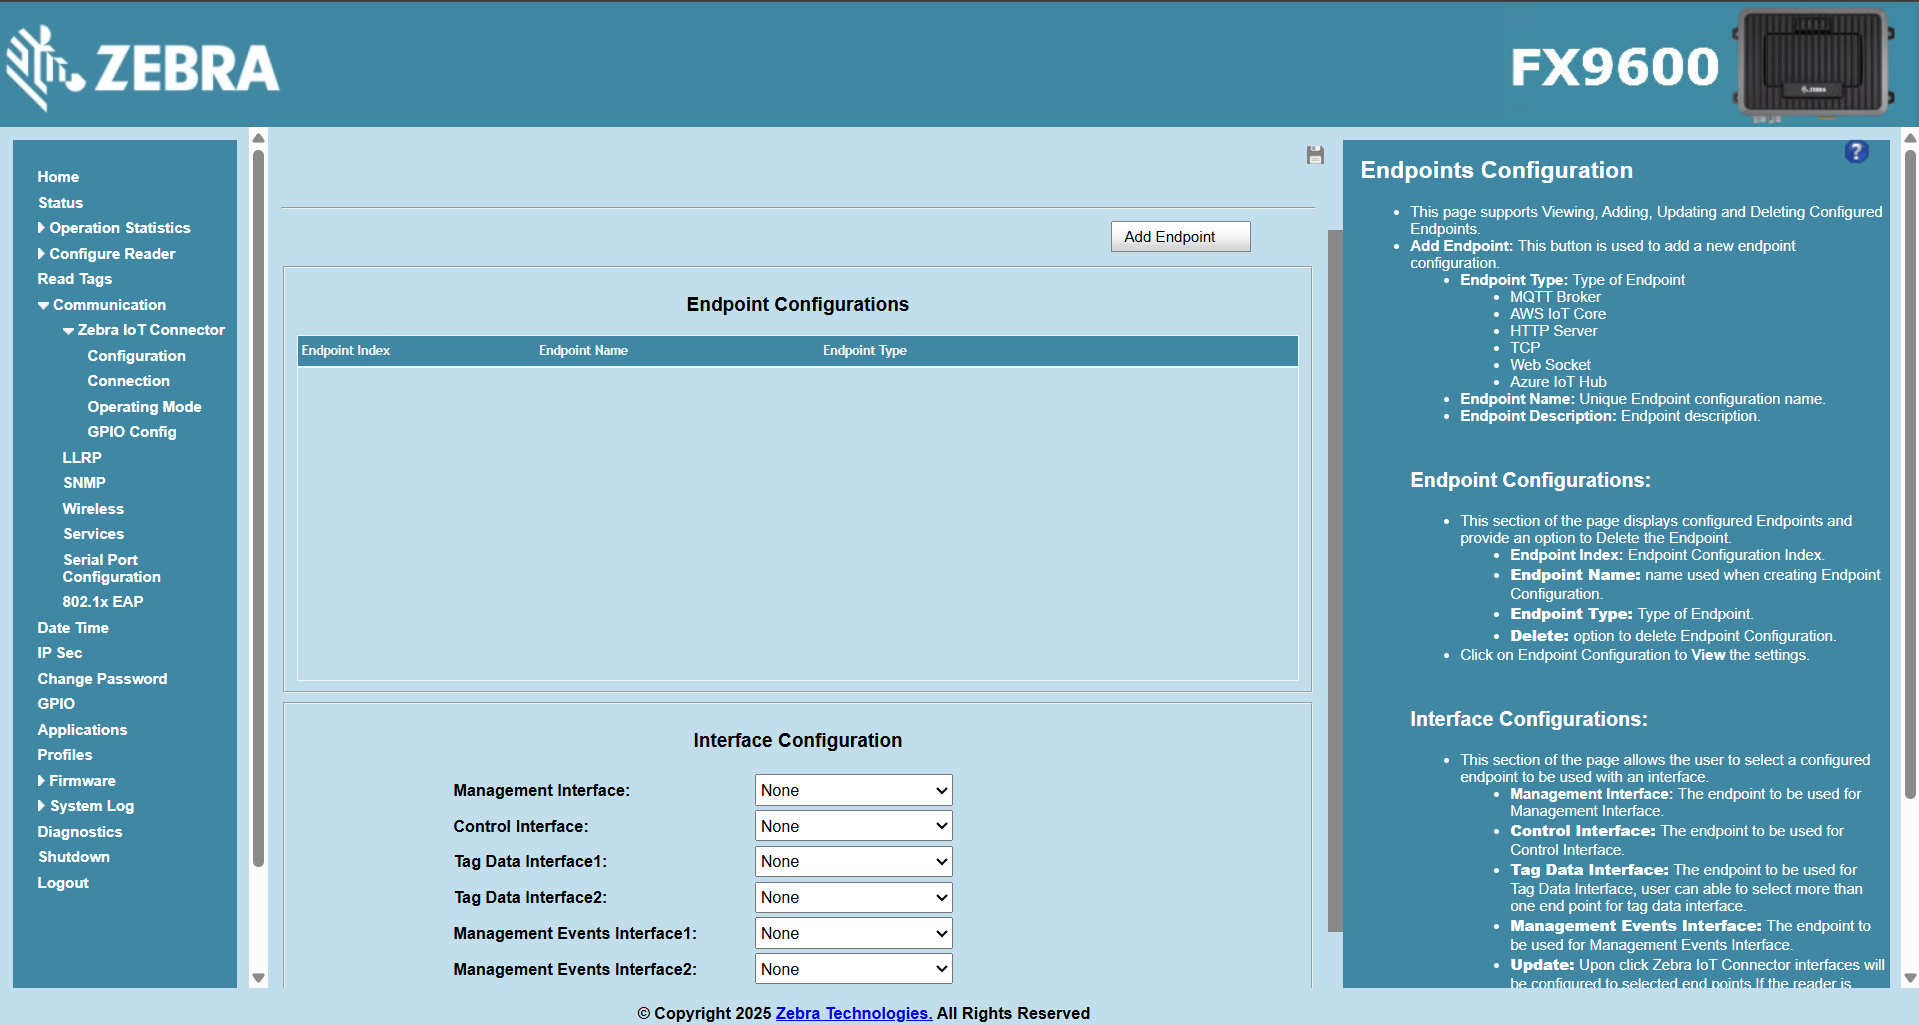
Using this page user can
Add,View,Update, andDeleteendpoint configurations.Endpoint Configuration can be added by clicking
Add Endpointbutton. currently reader supports following endpoints.MQTT Broker.
HTTP Server.
AWS IoT Core.
Azure IoT Hub.
TCP
Websockets
Keyboard Emulation and HID
Current configured endpoints will be displayed under Endpoint Configurations section.
Endpoint Configuration can be updated by clicking on the endpoint configuration row.
Endpoint Configuration can be deleted by clicking on the delete icon in the endpoint configuration row.
The current interface configuration will be displayed under Interface Configuration section.
Interface configuration can be updated by selecting appropriate endpoint from dropdown and clicking
Updatebutton.
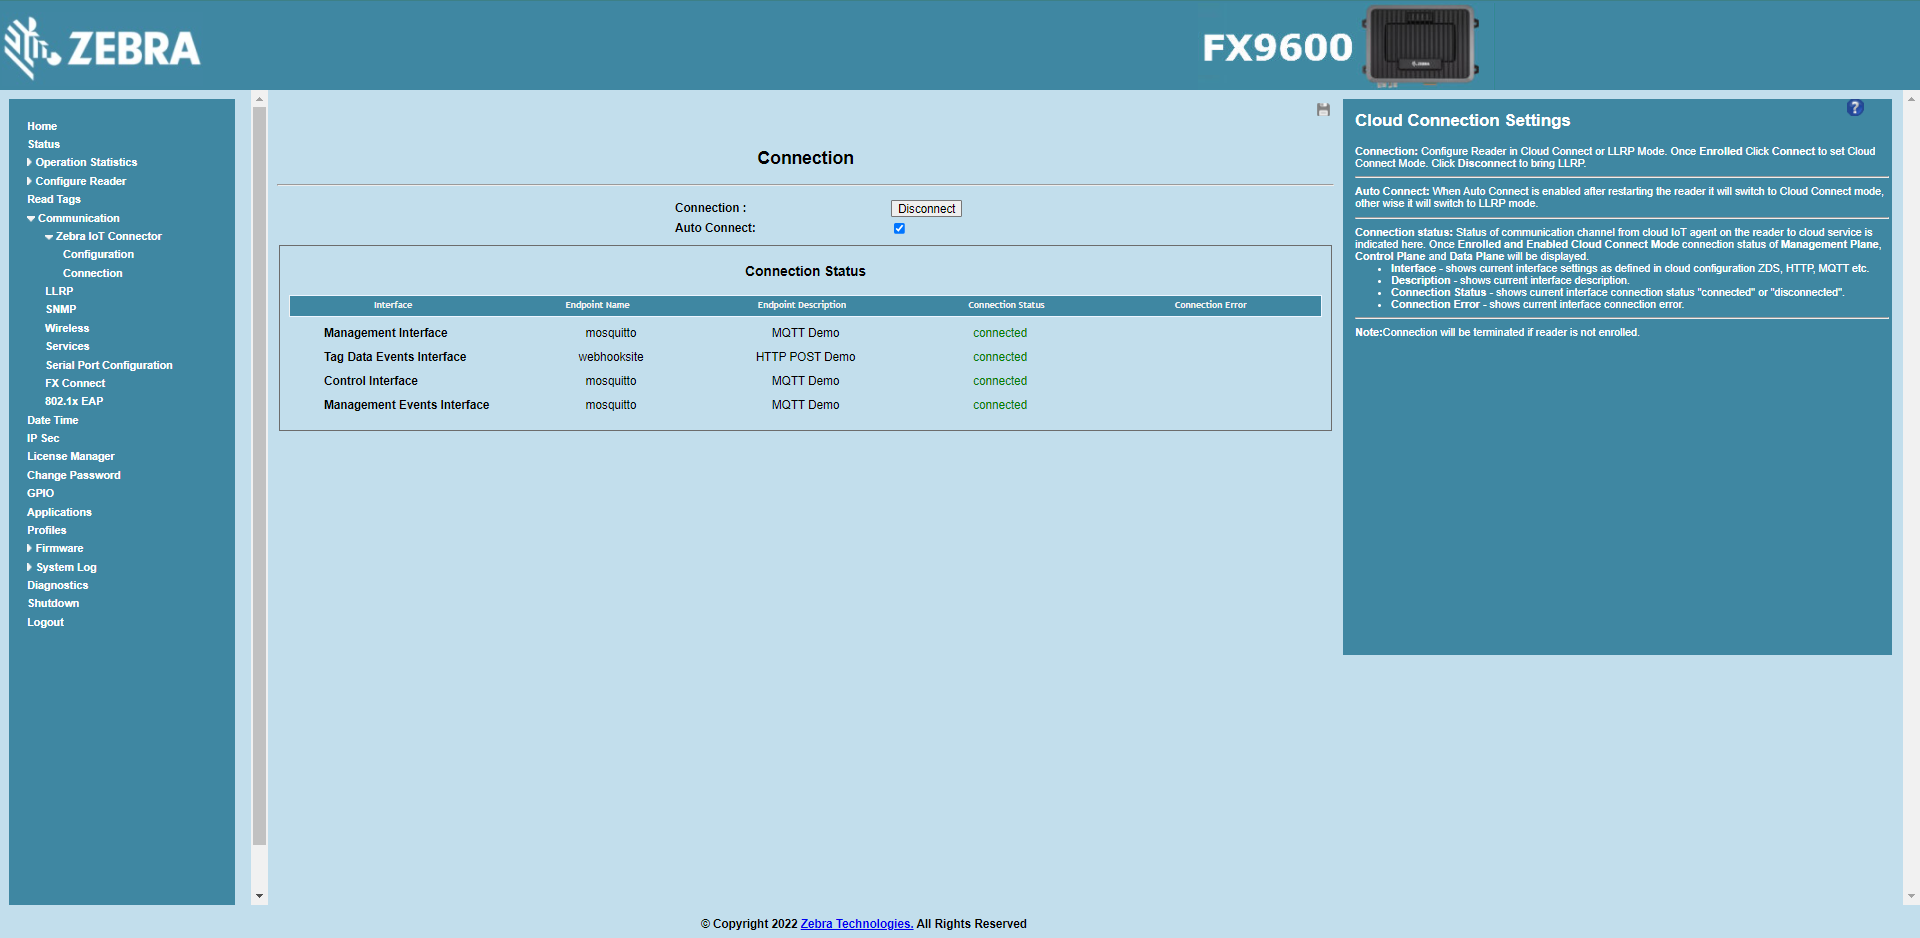
The connection page is used to view the current Interface Connection Status.
Click Communication > Zebra IoT Connector > Connection.
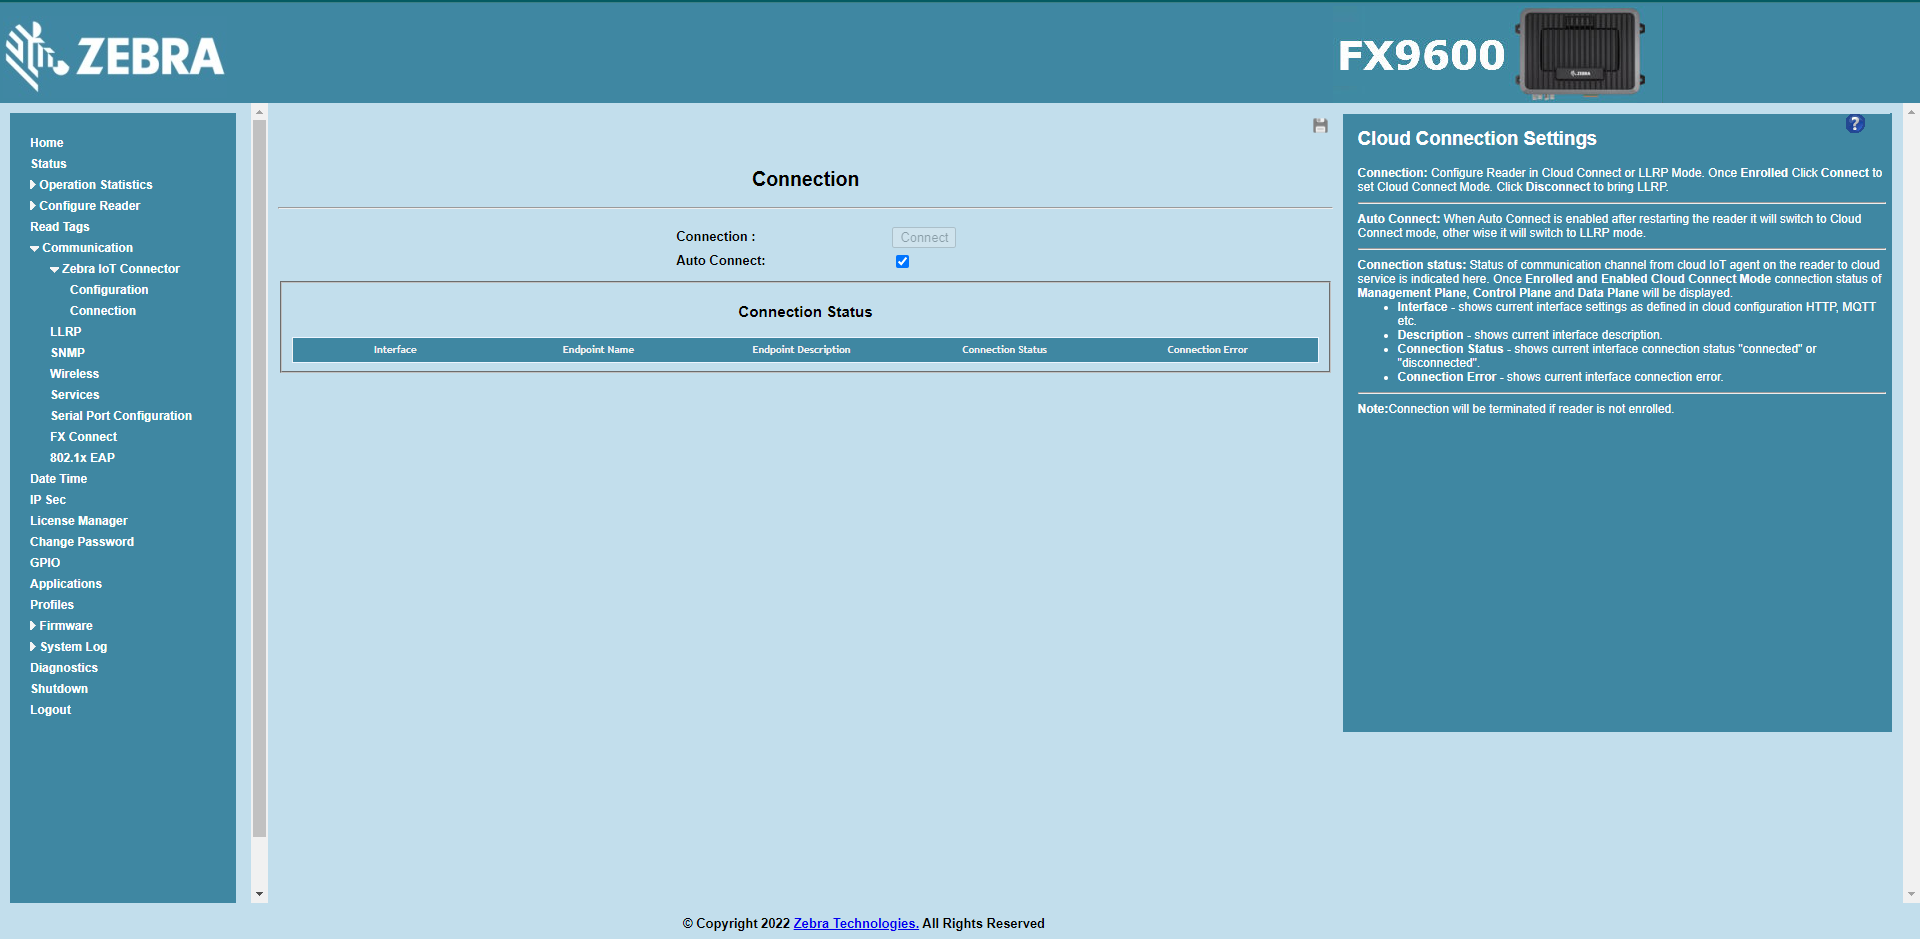
The Connection Status section displays the current interface
Connection StatusandConnection Errorinformation.
Note
While connected, the reader is configured to listen for local REST requests by default.
Reader Configuration
This section guides user to add an MQTT and HTTP Post endpoint configurations.
Endpoint Configuration
Add MQTT Endpoint
Note
An open source online MQTT Broker hosted at test.mosquitto.org will be used for this tutorial.
Open a web browser to connect to the reader using the host name or IP address.
Click Communication > Zebra IoT Connector > Configuration.
Click on
Add Endpointbutton to add new endpoint.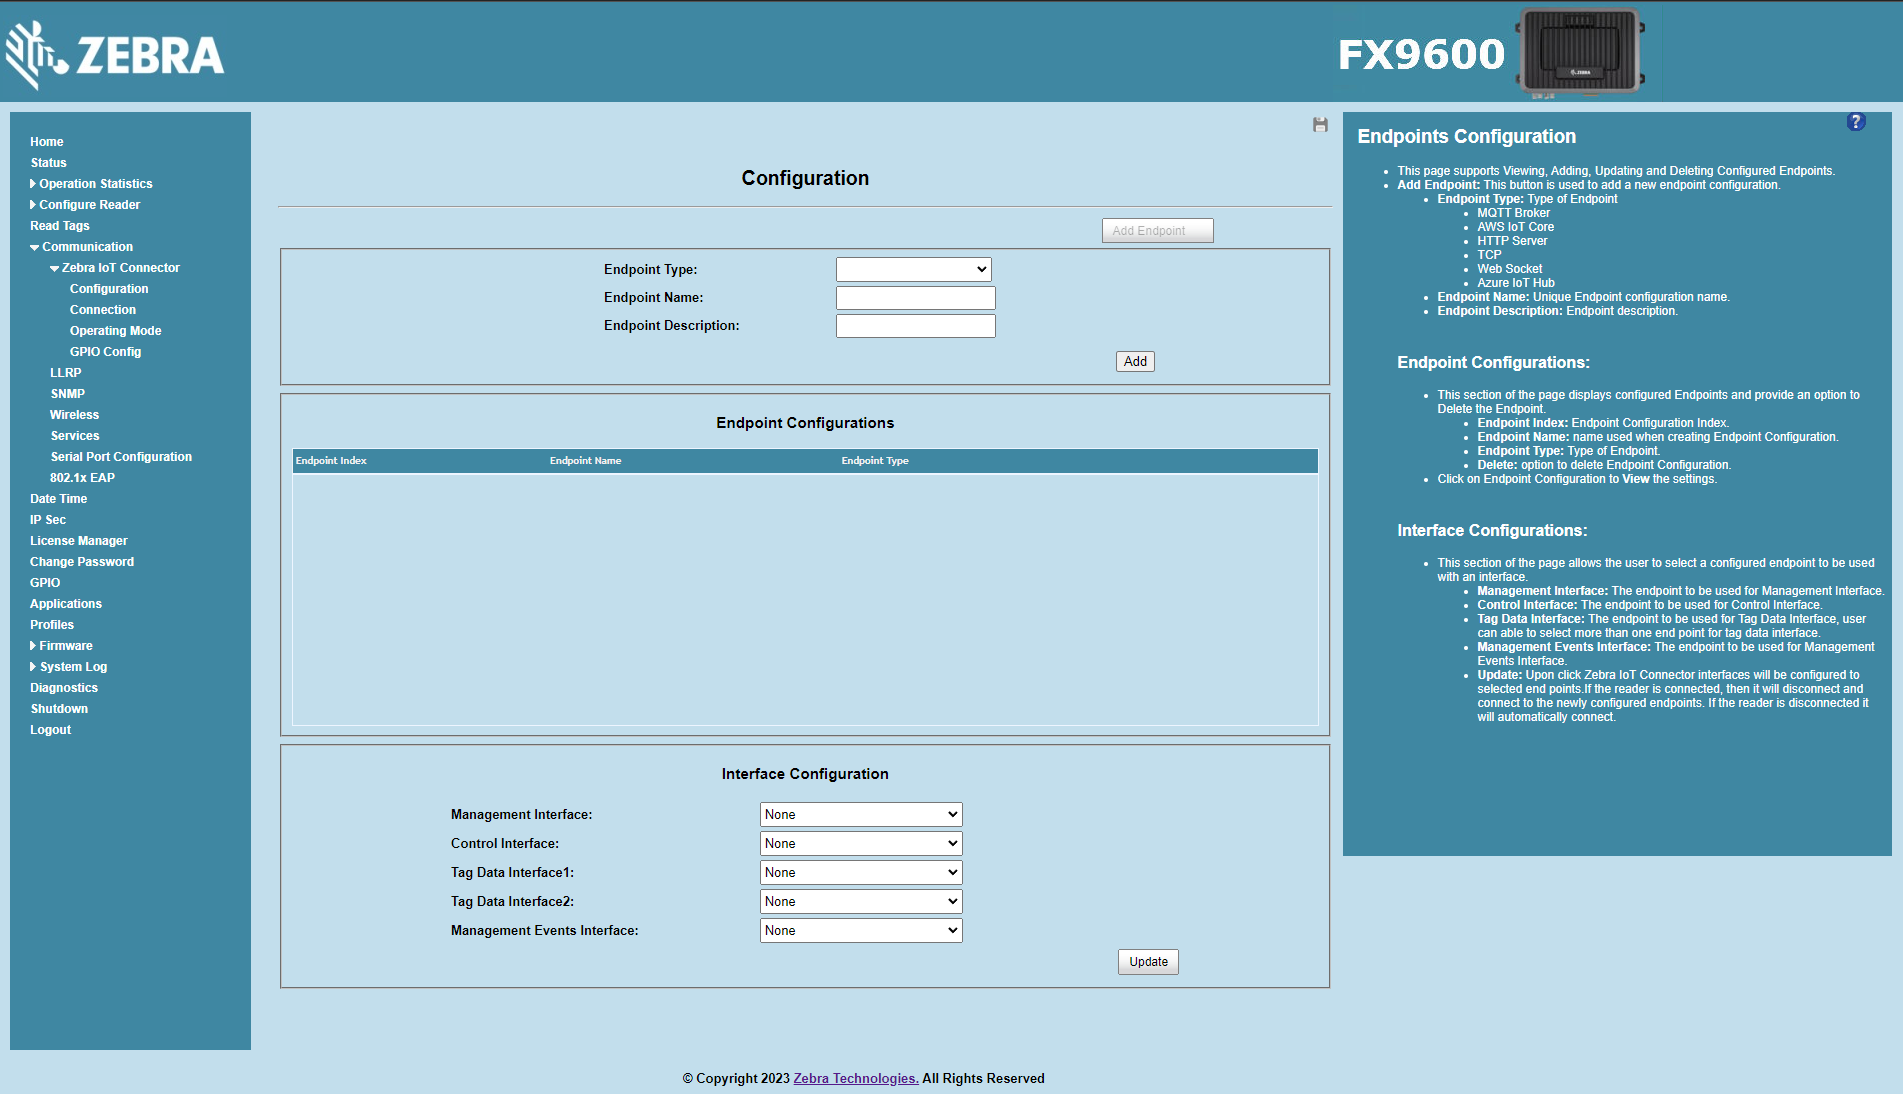
Select
MQTTfor Endpoint Type.Configure Endpoint Name and Endpoint Description fields.
Configure Connection, Topics and Certificates sections.
Configure
Server,Port,Protocol,Client Id,Clean Session,Basic Authentication, andKeep Aliveparameters under Connection section.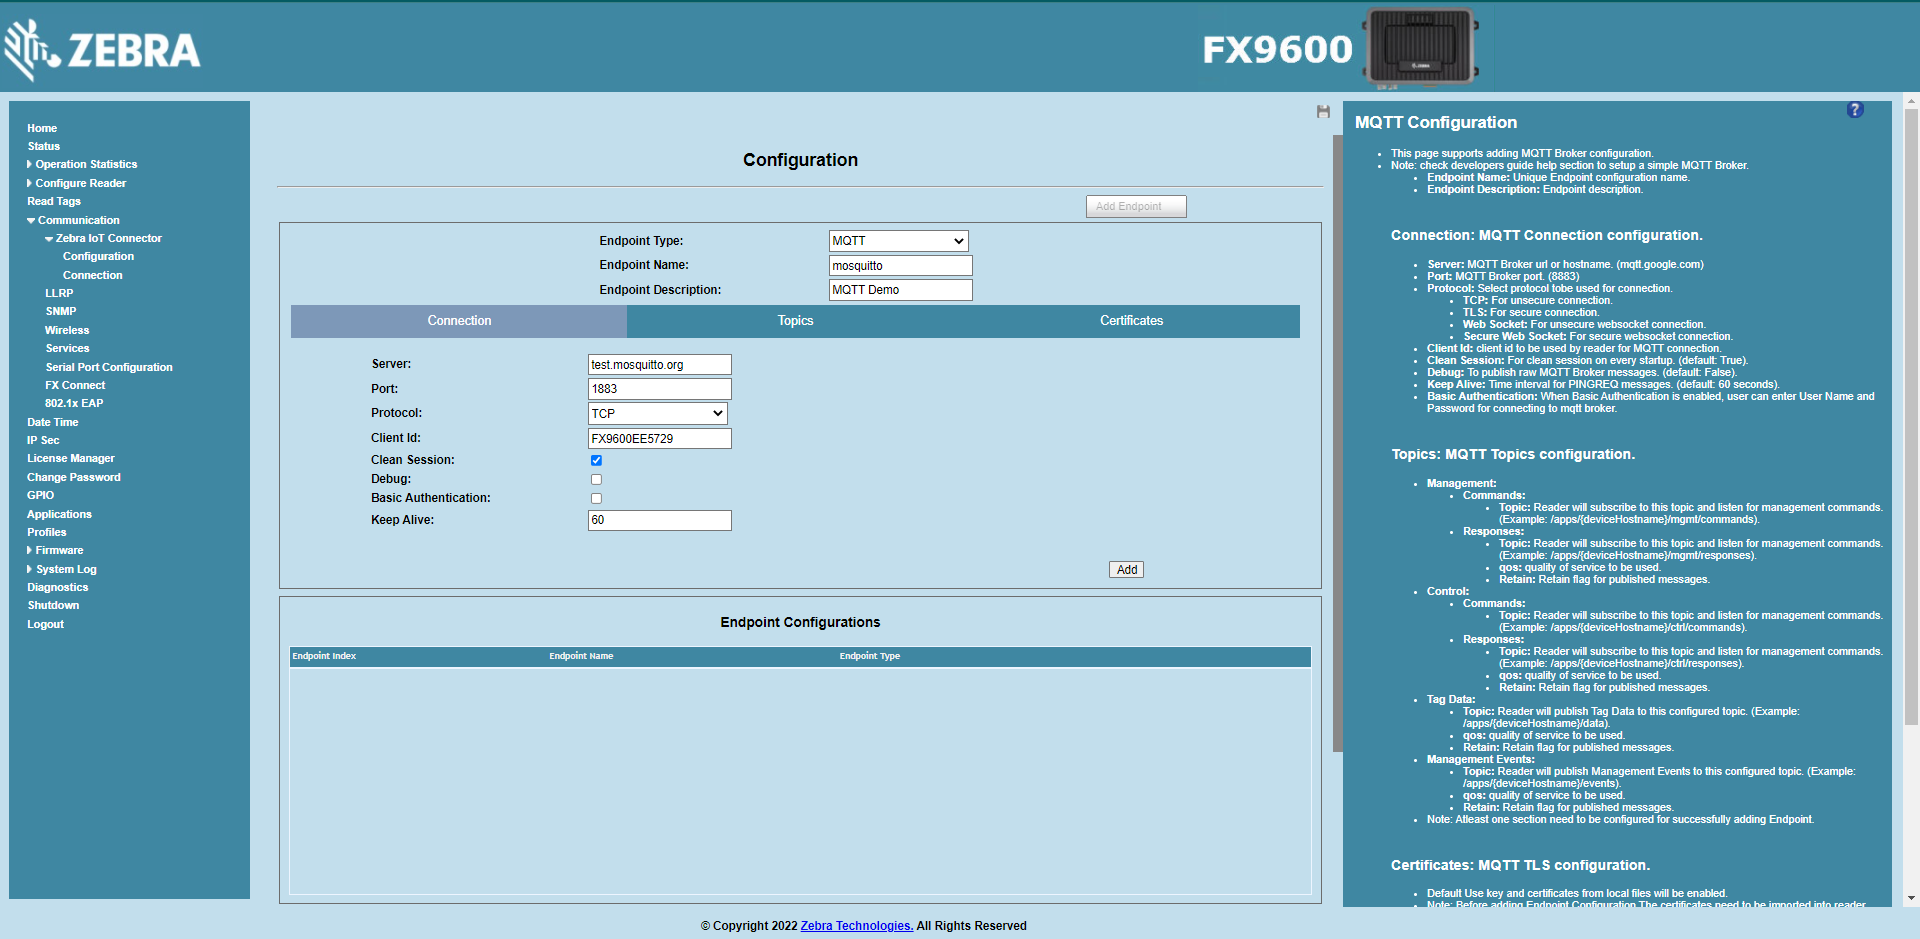
Click on Topics to configure topics to be used for Management, Control, Health and Tag Data Interfaces.
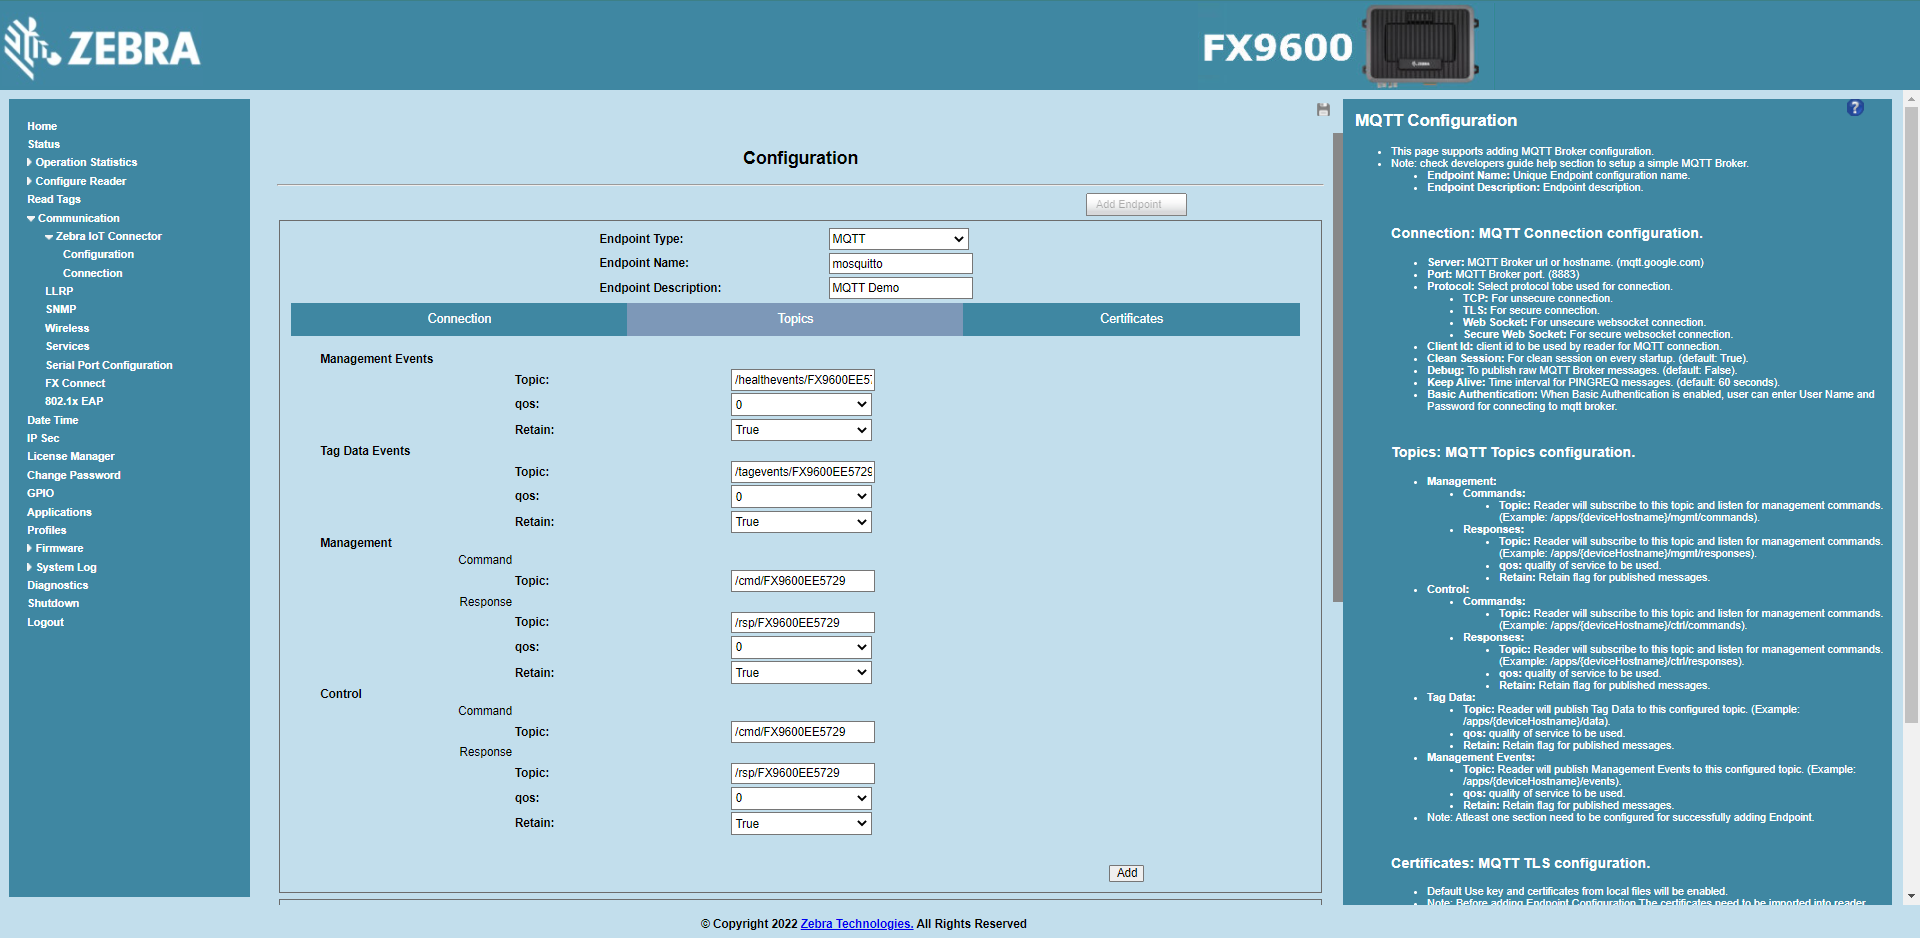
Click on
Addbutton to add endpoint.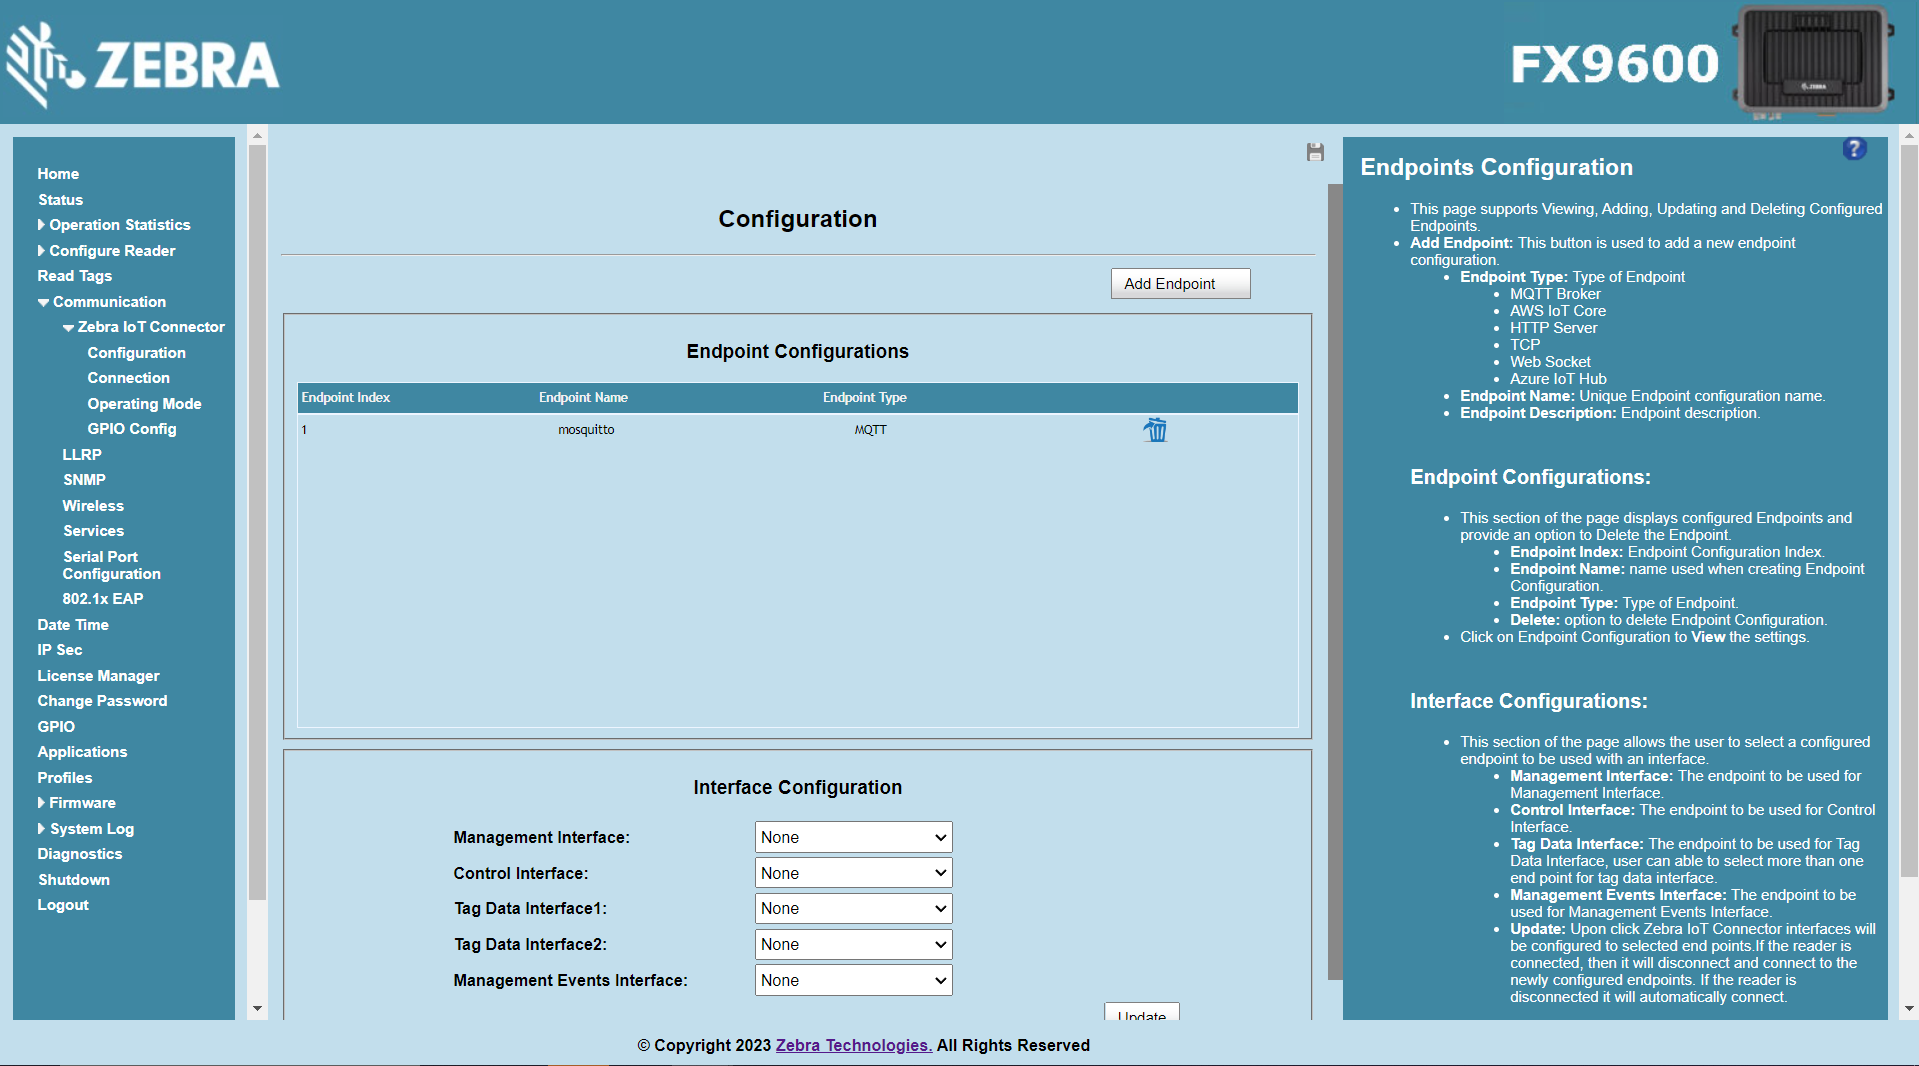
Add HTTP POST Endpoint
Note
An open source online HTTP server hosted at webhook.site will be used for this tutorial.
Open a web browser to connect to the reader using the host name or IP address.
Click Communication > Zebra IoT Connector > Configuration.
Click on
Add Endpointbutton to add new endpoint.
Select
HTTP POSTfor Endpoint Type.Configure Endpoint Name and Endpoint Description fields.
Configure Connection and Certificates sections.
Configure
URL,Verify Host,Verify PeerandAuthentication Typeparameters under Connection section.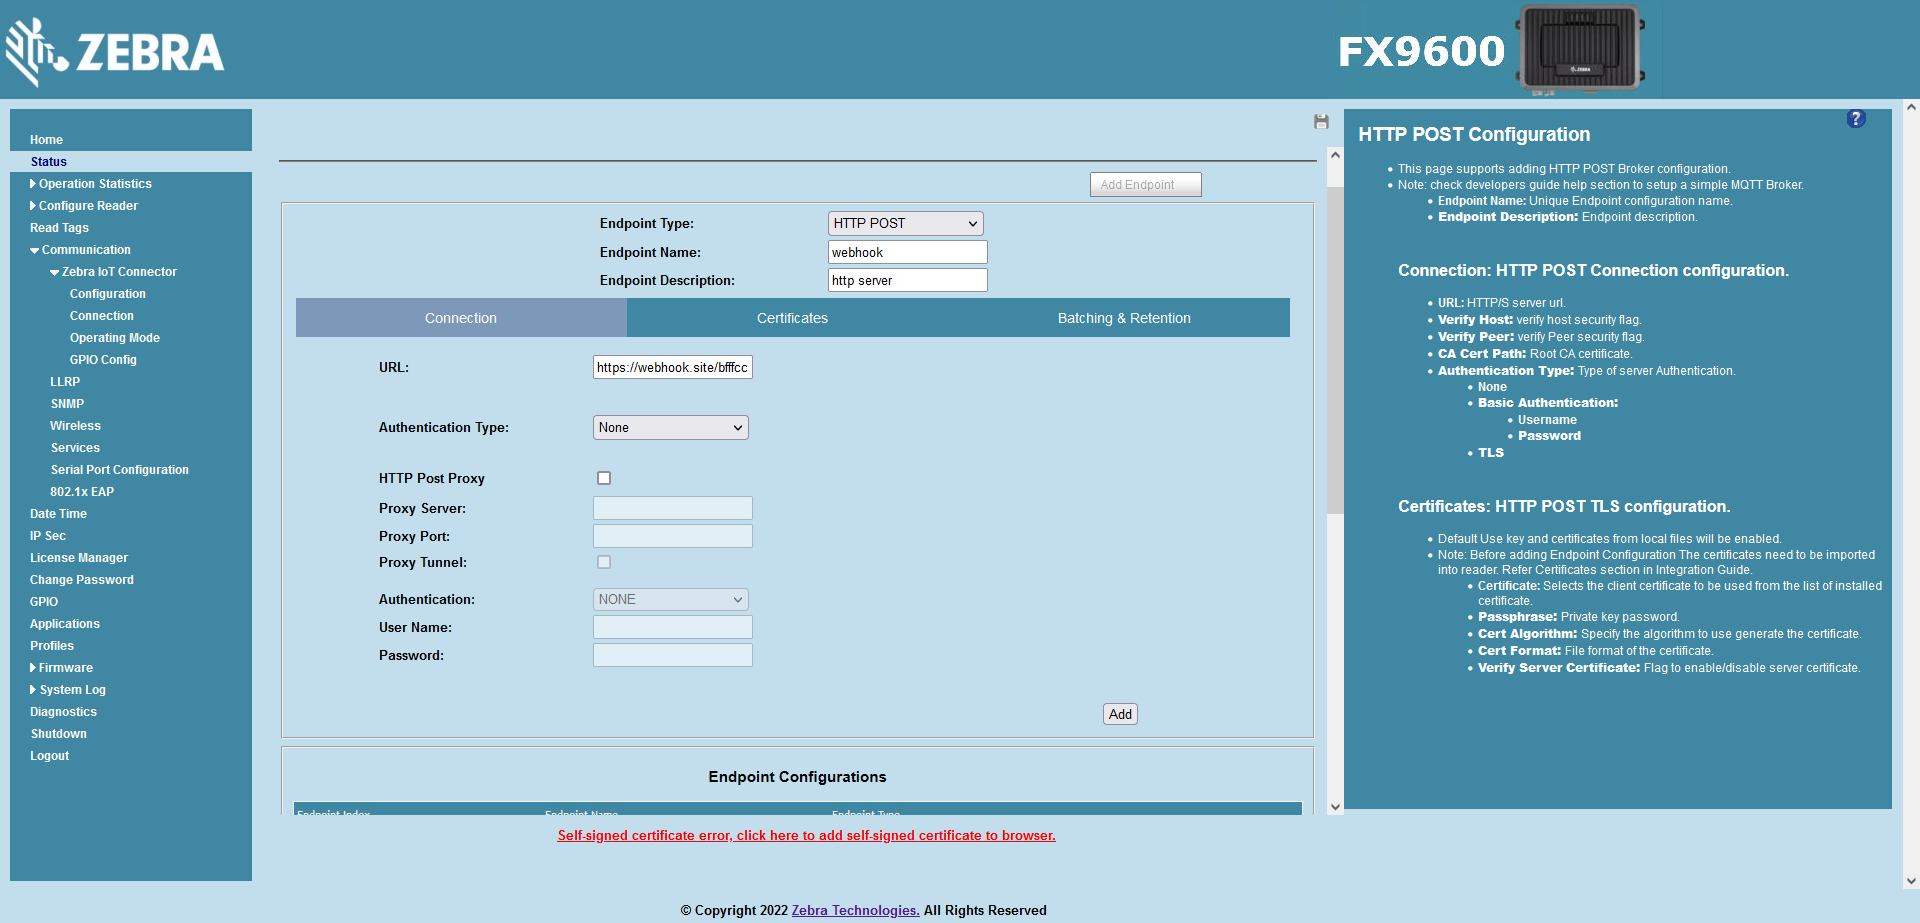
Click on
Addbutton to add endpoint.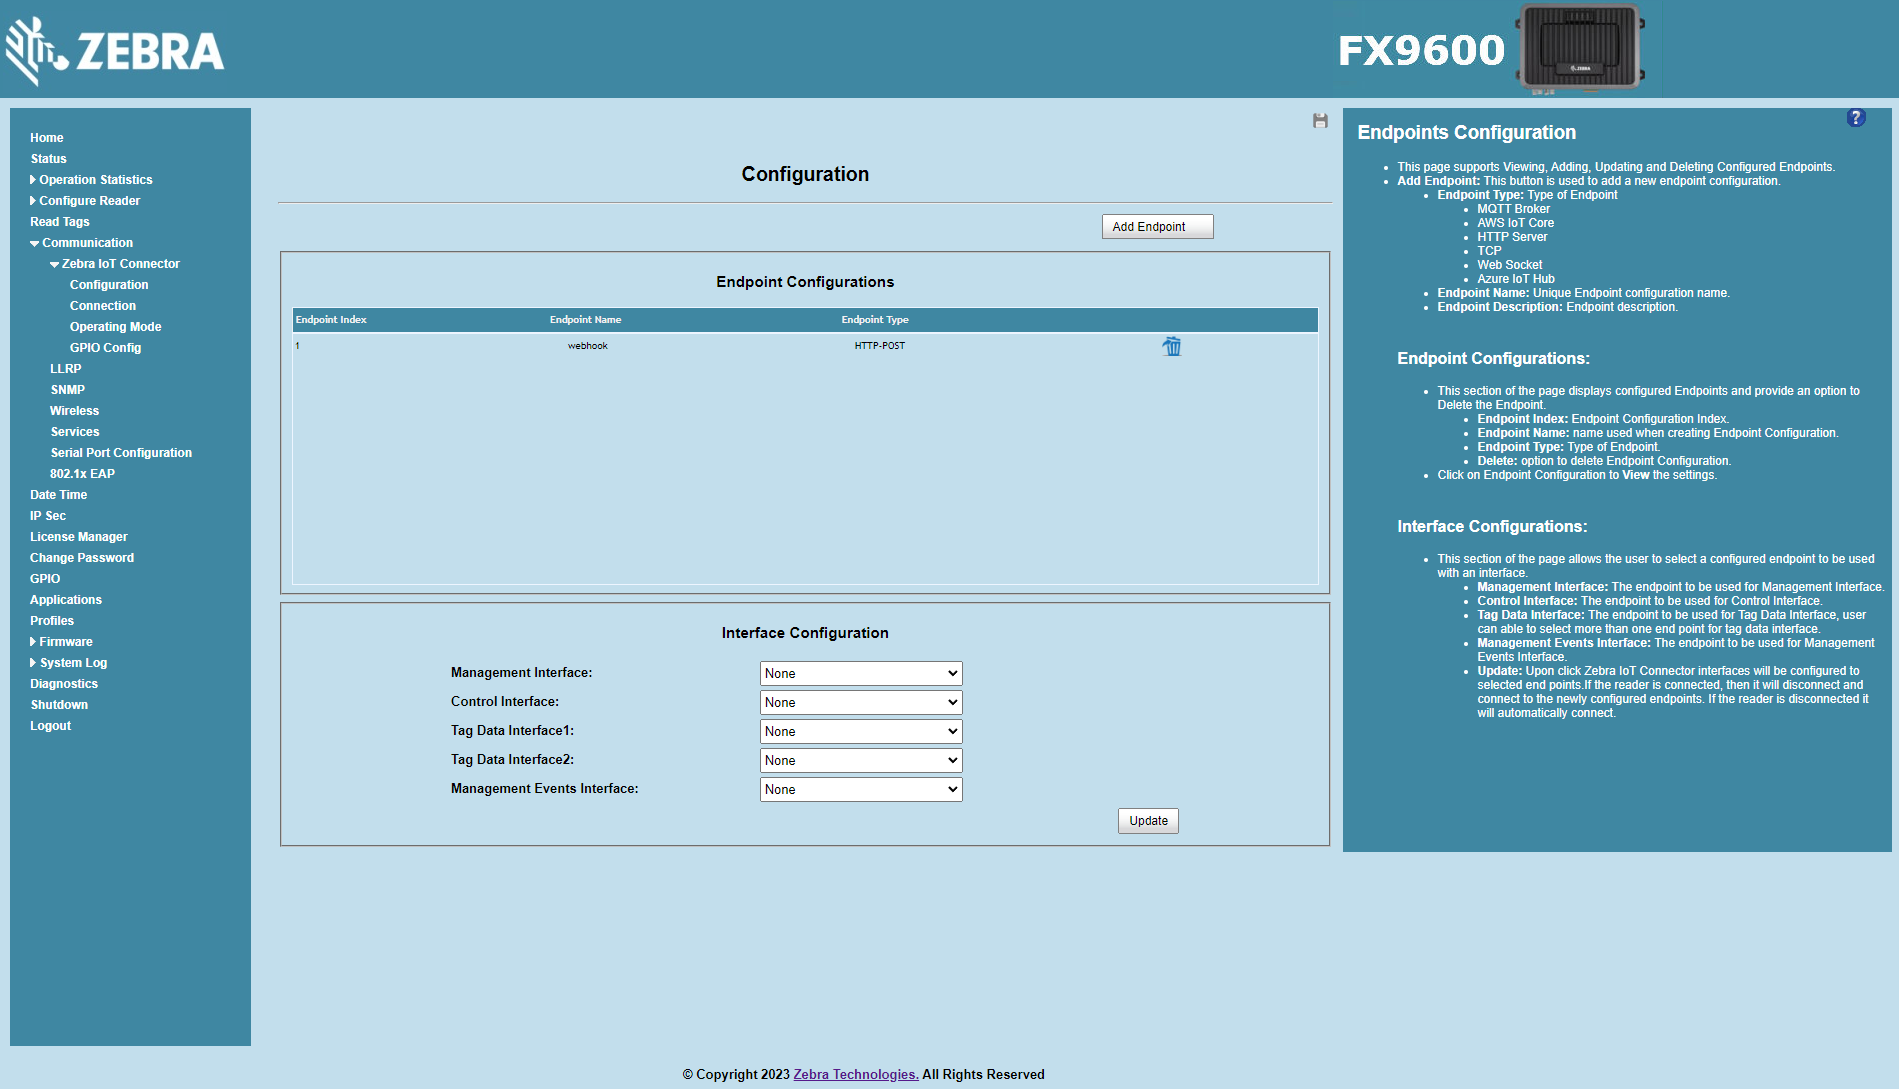
Interface Configuration
Open a web browser to connect to the reader using the host name or IP address.
Click Communication > Zebra IoT Connector > Configuration.
Select mosquitto endpoint for Management Interface, Control Interface, and Management Events Interface1.
Select webhooksite endpoint for Tag Data Interface and Management Events Interface2.
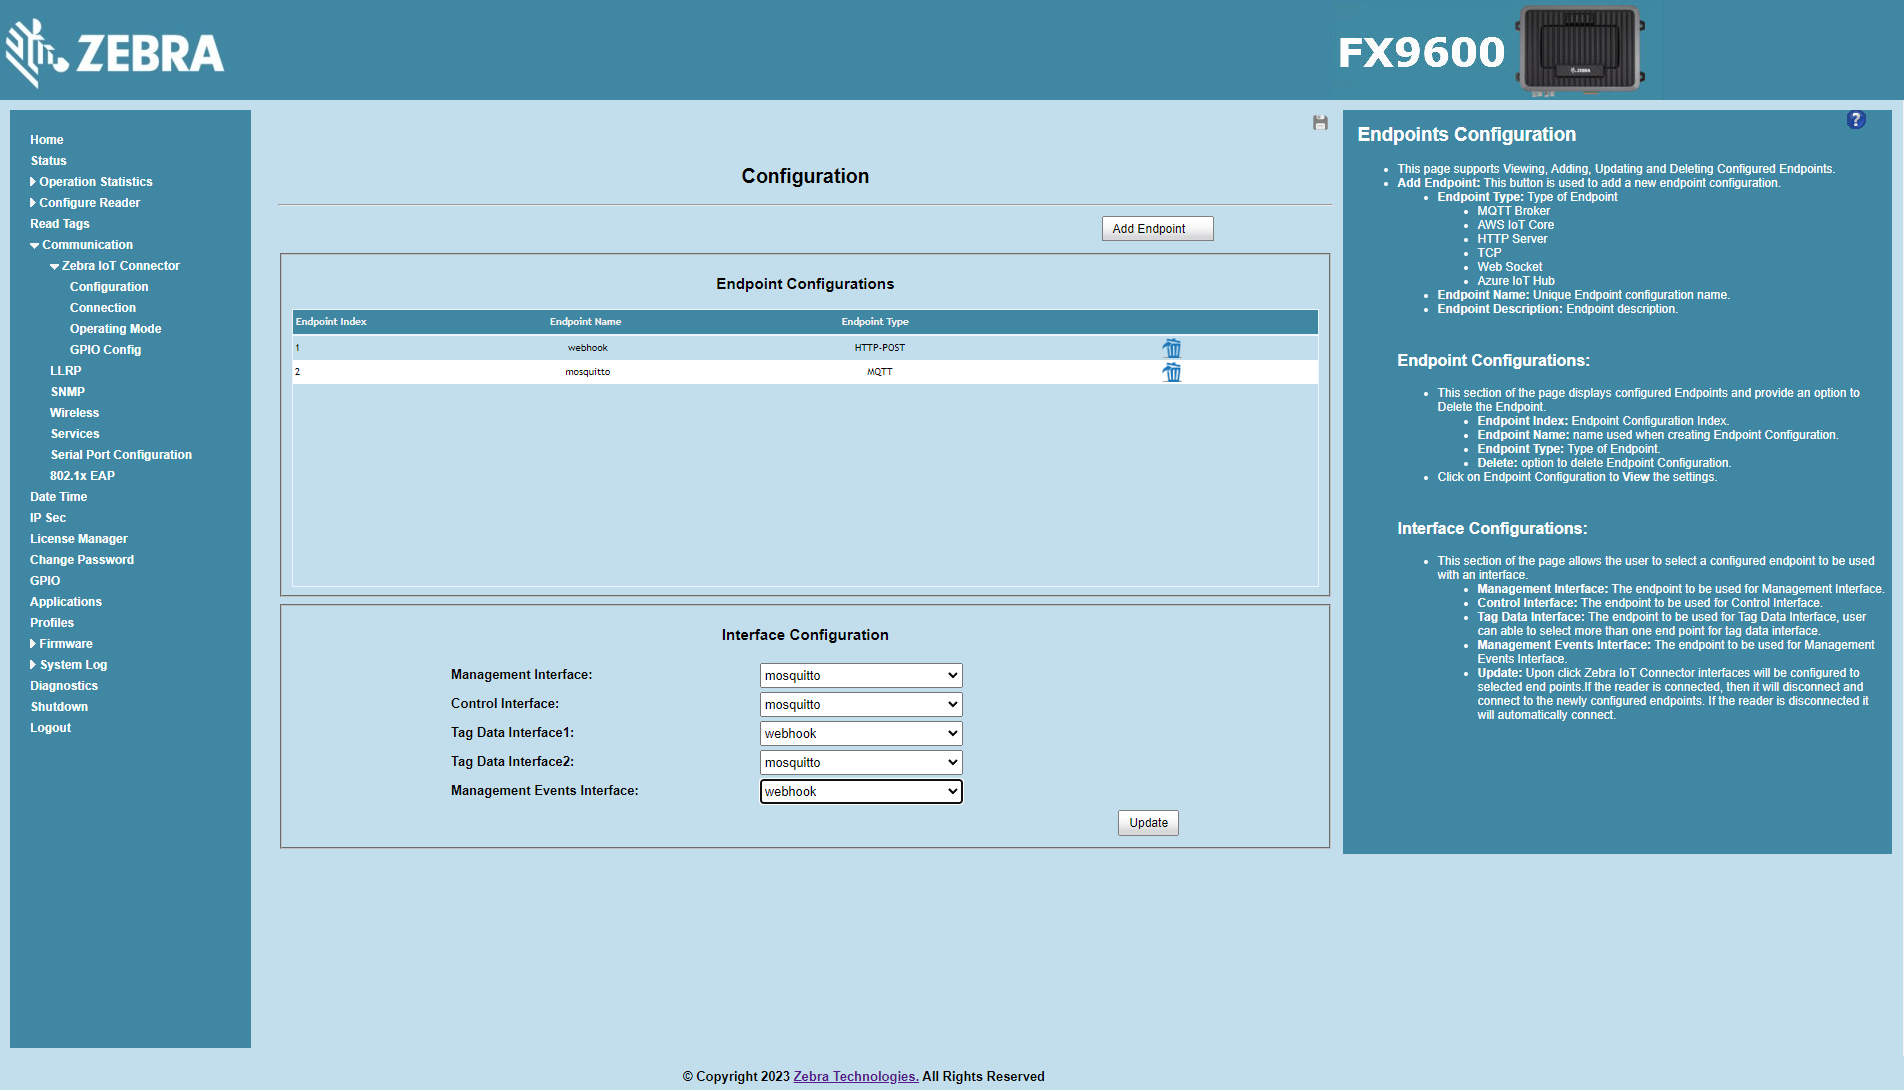
Click on
Updatebutton to update interface configuration.current connection status of the interfaces will be displayed under Connection Status section.
Start Reading Tags
The process of starting tag reading can be initiated in two ways:
By clicking the
Startbutton on the connection page of the web interface.By sending a request through Postman.
Open
Postmanand send a GET request to/cloud/localRestLoginto the local Rest Management interface as shown below.Important
The Authentication type
Basic Authshould be selected and the username and password provided must be same as what is used to login to reader web console as an admin user.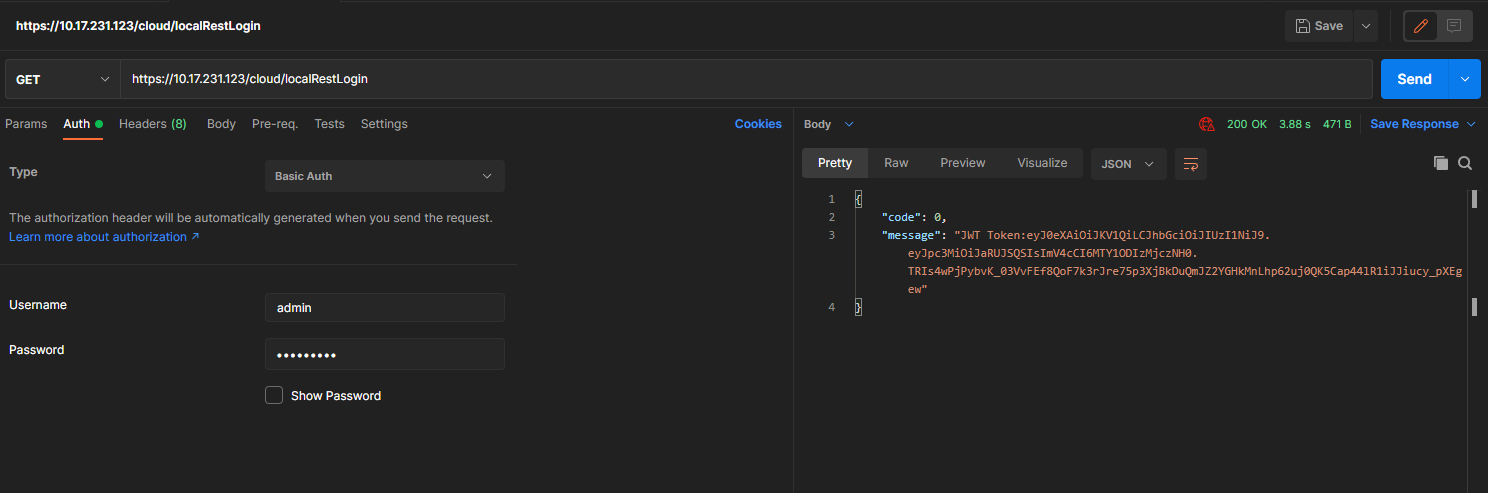
- Send a PUT request to
/cloud/startto start tag reads. Important
The Authentication type
Bearer Tokenshould be selected and the token returned from the localRestLogin API must be used excluding the string “JWT Token:”.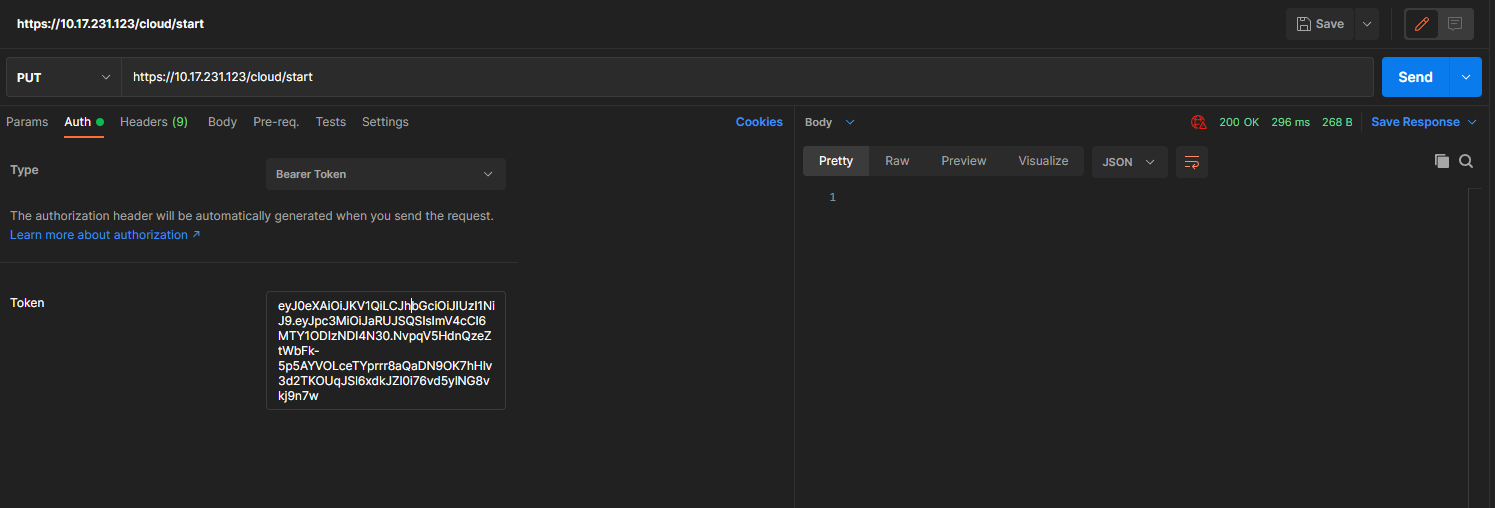
- Send a PUT request to
Testing
Note
To interact with reader via MQTT Broker an MQTT client is required. An open source MQTT Client MQTT X will be used for this tutorial.
Install MQTT Client
Install the MQTT Client by following steps here.
Configure MQTT Client
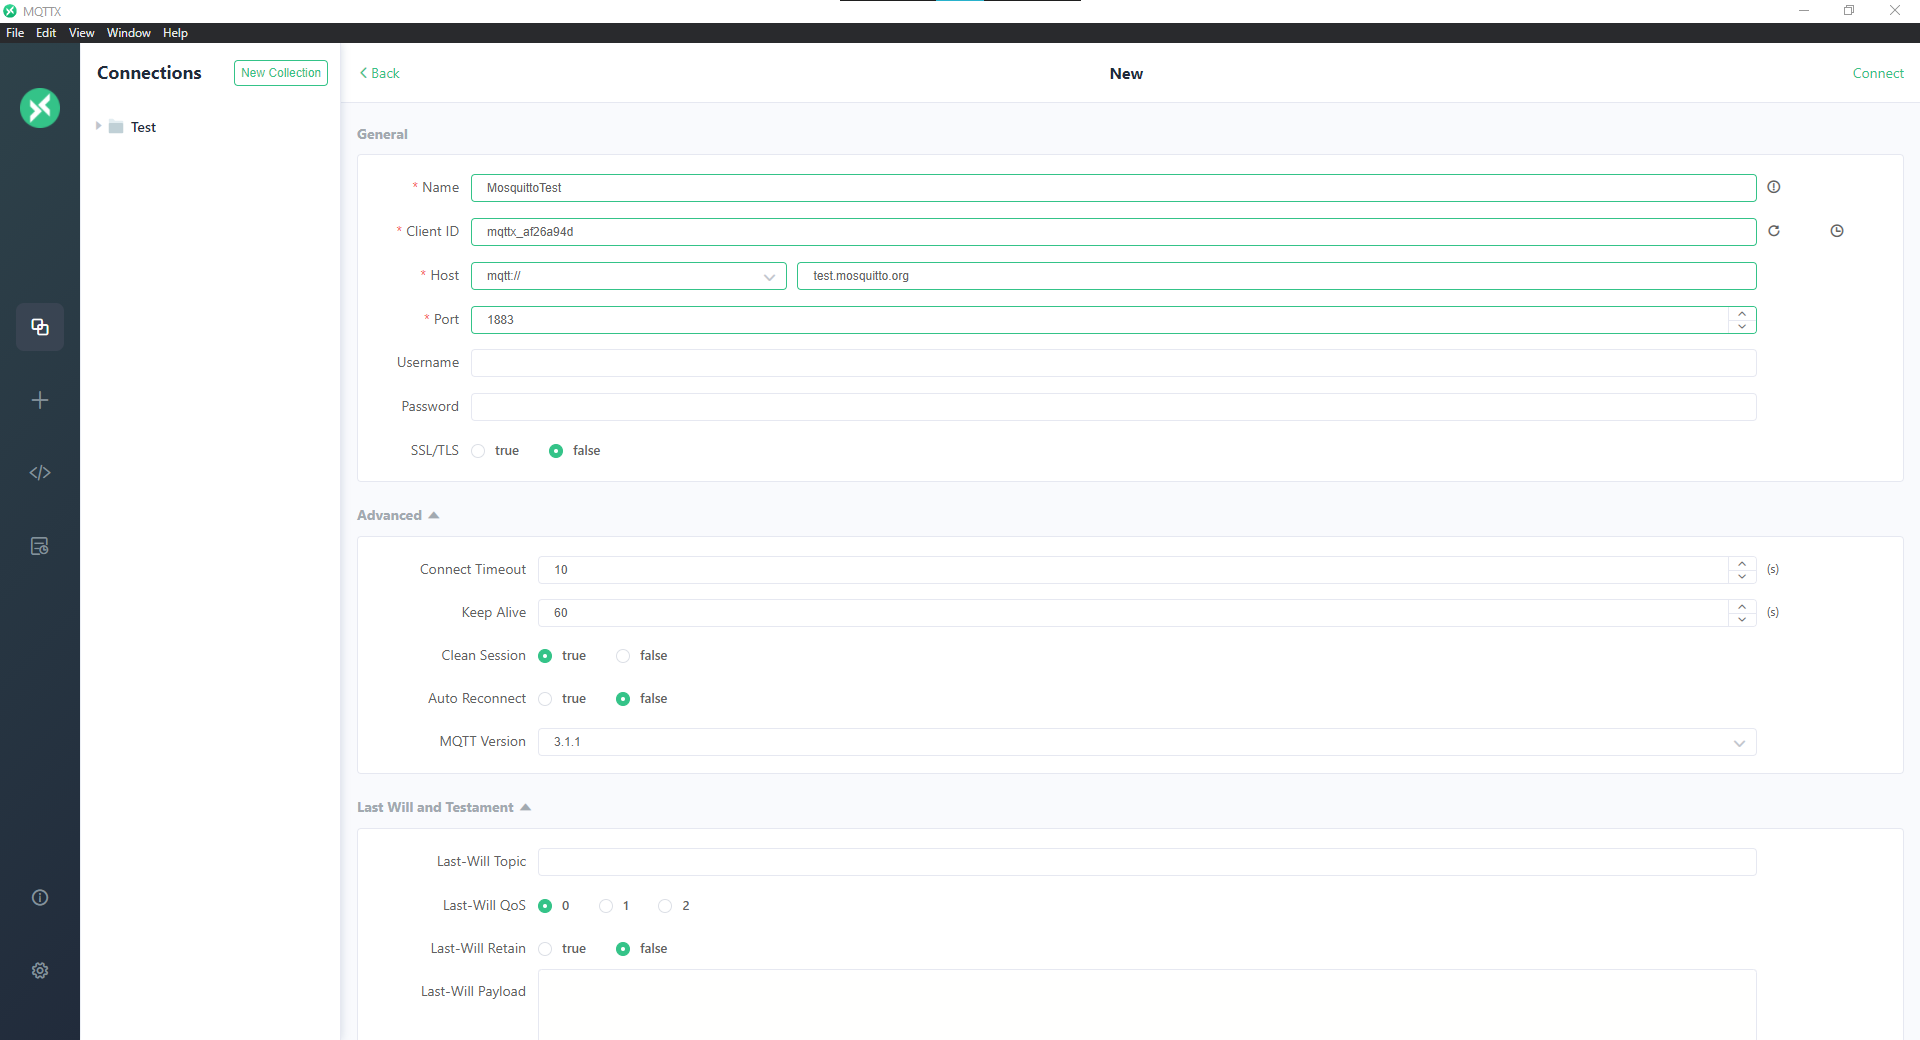
Launch the MQTT X Client.
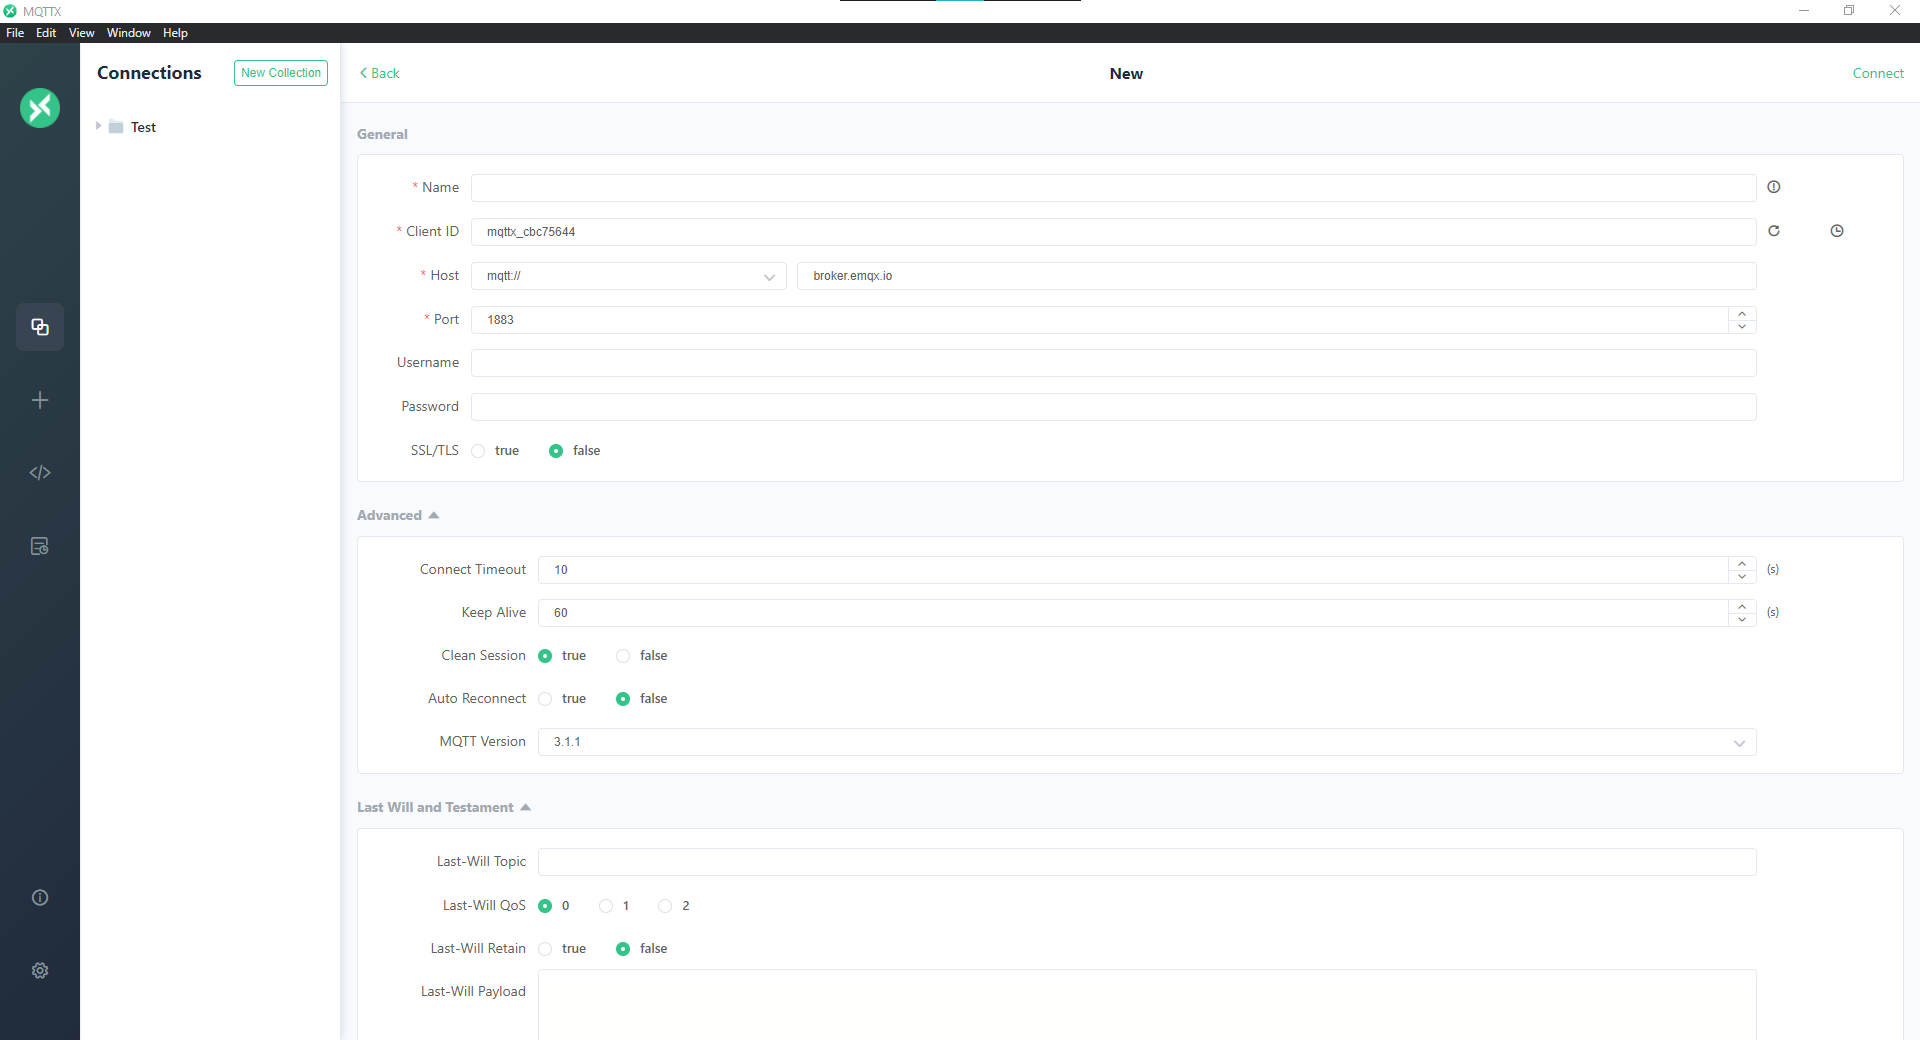
Configure the MQTT X Client with MQTT Broker details configured in the reader and click on Connect.
Subscribe to all the topics to view the events sent by the reader by clicking New Subscription.

Once subscribed the MQTT X Client will start showing the health events sent by the reader in the Management Events topics configured.
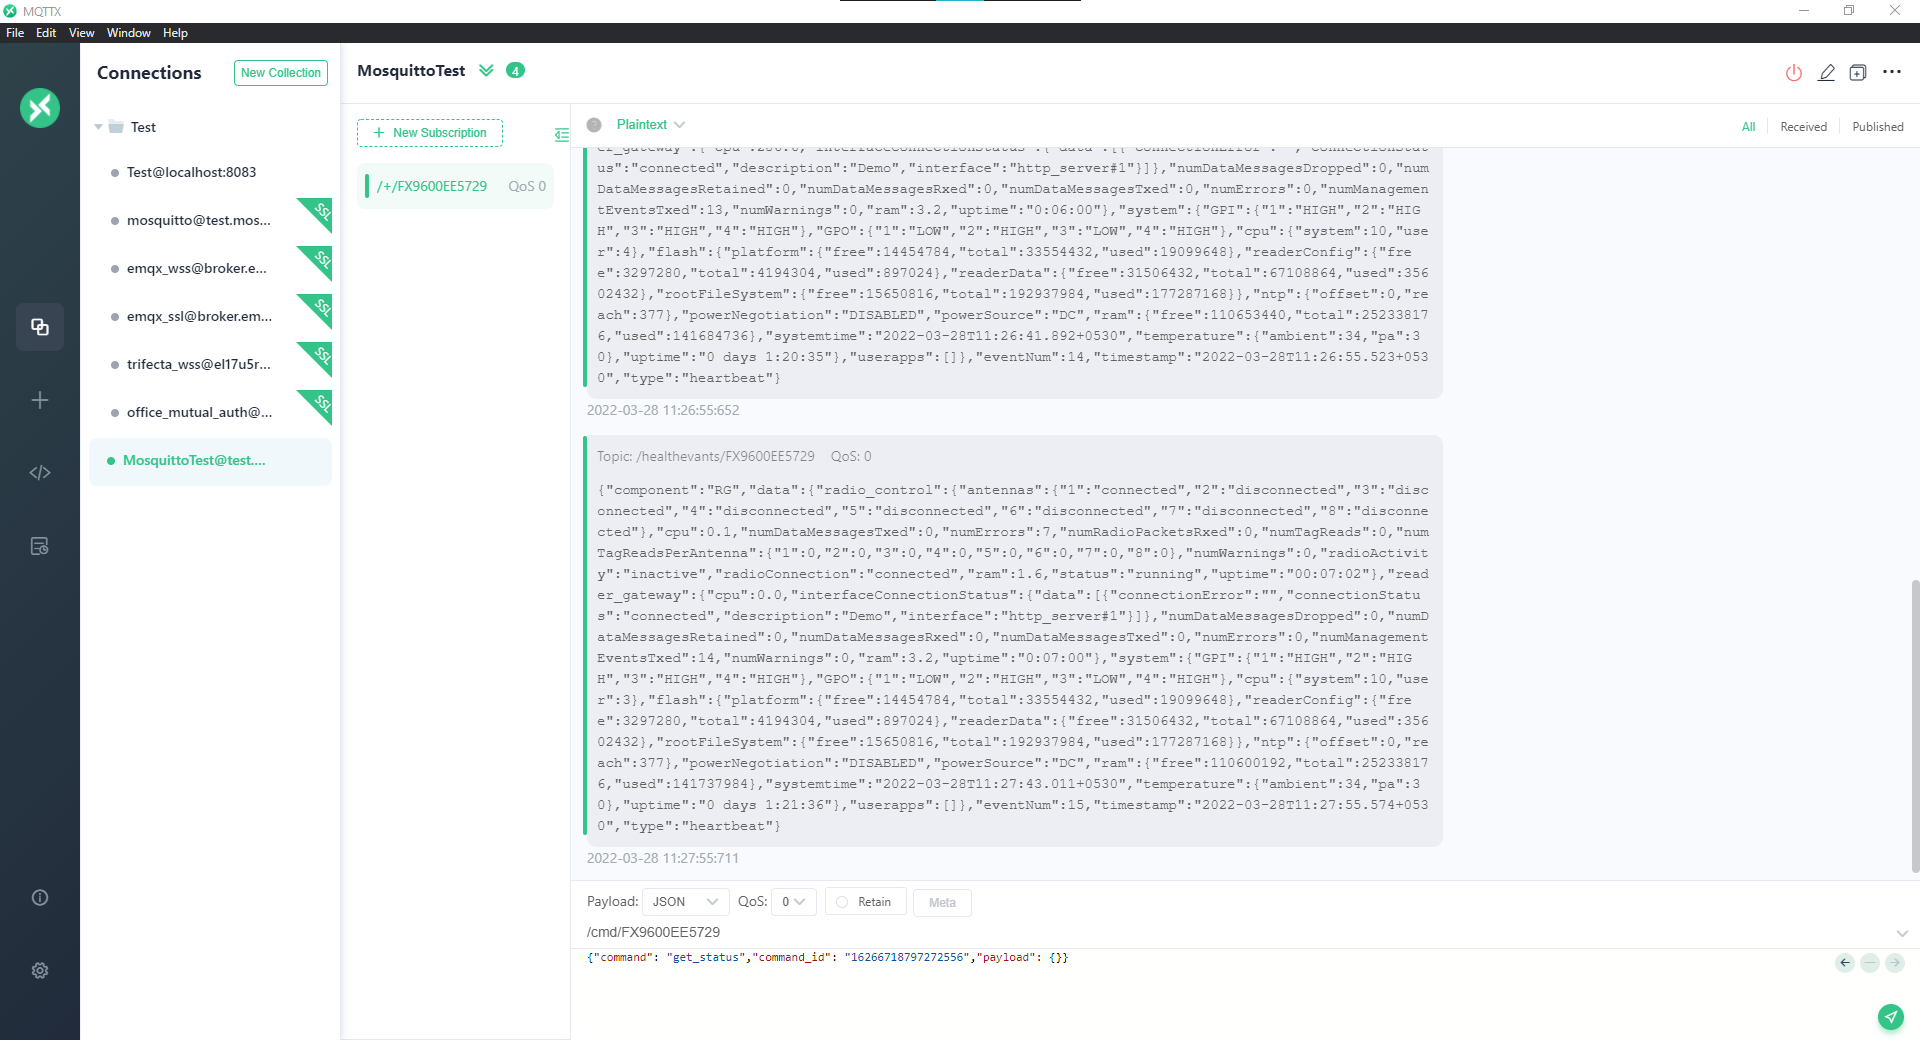
Interact with Reader
Using the MQTT X Client the user can manage and control the reader by sending RAW MQTT Payload Schemas in the commands topic configured.

Tag reads can be started by sending
startcommand to the reader.
Once
startsucceed the tag data will be sent to the HTTP Server configured in the reader.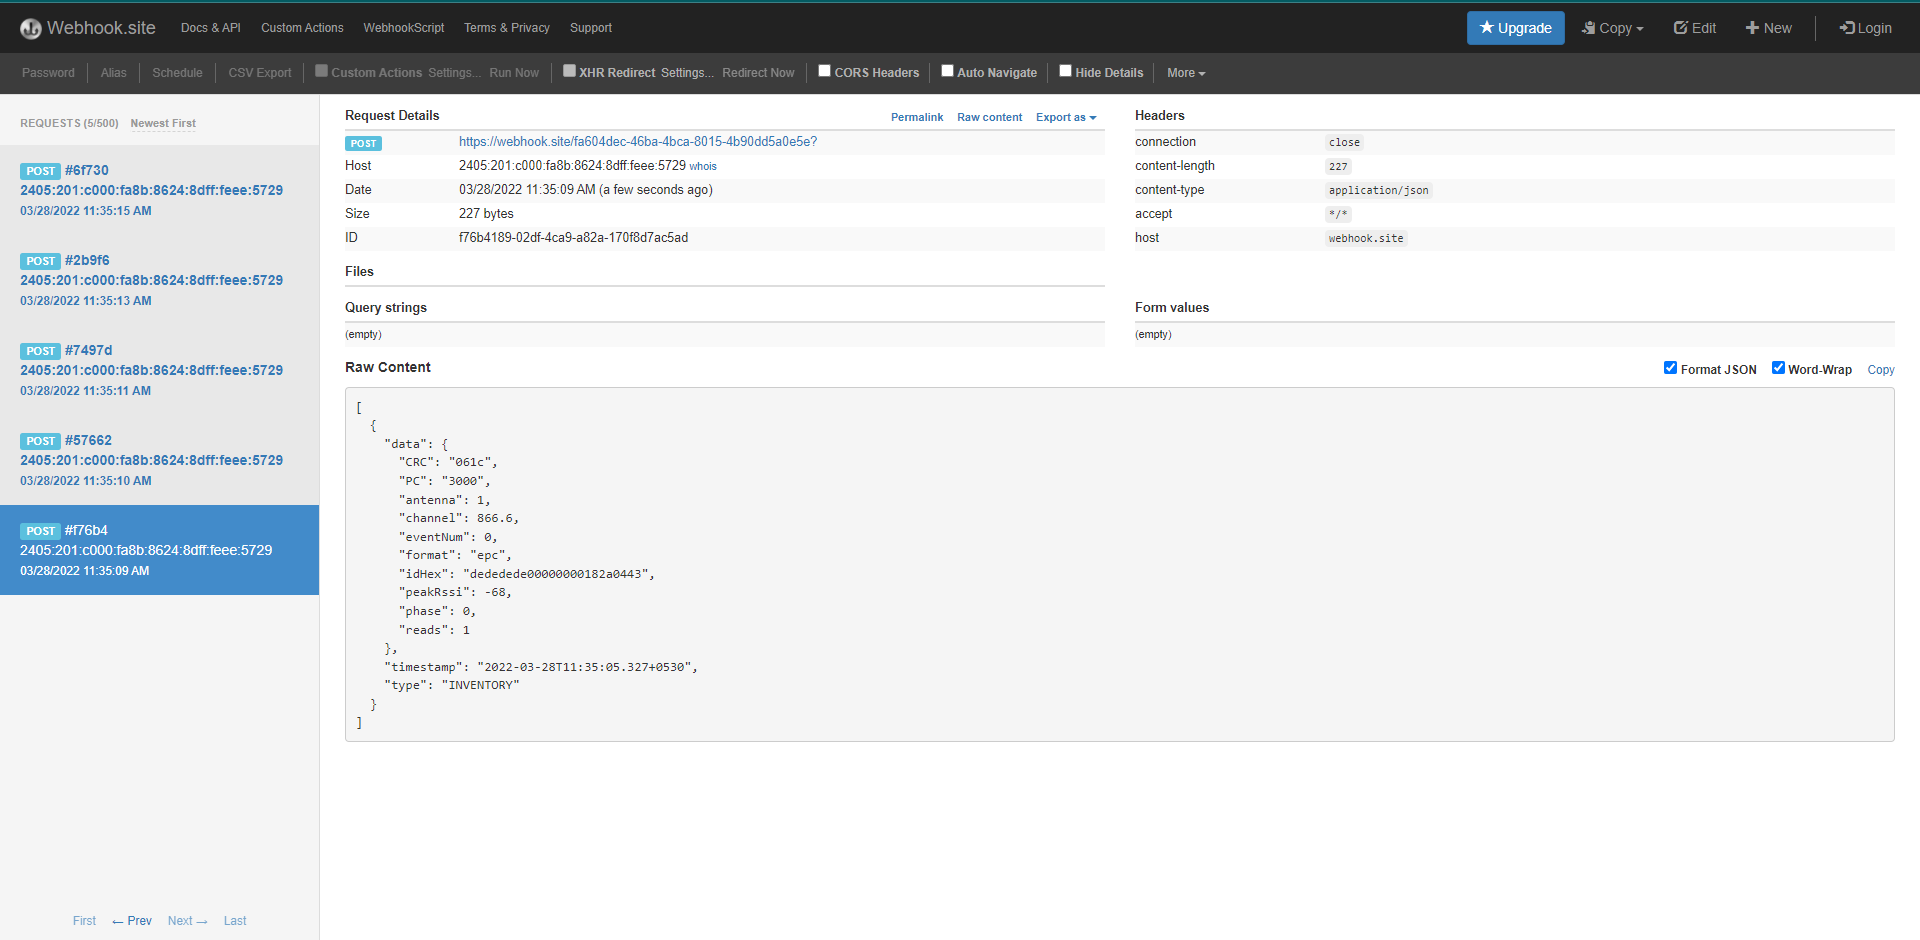
For full set of supported commands refer RAW MQTT Payload Schemas section.