Appendix
Set up Mutual TLS (MQTT)
- What is Mutual TLS?
Mutual TLS, often abbreviated as mTLS, is a security mechanism that involves both the client and server authenticating each other during a communication exchange. i.e both the client and server present digital certificates to each other to verify their identities.
Guide to setting up MQTT mTLS connection for IOTC:
Note
Ensure linux is updated to the latest version prior to following the steps in this guide
Important
You are going to require OpenSSL as a part of this guide. If you do not already have it installed, run the following command in your terminal
sudo apt-get install libssl-dev
This command installs the development files for OpenSSL, a widely-used library for secure communications over computer networks.
Generate the self-signed CA certificate
Assuming your system has OpenSSL installed. The toolkit included with OpenSSL can generate the certificate we need.
Create your working directory. For this example, we are creating a directory ‘reader-certs’.
mkdir reader-certs
Generate Private key
openssl genrsa -out ca.key 2048This command generates a 2048-bit RSA private key and saves it in a file named “ca.key”. A ca.key file typically contains the private key associated with a Certificate Authority (CA). In the context of SSL/TLS and digital certificates, a CA is responsible for issuing and managing certificates used for secure communication. The private key stored in the ca.key file is crucial for signing digital certificates, validating the authenticity of entities, and establishing trust in secure connections.
Generate EMQX root certificate
openssl req -x509 -new -nodes -key ca.key -sha256 -days 3650 -out ca.pemInput region details as needed This generates a self-signed X.509 certificate using OpenSSL. Here’s a breakdown of the options:
req: This is the OpenSSL command for certificate requests and certificate creation.-x509: Specifies that a self-signed certificate is being generated rather than a certificate signing request (CSR).-new: Requests a new certificate.-nodes: Indicates that the private key should not be encrypted with a passphrase, allowing for automated processes without manual intervention.-key ca.key: Specifies the private key file (ca.key) to be used for generating the certificate.-sha256: Specifies the hashing algorithm to be used (SHA-256 in this case) for the certificate.-days 3650: Sets the validity period of the certificate to 3650 days (approximately 10 years).-out ca.pem: Specifies the output file (ca.pem) where the generated certificate will be saved.
In summary, this command generates a self-signed X.509 certificate named ca.pem with a 10-year validity period, using the private key from ca.key and employing the SHA-256 hashing algorithm.
Generate server certificate
Important
The following steps are performed on the server hosting the emqx broker.
Generate EMQX private key
openssl genrsa -out emqx.key 2048This command generates a 2048-bit RSA private key and saves it in a file named “emqx.key”. The private key on the client side is used to authenticate the client to the server, while that on the server side (generated in step 3) is used to authenticate the server to the client. Having keys on both sides establishes mutual trust.
Create a config file ‘openssl.cnf’. This typically contains settings and information required in the certificate generation process
[req]
default_bits = 2048
distinguished_name = req_distinguished_name
req_extensions = req_ext
x509_extensions = v3_req
prompt = no
[req_distinguished_name]
countryName = CN
stateOrProvinceName = Zhejiang
localityName = Hangzhou
organizationName = EMQX
commonName = Server certificate
[req_ext]
subjectAltName = @alt_names
[v3_req]
subjectAltName = @alt_names
[alt_names]
IP.1 = BROKER_ADDRESS
DNS.1 = BROKER_ADDRESS
[req_distinguished_name],BROKER_ADDRESSin IP and DNS need to be updated as neededEnsure you provide an organizationName, IP maps to the server address the client connects to and DNS maps to the hostname of the server. In the absence of a hostname, the IP can be used.
Issue an emqx certificate
openssl req -new -key ./emqx.key -config openssl.cnf -out emqx.csr
This command is used to generate a Certificate Signing Request. The CSR is a request sent to the CA to obtain a digital certificate. openssl.cnf specifies the configuration file to use.
openssl x509 -req -in ./emqx.csr -CA ca.pem -CAkey ca.key -CAcreateserial -out emqx.pem -days 3650 -sha256 -extensions v3_req -extfile openssl.cnfThis command signs the CSR (emqx.csr) using the CA’s certificate (ca.pem) and private key (ca.key), creates a serial number file for the CA, and generates the signed certificate (emqx.pem) with a specified validity period and extensions as defined in the configuration file. The resulting emqx.pem file can then be used for secure communication in the context of an MQTT setup.
Update emqx.conf
Copy the file emqx.pem, emqx.key and ca.pem generated by OpenSSL tool into the directory etc/certs/ of EMQX and refer the following configuration to modify emqx.conf:
## listener.ssl.$name is the IP address and port that the MQTT/SSL
## Value: IP:Port | Port

listener.ssl.external = 8883

## Path to the file containing the user's private PEM-encoded key.
## Value: File

listener.ssl.external.keyfile = path/to/emqx.key

## NOTE: If emqx.pem is a certificate chain, please make sure the first certificate is the certificate for the server, but not a CA certificate.
## Path to a file containing the user certificate.
## Value: File

listener.ssl.external.certfile = path/to/emqx.pem

## Note: ca.pem is to hold the server's intermediate and root CA certificates. Other trusted CAs can be appended for client certificate
## Path to the file containing PEM-encoded CA certificates. The CA certificates
## Value: File

listener.ssl.external.cacertfile = path/to/ca.pem

## A server only does x509-path validation in mode verify_peer,
## as it then sends a certificate request to the client (this
## message is not sent if the verify option is verify_none).
##
## Value: verify_peer | verify_none

listener.ssl.external.verify = verify_peer

## Used together with {verify, verify_peer} by an SSL server. If set to true,
## the server fails if the client does not have a certificate to send, that is,
## sends an empty certificate.
##
## Value: true | false

listener.ssl.external.fail_if_no_peer_cert = true
Map
listener.ssl.external.keyfile,listener.ssl.external.certfile,listener.ssl.external.cacertfileto the appropriate file paths as shown above and further modify any of the other fields as needed.With this, the emqx server is ready to accept connections.
Now we need to generate certificates signed by the same ca on the reader in order to establish a connection.
Generate client certificate
Create a client key
openssl genrsa -out client.key 2048Similar to step 2a, this command generates a 2048-bit RSA private key and saves it in a file named “client.key”.
Create a client request file
openssl req -new -key client.key -out client.csr -subj "/C=CN/ST=Zhejiang/L=Hangzhou/O=EMQX/CN=client"This command creates a CSR file (client.csr) for a new certificate, using the private key from client.key and specifying the subject information for the certificate
-subj "/C=CN/ST=Zhejiang/L=Hangzhou/O=EMQX/CN=client": Sets the subject (distinguished name) of the certificate request using a subject string in the form of a slash-separated list of field-value pairs. In this case:/C: Country/ST: State or Province/L: Locality (City)/O: Organization/CN: Common Name (used for the entity’s name, in this case, “client”).
Update the above -subj string as needed
Use the previously generated ca.key and ca.pem file to generate client.pem
openssl x509 -req -days 3650 -in client.csr -CA ca.pem -CAkey ca.key -CAcreateserial -out client.pemTo install the generated client certificate onto the reader, run the following command
openssl pkcs12 -export -out reader.pfx -inkey client.key -in client.pem -certfile ca.pem
You will be prompted to enter a pfx password.
This will generate a “reader.pfx” file accepted by the reader. A PFX (Personal Exchange Format) file, is a binary format for storing a cryptographic archive of a user’s certificate and private key. This file format is commonly used to bundle the private key along with its corresponding public key certificate and any intermediate certificates in a single file. A PFX file is typically password-protected to enhance security
Install client certificate on a reader
Navigate to the reader home page
Select “Configure Reader” >> “Certificates”
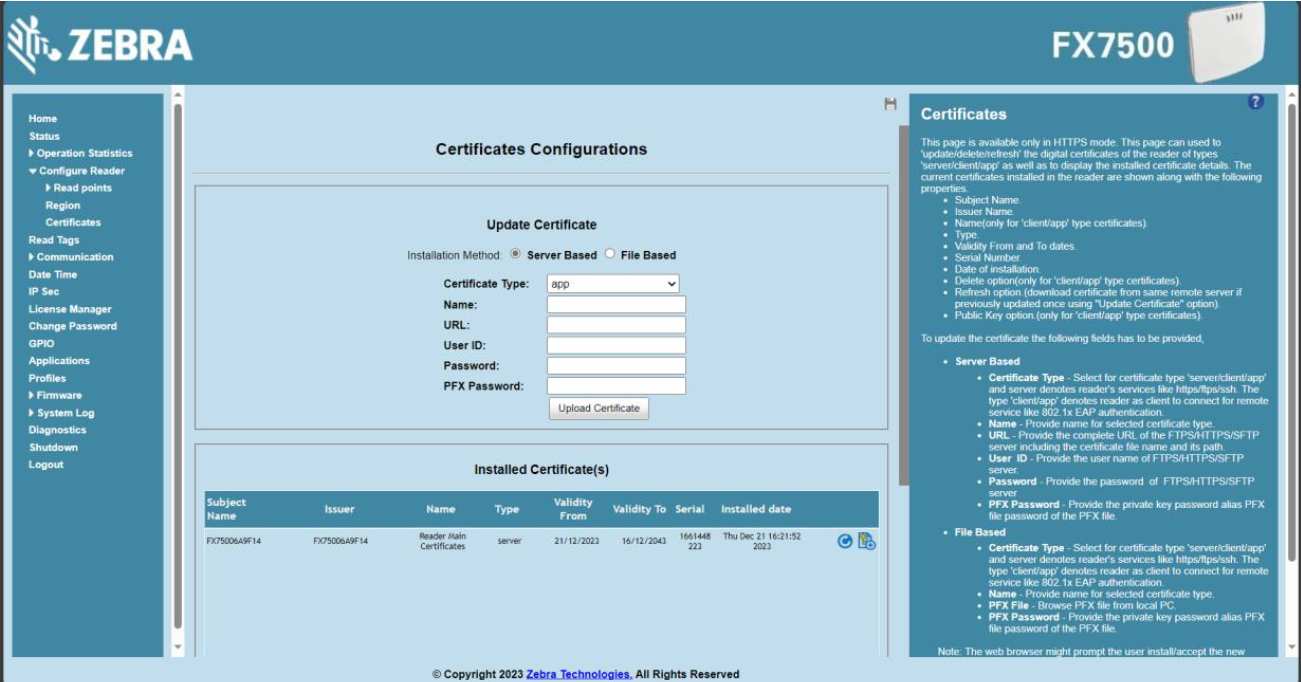
Select the “File Based” radio button
Under the “Certificate Type” drop down menu, choose “client”, add an appropriate name.
Browse your computer for the “reader.pfx” file created earlier and upload it to the reader. Make sure you enter the same PFX password created.
Once all the fields are populated, click “Upload Certificate”
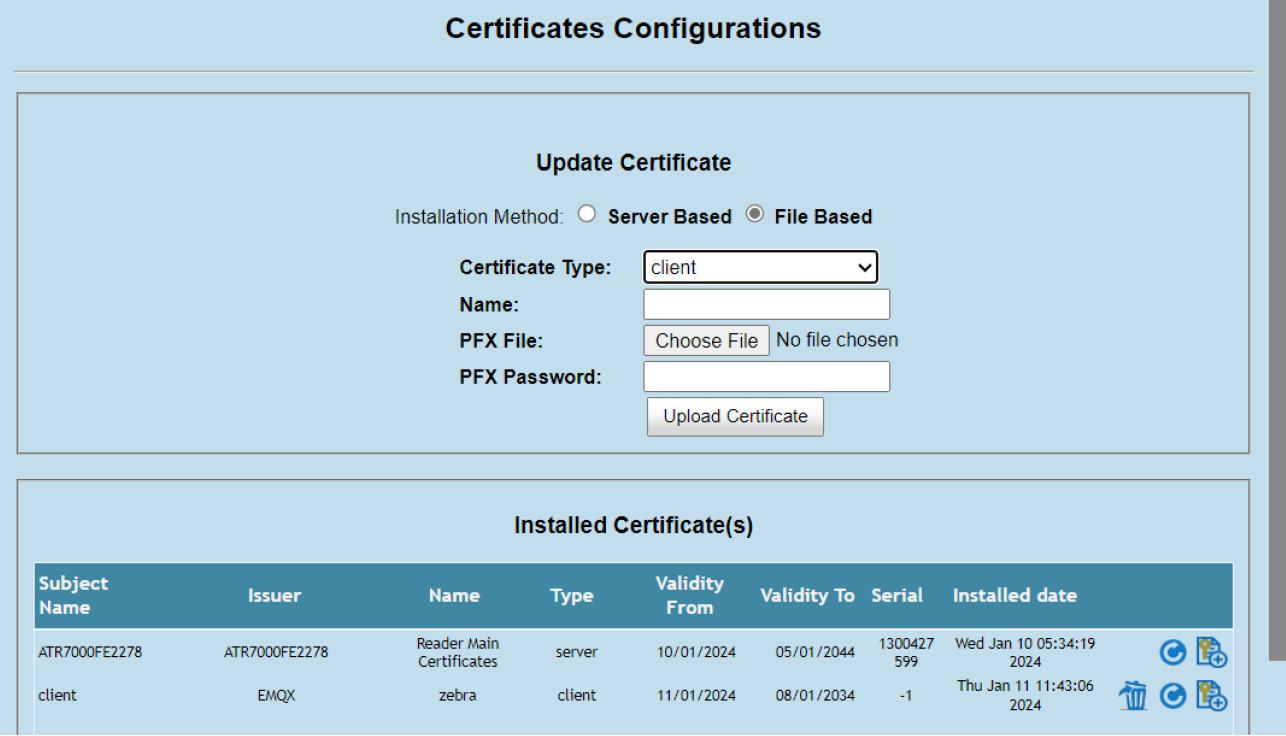
Once uploaded, the list of “Installed Certificates” should be updated:
Configure TLS Endpoint on a reader
From the reader home page, navigate to “Communication” >> “Zebra IoT Connector” >> “Configuration”
Select “Add Endpoint” and choose the endpoint type “MQTT”. Set a name and description as needed.
Update the fields as required:
- Connection
Set the “Server” field to the IP of the emqx server configured.
The default port for a TLS connection is 8883, ensure this field matches emqx.conf file. (if modified)
Select “TLS” as the protocol
Enter a client Id
- Topics
Update topics as needed
- Certificates
Select your installed certificate from the “Certificate” drop down and enter the defined passphrase
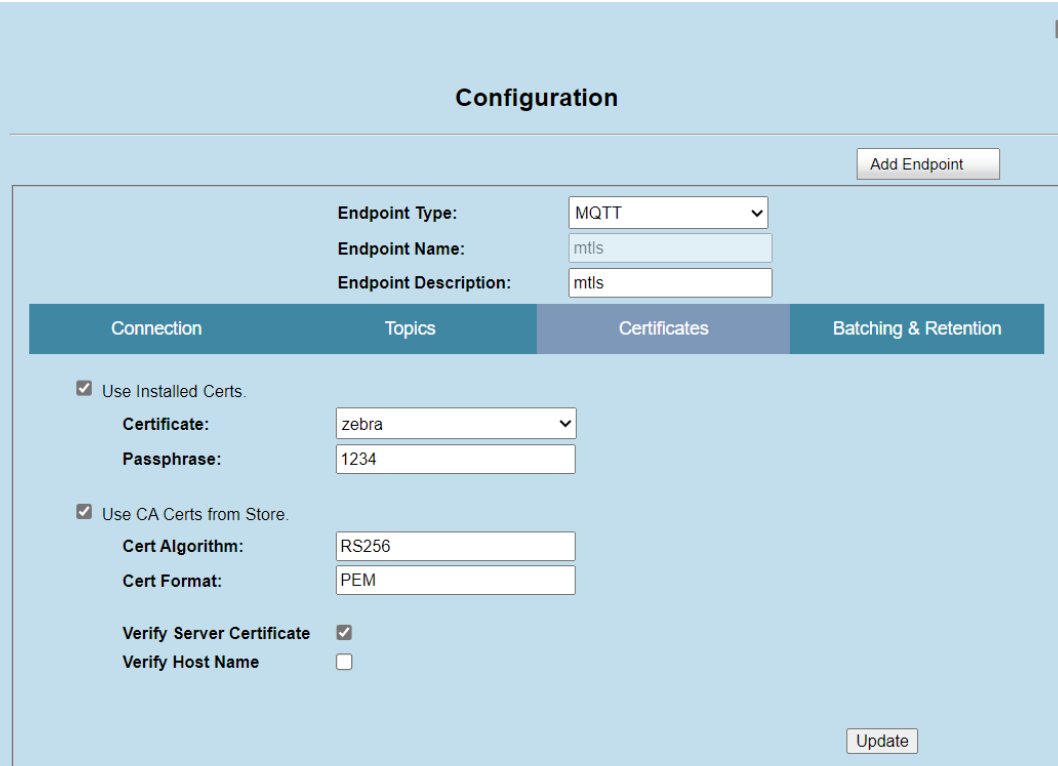
Hit “update”
Map the newly created configuration to the required endpoints in the “interface configuration” section and hit “update”
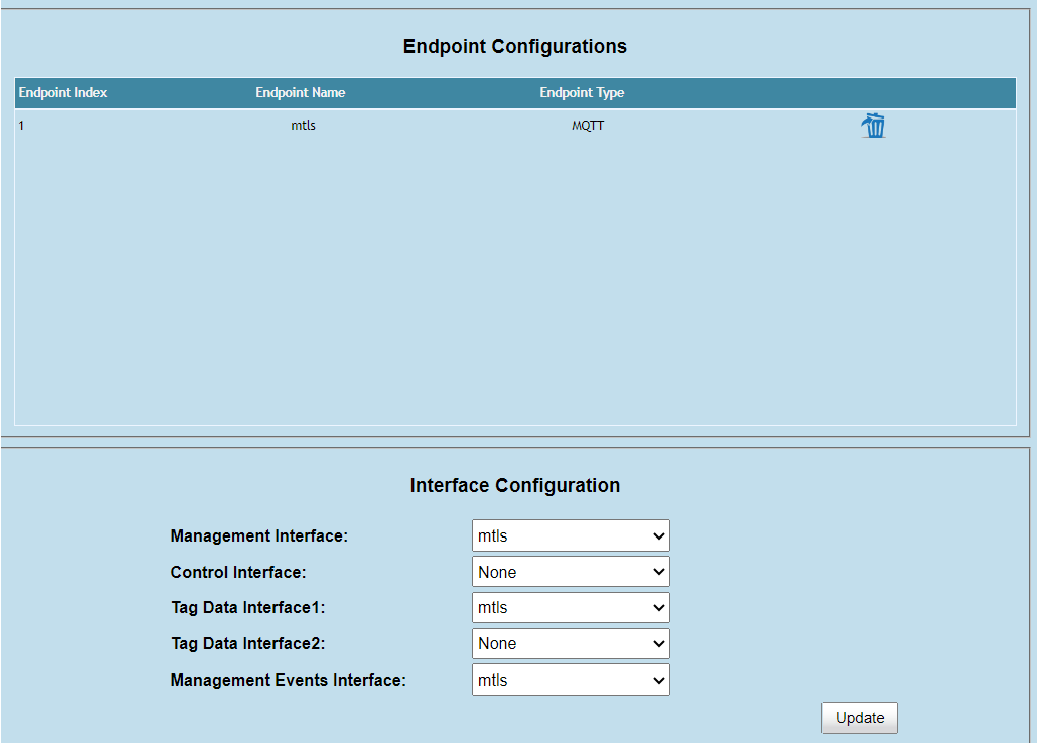
The reader is now ready to connect to your emqx server
Navigate to “Communication” >> “Zebra IoT Connector” >> “Connection” and hit “Connect”