HTTP POST Server Setup
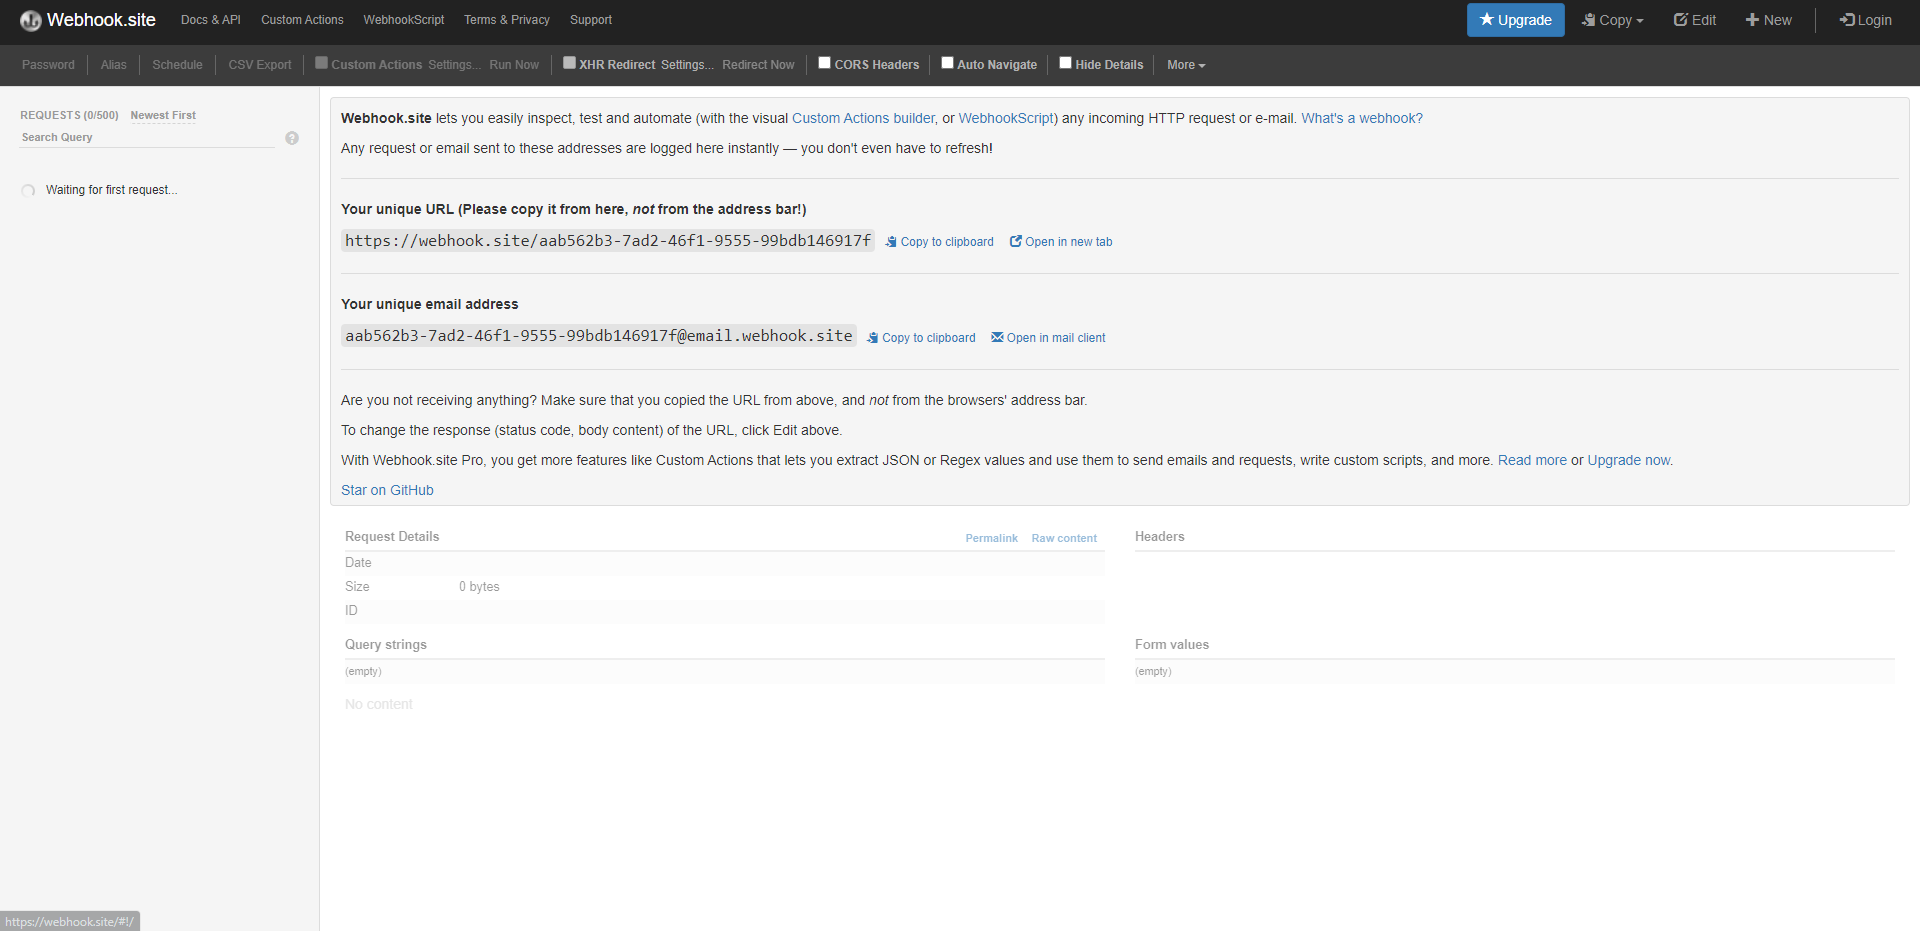
Reader support any HTTP POST Server for Tag Data and Management Events Interfaces. For this demo an Test HTTP Server is used.
Note
The unique URL showed can be used to post tags and management events.
HTTP POST Proxy Server Setup
An HTTP proxy server acts as an intermediary between a client and a server. When a client sends an HTTP request, the proxy server forwards it to the destination server, receives the response, and then sends the response back to the client. This process can be useful for various reasons, including filtering traffic, logging requests, caching content, or bypassing network restrictions.
Guide to Setting Up a Proxy Server with Squid
Step 1: Install Squid
First, need to install Squid. The installation process varies slightly depending on your Linux distribution.
On Ubuntu/Debian:
sudo apt update
sudo apt install squid
Step 2: Configure Squid
Once installed, need to configure Squid to suit your needs. The main configuration file is usually located a /etc/squid/squid.conf.
Backup Original Configuration:
sudo cp /etc/squid/squid.conf /etc/squid/squid.conf.backup
Edit Configuration File:
Open the Squid configuration file in a text editor:
sudo nano /etc/squid/squid.conf
Basic Configuration:
Port Configuration:
Squid listens on port 3128 by default. You can change this if needed by finding the line that starts with http_port and modifying it: http_port 3128
Access Control:
By default, Squid might be configured to deny all access. You need to specify allowed networks. Add the following lines to allow access from a specific network: acl localnet src 192.168.1.0/24 # Replace with your network http_access allow localnet
Allow HTTP and HTTPS:
Ensure these lines are present to allow HTTP and HTTPS traffic:
acl Safe_ports port 80 # http
acl Safe_ports port 443 # https
http_access deny !Safe_ports
Save and Exit:
Save the changes and exit the text editor (in nano, press CTRL + X, then Y, and Enter).
Step 3: Set Up Authentication
Install apache2-utils: This utility is required to create and manage username/password pairs using the
htpasswdcommand.sudo apt install apache2-utilsCreate a Password File: Use the
htpasswdcommand to create a new password file and add a user.sudo htpasswd -c /etc/squid/passwd usernameReplace username with the desired username. You will be prompted to set and confirm a password.
To add another user, omit the
-cflag and execute the following command:sudo htpasswd /etc/squid/passwd anotheruserRestart Squid
sudo systemctl restart squid
Step 4: Start and Enable Squid Service
After configuring Squid, start the service and enable it to start on boot.
Start Squid:
sudo systemctl start squidEnable Squid:
sudo systemctl enable squidCheck Status:
Verify that Squid is running:
sudo systemctl status squid
Step 5: Configure Firewall
Ensure that your firewall allows traffic on the port Squid is using (default is 3128).
On Ubuntu with UFW:
sudo ufw allow 3128/tcp
Step 6: Test the Proxy Server
Configure a Client:
On a client machine, configure the network settings to use the proxy server. Use the IP address of your Squid server and the port number (e.g., 3128).
Test Connectivity:
Open a web browser or use a command-line tool like curl to verify that you can browse the internet through the proxy.
curl -x http://your-squid-server-ip:3128 http://www.example.com