Configure device using Web Interface
To connect the reader to HTTP POST Server, follow the steps below:
Import Certificates
For secure HTTP POST Server with self signed certificate the Root CA certificate of the server need to be imported into the reader. For mutual TLS setups device public certificate and private key generated need to be imported.
Using SCP
Copy generated certificates and CA certificate into reader. (copy to desired folder inside
/apps/).
Using Web UI
Create
PFXfile from certificate generated.Follow reader’s Integration guide to import certificates into reader.
Add HTTP Post Endpoint
Open a web browser to connect to the reader using the host name or IP address.
Click Communication > Zebra IoT Connector > Configuration.

Click on
Add Endpointbutton to add new endpoint.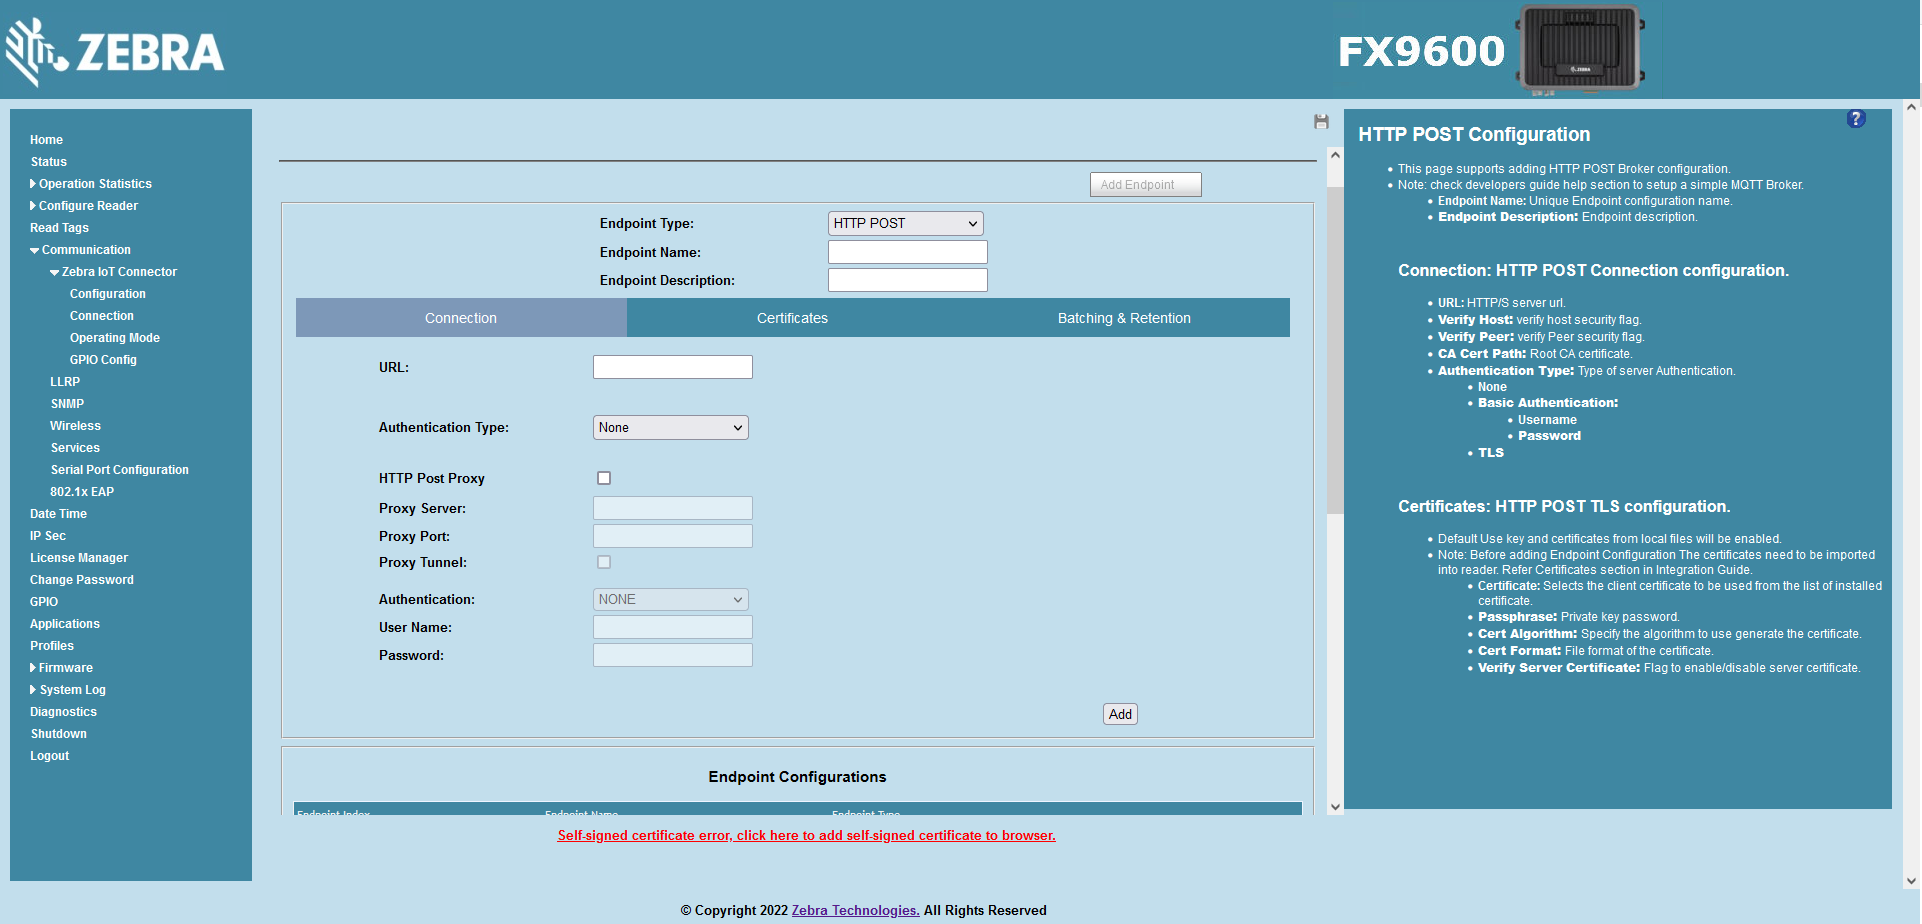
Select
HTTP POSTfor Endpoint Type.Configure Endpoint Name and Endpoint Description fields.
Configure Connection details with device details of HTTP POST Server.
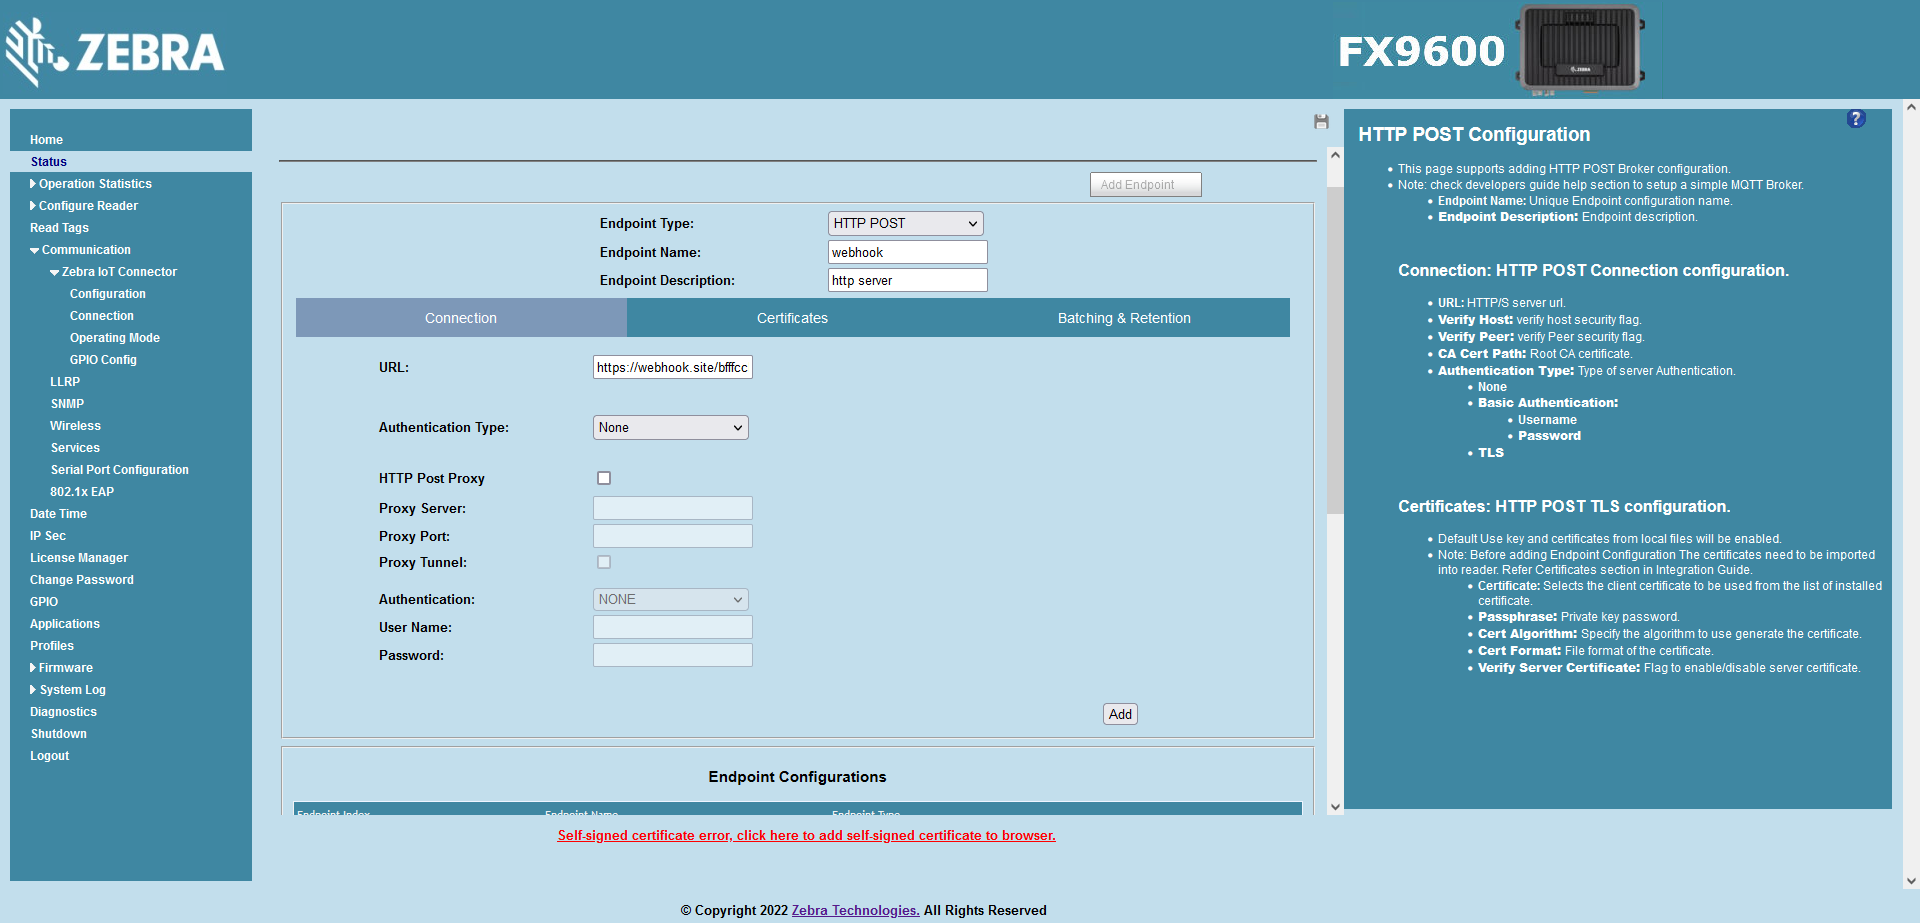
Note
URLHTTP POST Server URL with path.
Verify HostOption to check Server hostname.
Verify PeerEnable Server certificate verification.
Authentication Type- Authentication Type for Server.
BasicServer Basic Authentication information.username: usernamepassword: password
TLSServer TLS Authentication.
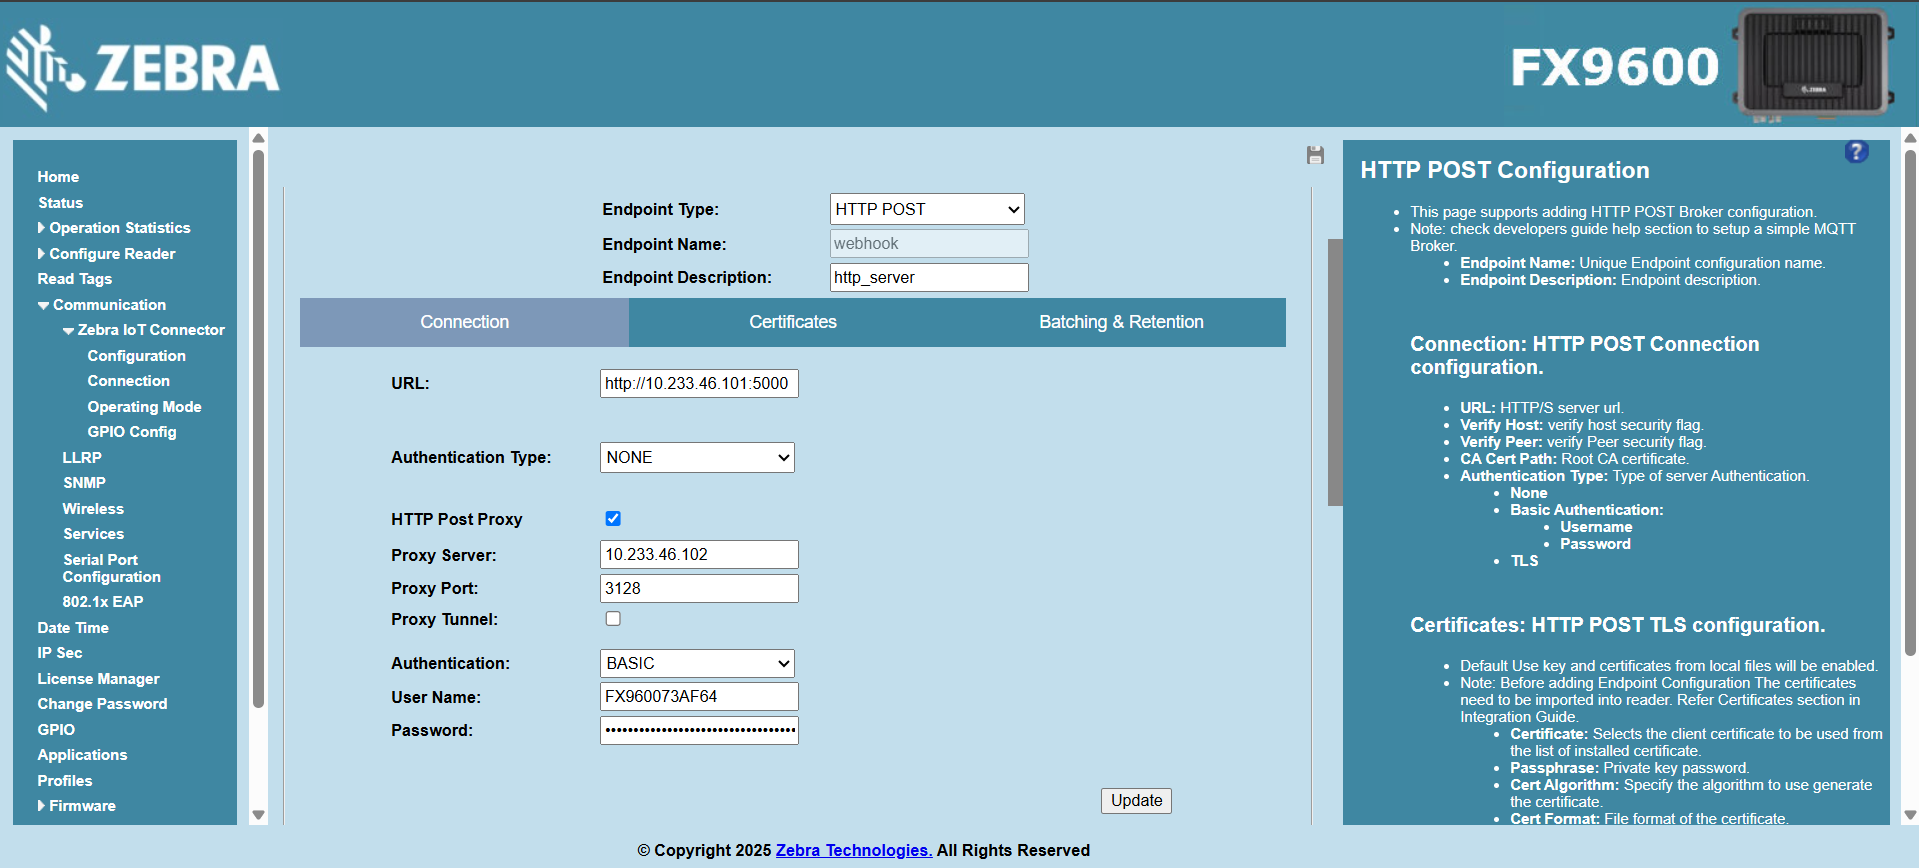
configure HTTP Post proxy
When using a proxy server to handle HTTP POST requests, specific configurations must be made to ensure successful communication. Below are detailed explanations of common proxy server fields.
Proxy Server Configuration Fields
Proxy Server
Definition: The proxy server field specifies the hostname or IP address of the proxy server that will handle the requests.
Usage: This field tells the client application where to send HTTP requests to be forwarded. The proxy server can be located on the local network or on the internet.
Example: proxy.example.com or 192.168.1.100
Proxy Port
Definition: The proxy port is the network port that the proxy server listens on for incoming HTTP requests.
Usage: The client application must use the correct port number to establish a connection with the proxy server. Commonly used ports for HTTP proxies are 8080, 3128, and 8000.
Example: 8080
Proxy Tunnel (HTTP CONNECT Method)
Definition: The proxy tunnel field specifies whether the client application should use the HTTP CONNECT method to establish a tunnel through the proxy server.
Usage: The HTTP CONNECT method is used to establish a secure, end-to-end connection between the client and the destination server. This is commonly used for HTTPS connections.
Consideration: Proxy tunneling is mainly relevant when dealing with HTTPS requests, as it allows the client to establish a secure connection through an intermediate server.
Authentication:
Definition: Authentication refers to the process of verifying the identity of the client attempting to use the proxy server. This is often required to access restricted networks or to log traffic for security purposes.
Types of Authentications:
Basic Authentication: Involves sending a username and password with each request, encoded in Base64.
Digest Authentication: A more secure method that uses a challenge-response mechanism to send credentials.
NTLM/Kerberos: Used in enterprise environments for secure, single sign-on authentication.
Configure Certificates section with the location of certs inside reader. The certificate path, private key path and passphrase need to be provided.
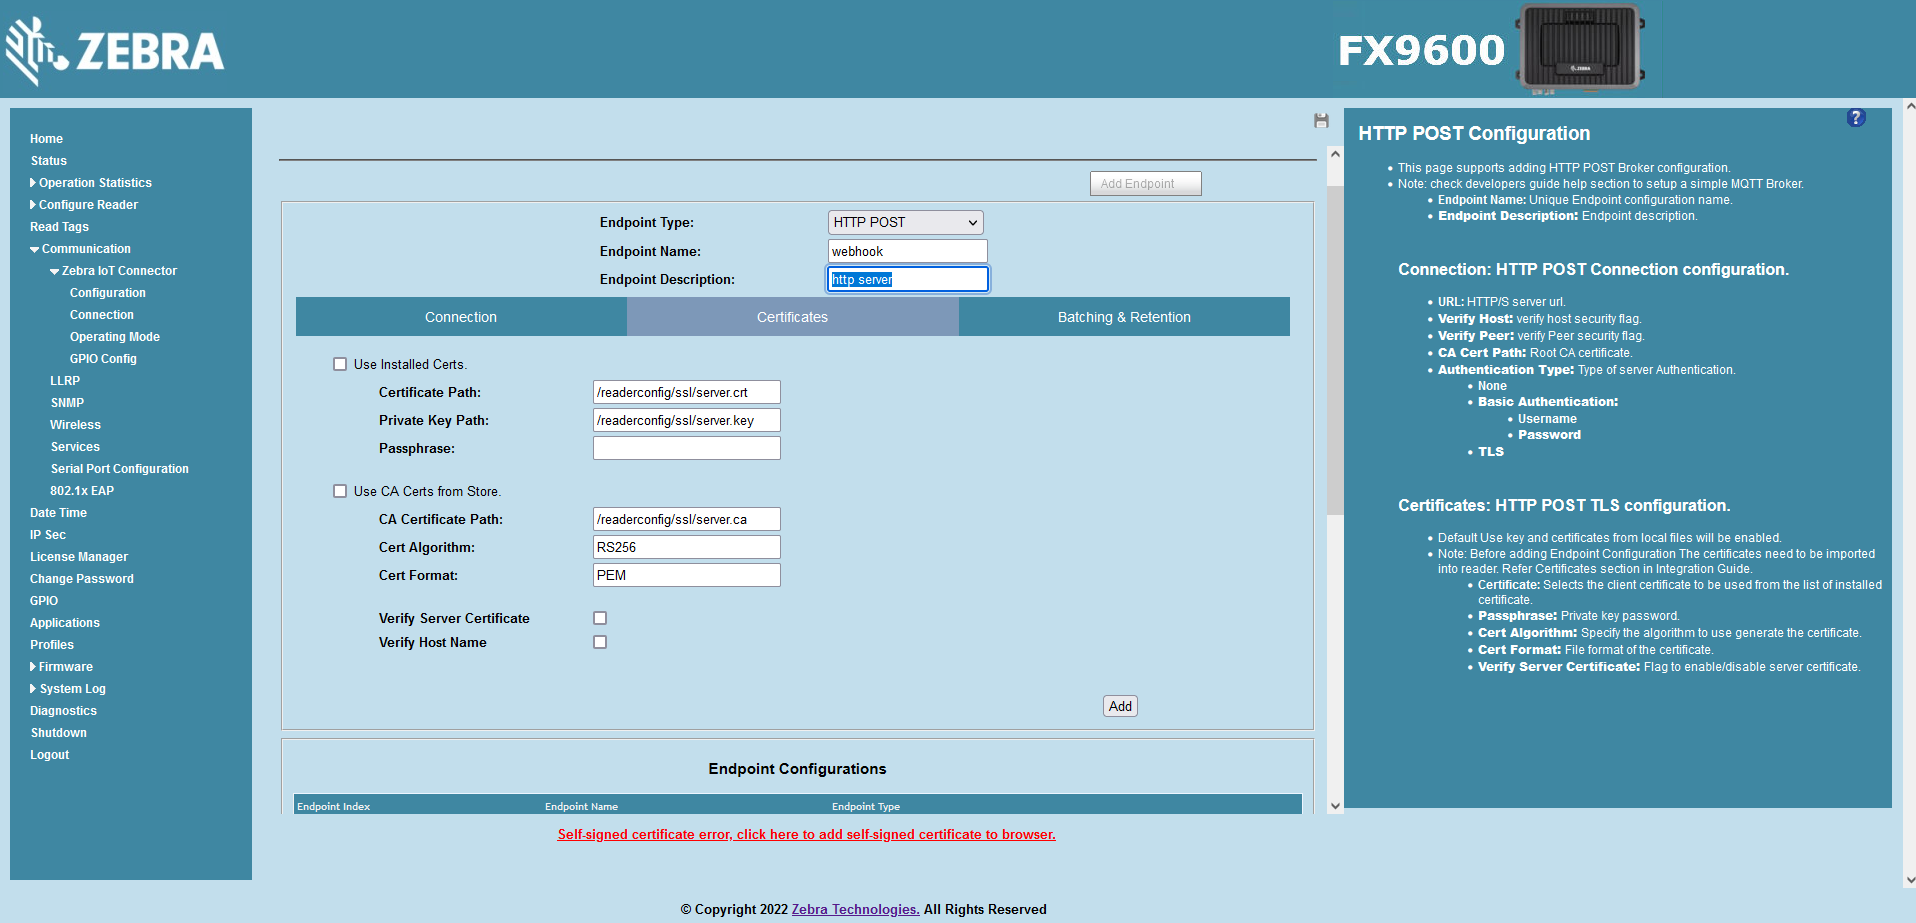
Click on
Add.Once added the endpoint will be seen under
Endpoint Configurations.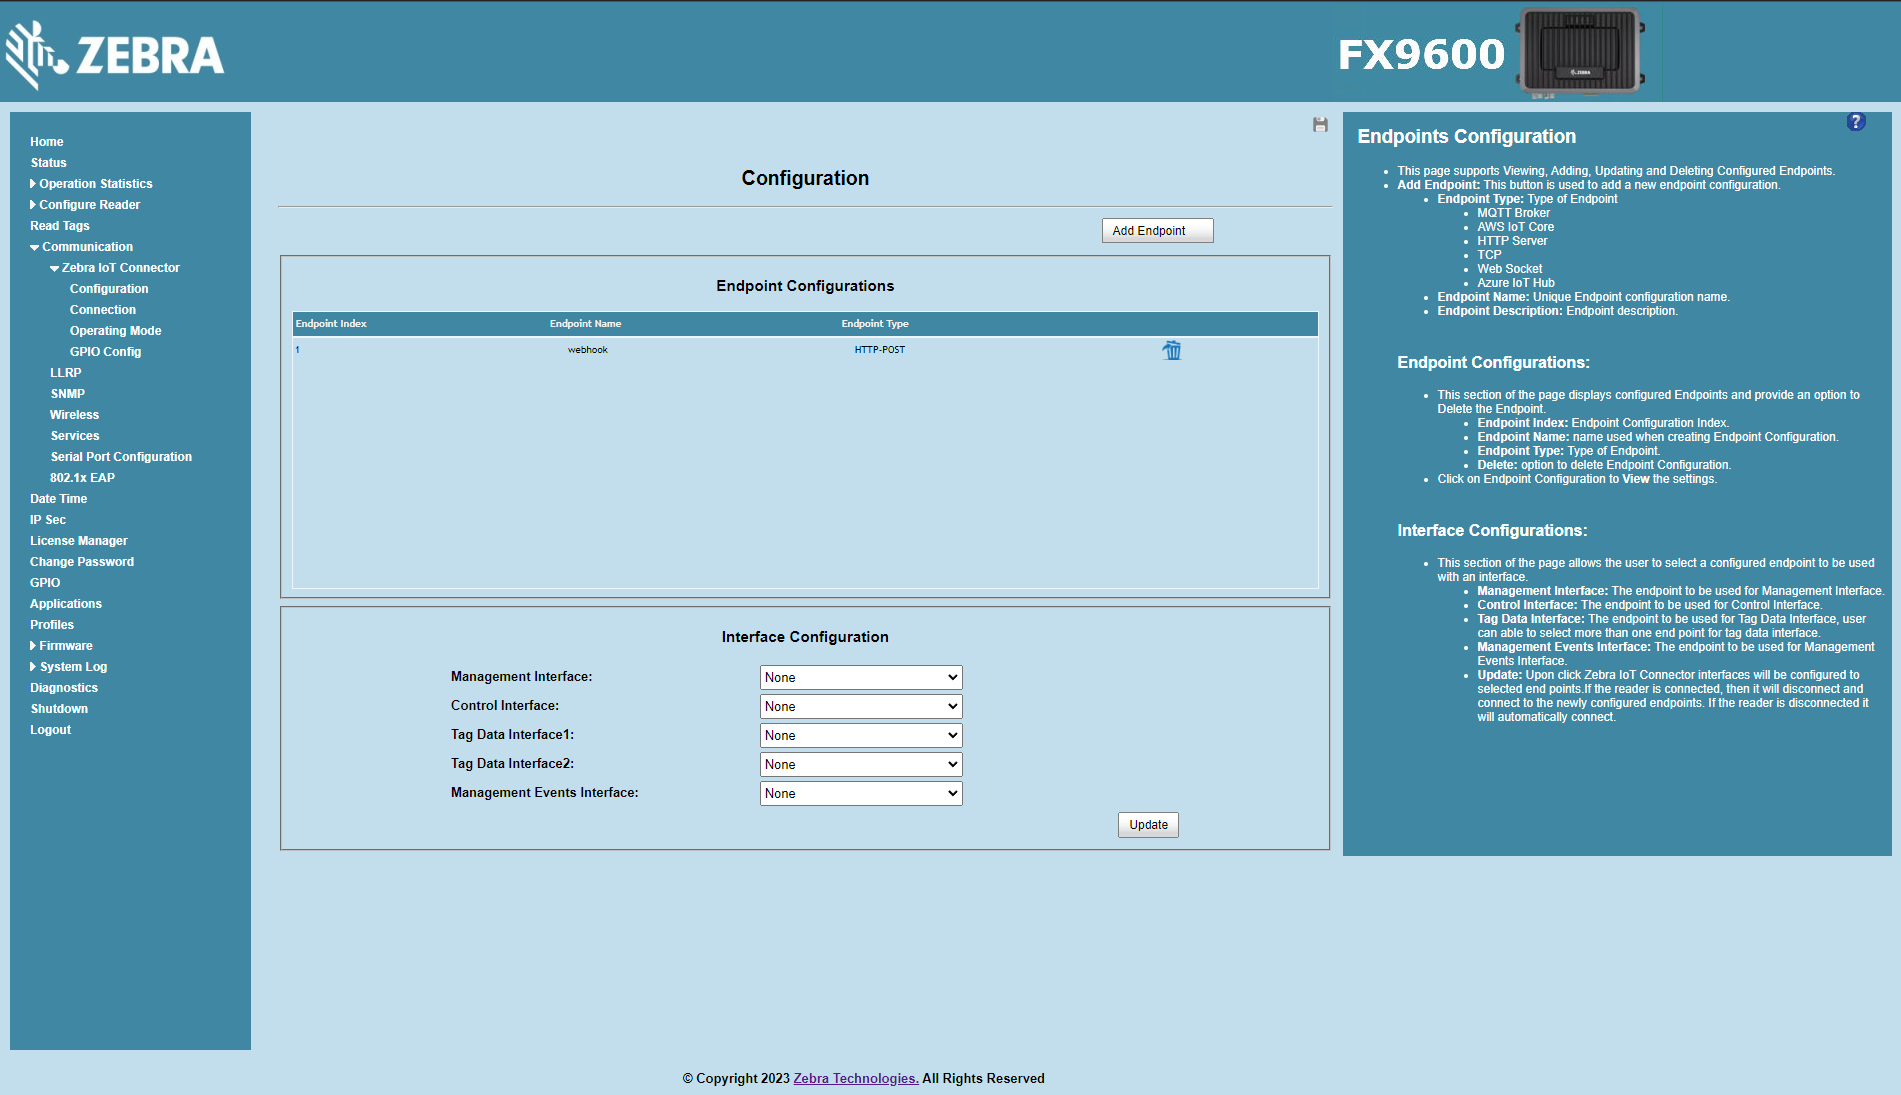
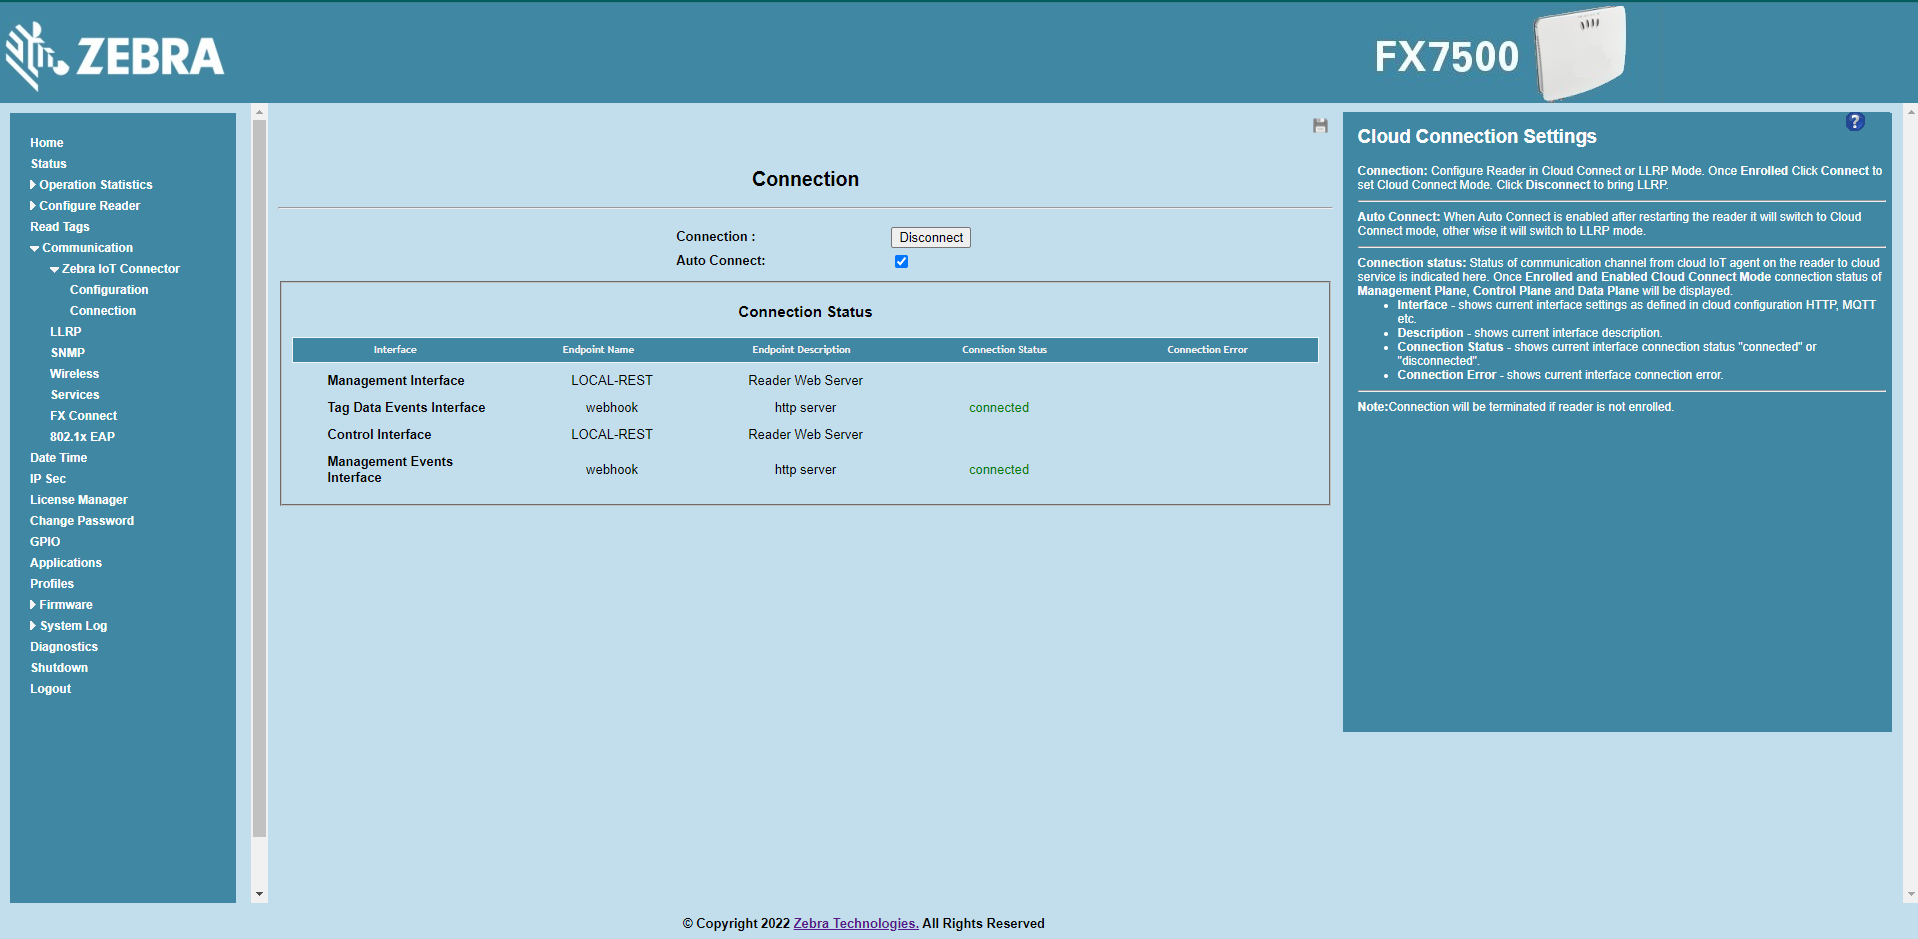
Interface Configuration
Open a web browser to connect to the reader using the host name or IP address.
Click Communication > Zebra IoT Connector > Configuration.
Select webhook endpoint for Management Events Interface and Tag Data Interface.

Click on
Updatebutton to update interface configuration.Current connection status of the interfaces will be displayed under Connection Status section.