Configure device using RM Interface
This page guides user to configure reader using Reader Management Interface.
Important
This guide uses Postman Tool for sending API calls to reader.
Import Certificates and Generate Endpoint Configuration
Import AWS device certificates downloaded into reader.
Method-1: Using SCP.
Copy generated certificates and CA certificate into reader. (copy to desired folder inside
/apps/).Method-2: Using reader certificate webpage.
Create
PFXfile from certificate.Import Certificates into reader using certificate page.
Method-3: pass certificates contents along with
Endpoint Config.
Create MQTT Endpoint JSON object (when used
Method-1orMethod-2for importing certificates).
Edit Example MQTT endpoint JOSN object shown below.
{
    "type": "MQTT",
    "name": "emqx_ssl",
    "description": "emqx",
    "configuration": {
        "endpoint": {
            "hostname": "broker.emqx.io",
            "port": 8883,
            "protocol": "ssl"
        },
        "additional": {
            "cleanSession": true,
            "clientId": "FX7500FCCD18",
            "debug": false,
            "keepAlive": 60
        },
        "enableSecurity": true,
        "security": {
            "certificates": {
                "CACertificatePath": "/apps/broker.emqx.io-ca.crt",
                "certAlgorithm": "RS256",
                "certFormat": "PEM",
                "certificatePath": "/readerconfig/ssl/server.crt",
                "privateKeyPath": "/readerconfig/ssl/server.key"
            },
            "useLocalCerts": true,
            "verifyServerCertificate": true
        },
        "topics": {
            "control": {
                "command": {
                    "qos": 0,
                    "retain": false,
                    "topic": "/FX7500FCCD18_ssl/cmds"
                },
                "response": {
                    "qos": 0,
                    "retain": false,
                    "topic": "/FX7500FCCD18_ssl/rsp"
                }
            },
            "management": {
                "command": {
                    "qos": 0,
                    "retain": false,
                    "topic": "/FX7500FCCD18_ssl/cmds"
                },
                "response": {
                    "qos": 0,
                    "retain": false,
                    "topic": "/FX7500FCCD18_ssl/rsp"
                }
            },
            "managementEvents": {
                "qos": 0,
                "retain": false,
                "topic": "/FX7500FCCD18_ssl/mevents"
            },
            "tagEvents": {
                "qos": 0,
                "retain": false,
                "topic": "/FX7500FCCD18_ssl/tevents"
            }
        }
    }
}
Edit endpoint details with MQTT Broker settings.
Edit protocol based on the desired connection required.
tcp: for unsecure TCP connection.
ssl: for secure TCP connection.
ws: for unsecure Websocket connection.
wss: for secure Websocket connection.For protocols
sslandwssit is required to provide security settings.
Edit
CACertificatePath,certificatePathandprivateKeyPathwith certificate path details
Create MQTT Endpoint JSON object without local certificates (when used
Method-3for importing certificates).
Edit Example MQTT endpoint JOSN object shown below.
{
    "type": "MQTT",
    "name": "emqx_ssl",
    "description": "emqx",
    "configuration": {
        "endpoint": {
            "hostname": "broker.emqx.io",
            "port": 8883,
            "protocol": "ssl"
        },
        "additional": {
            "cleanSession": true,
            "clientId": "FX7500FCCD18",
            "debug": false,
            "keepAlive": 60
        },
        "enableSecurity": true,
        "security": {
            "useLocalCerts": false,
            "certificates": {
                "certificateContent": "{certificateContent}",
                "certAlgorithm": "RS256",
                "certFormat": "PEM",
                "privateKeyContent": "{privateKeyContent}",
                "CACertificateContent": "{CACertificateContent}"
            },
            "verifyServerCertificate": true
        },
        "topics": {
            "control": {
                "command": {
                    "qos": 0,
                    "retain": false,
                    "topic": "/FX7500FCCD18_ssl/cmds"
                },
                "response": {
                    "qos": 0,
                    "retain": false,
                    "topic": "/FX7500FCCD18_ssl/rsp"
                }
            },
            "management": {
                "command": {
                    "qos": 0,
                    "retain": false,
                    "topic": "/FX7500FCCD18_ssl/cmds"
                },
                "response": {
                    "qos": 0,
                    "retain": false,
                    "topic": "/FX7500FCCD18_ssl/rsp"
                }
            },
            "managementEvents": {
                "qos": 0,
                "retain": false,
                "topic": "/FX7500FCCD18_ssl/mevents"
            },
            "tagEvents": {
                "qos": 0,
                "retain": false,
                "topic": "/FX7500FCCD18_ssl/tevents"
            }
        }
    }
}
Edit endpoint details with MQTT Broker settings.
Edit protocol based on the desired connection required.
tcp: for unsecure TCP connection.
ssl: for secure TCP connection.
ws: for unsecure Websocket connection.
wss: for secure Websocket connection.For protocols
sslandwssit is required to provide security settings.
replace
{certificateContent},{privateKeyContent}and{CACertificateContent}with Public Certificate, Private Key and Root CA certificate content.In certificate content replace newline
\\ncharacter with\\r\\ncharacters as shown below for proper JSON object.
Note
/FX7500FCCD18_ssl/teventsReader uses this topic to send tag read events.
/FX7500FCCD18_ssl/meventsReader uses this topic to send asynchronous events like heartbeats, GPI, userapp, errors and warnings.
/FX7500FCCD18_ssl/cmdsReader will subscribe to this topic and listening for commands from cloud.
/FX7500FCCD18_ssl/rspReader uses this topic to send responses to commands.
Import Configuration into Reader
Download and import postman collections
Cloud Connect Enhanced UI.postman_collection.jsonandCloud Connect - RM-commands.postman_collection.json.Create an environment variables
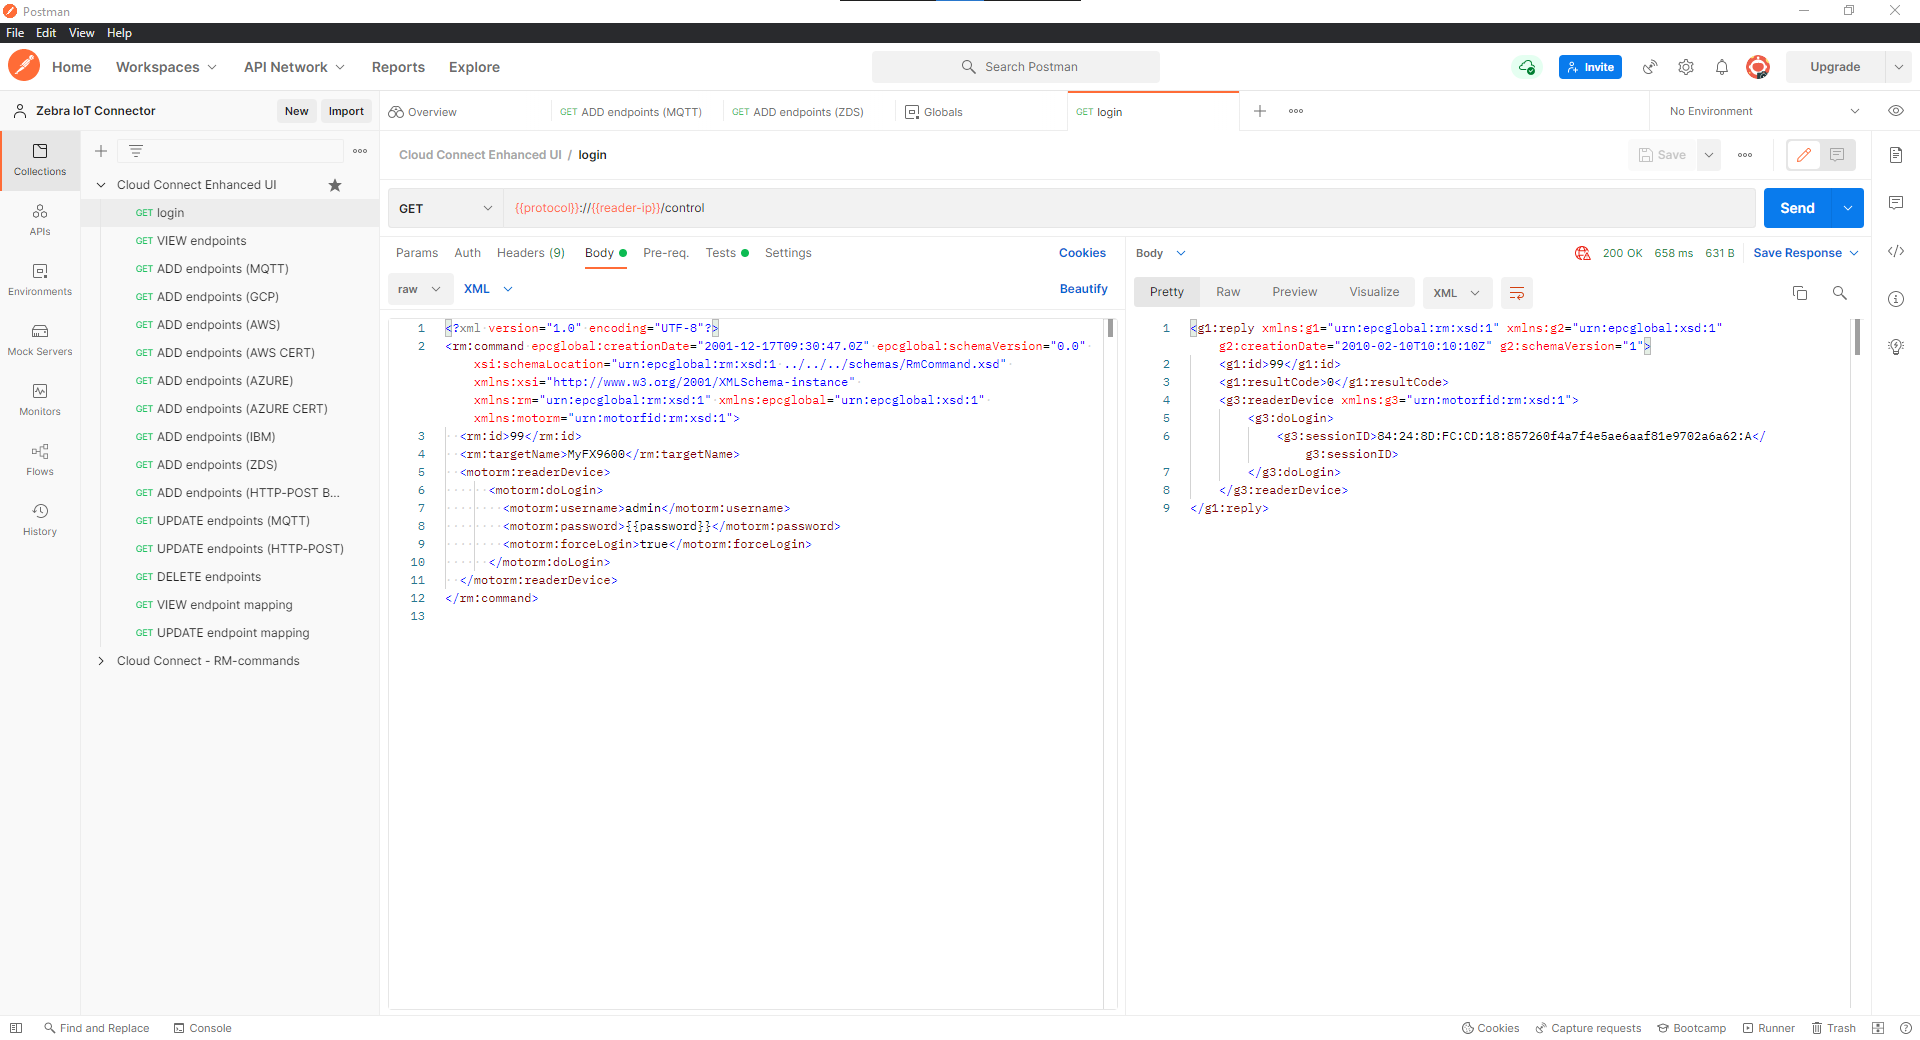
protocol(http/https) andreader-ip(10.17.231.7).Execute
LoginAPI.Important
change
usernameandpasswordfield in the body with readers username and password configured.
Goto
ADD endpoint (MQTT) APIand replace the JSON object between<motorm:data> </motorm:data>with the MQTT Endpoint JSON object created in Import Certificates and Generate Endpoint Configuration.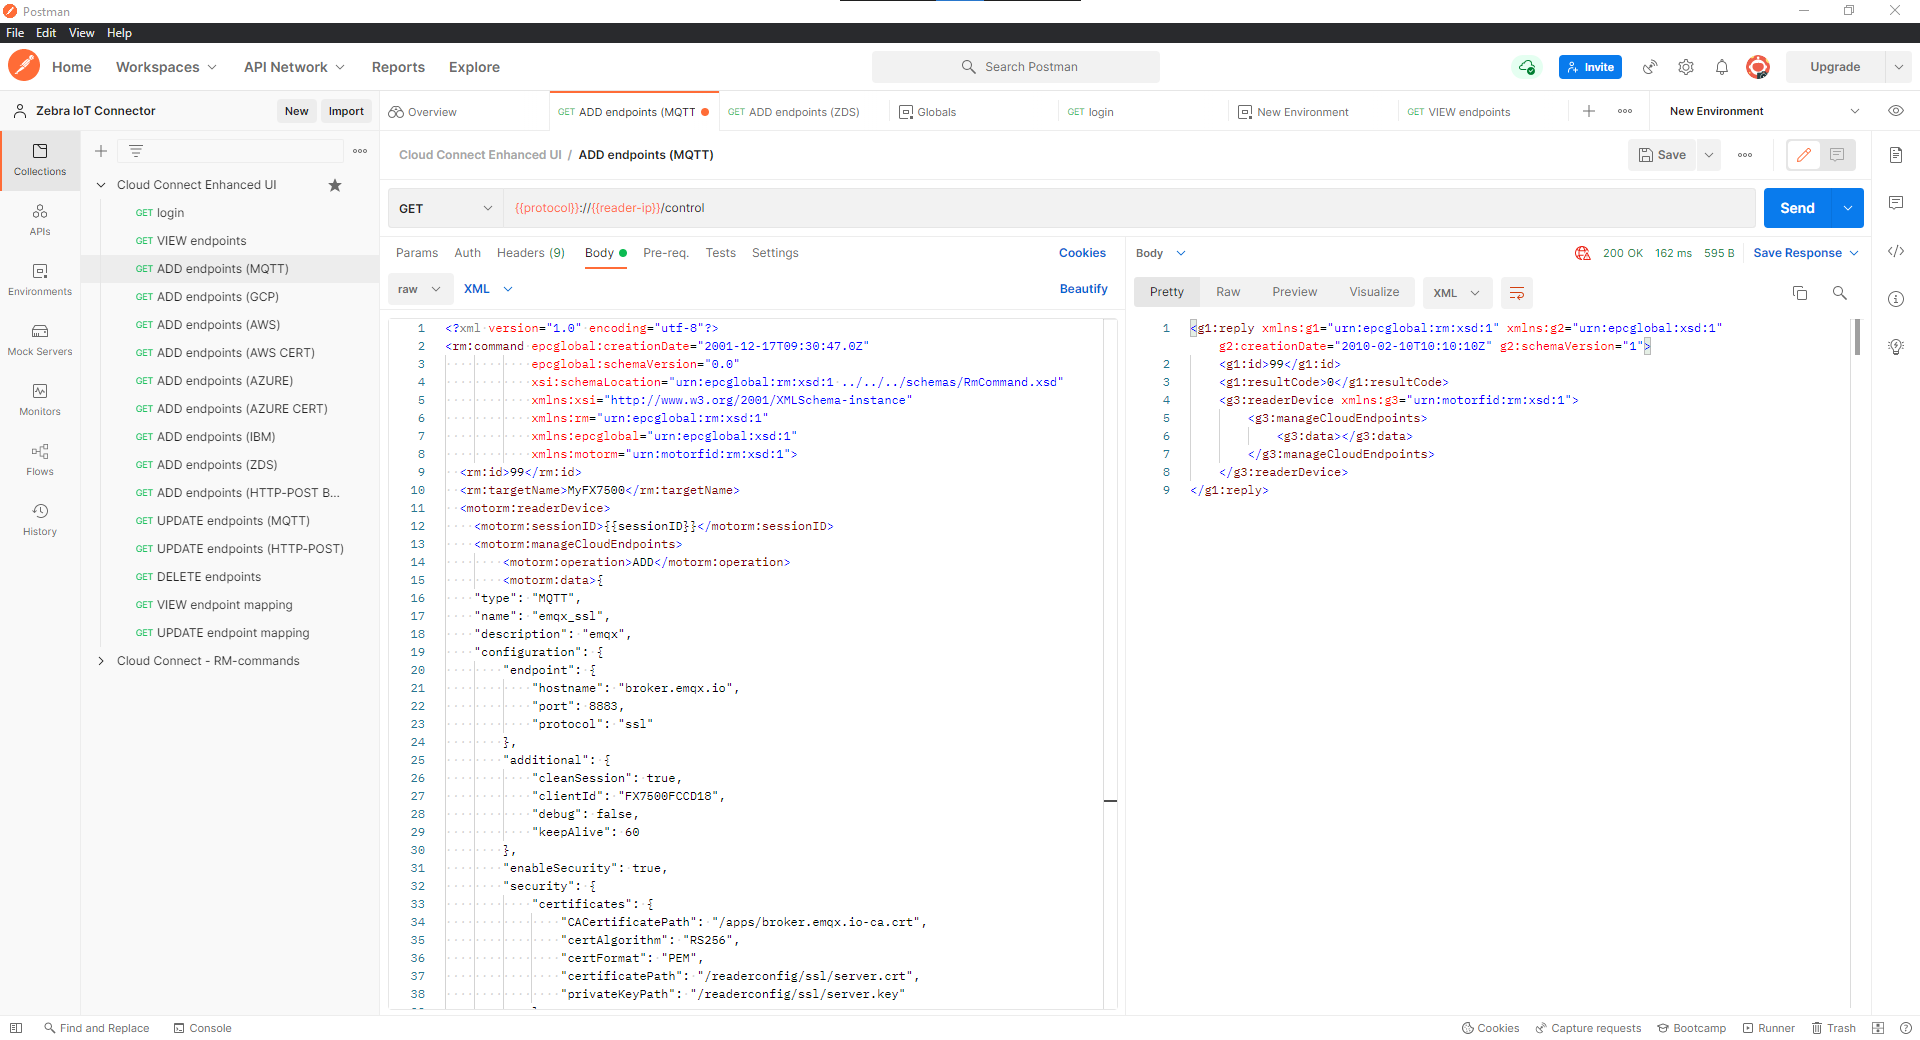
The response
200 OKindicate the endpoint got added successfully.Status other than
200indicate error and response contain the failure reason and checkreader syslogto get more info on error.
Create Endpoint Mapping for MQTT.
Goto
UPDATE endpoint mapping APIand edit control, data, event, and management endpoints to the name used in MQTT endpoint JSON object.
Important
Reader is configured to MQTT endpoint for all the interfaces.
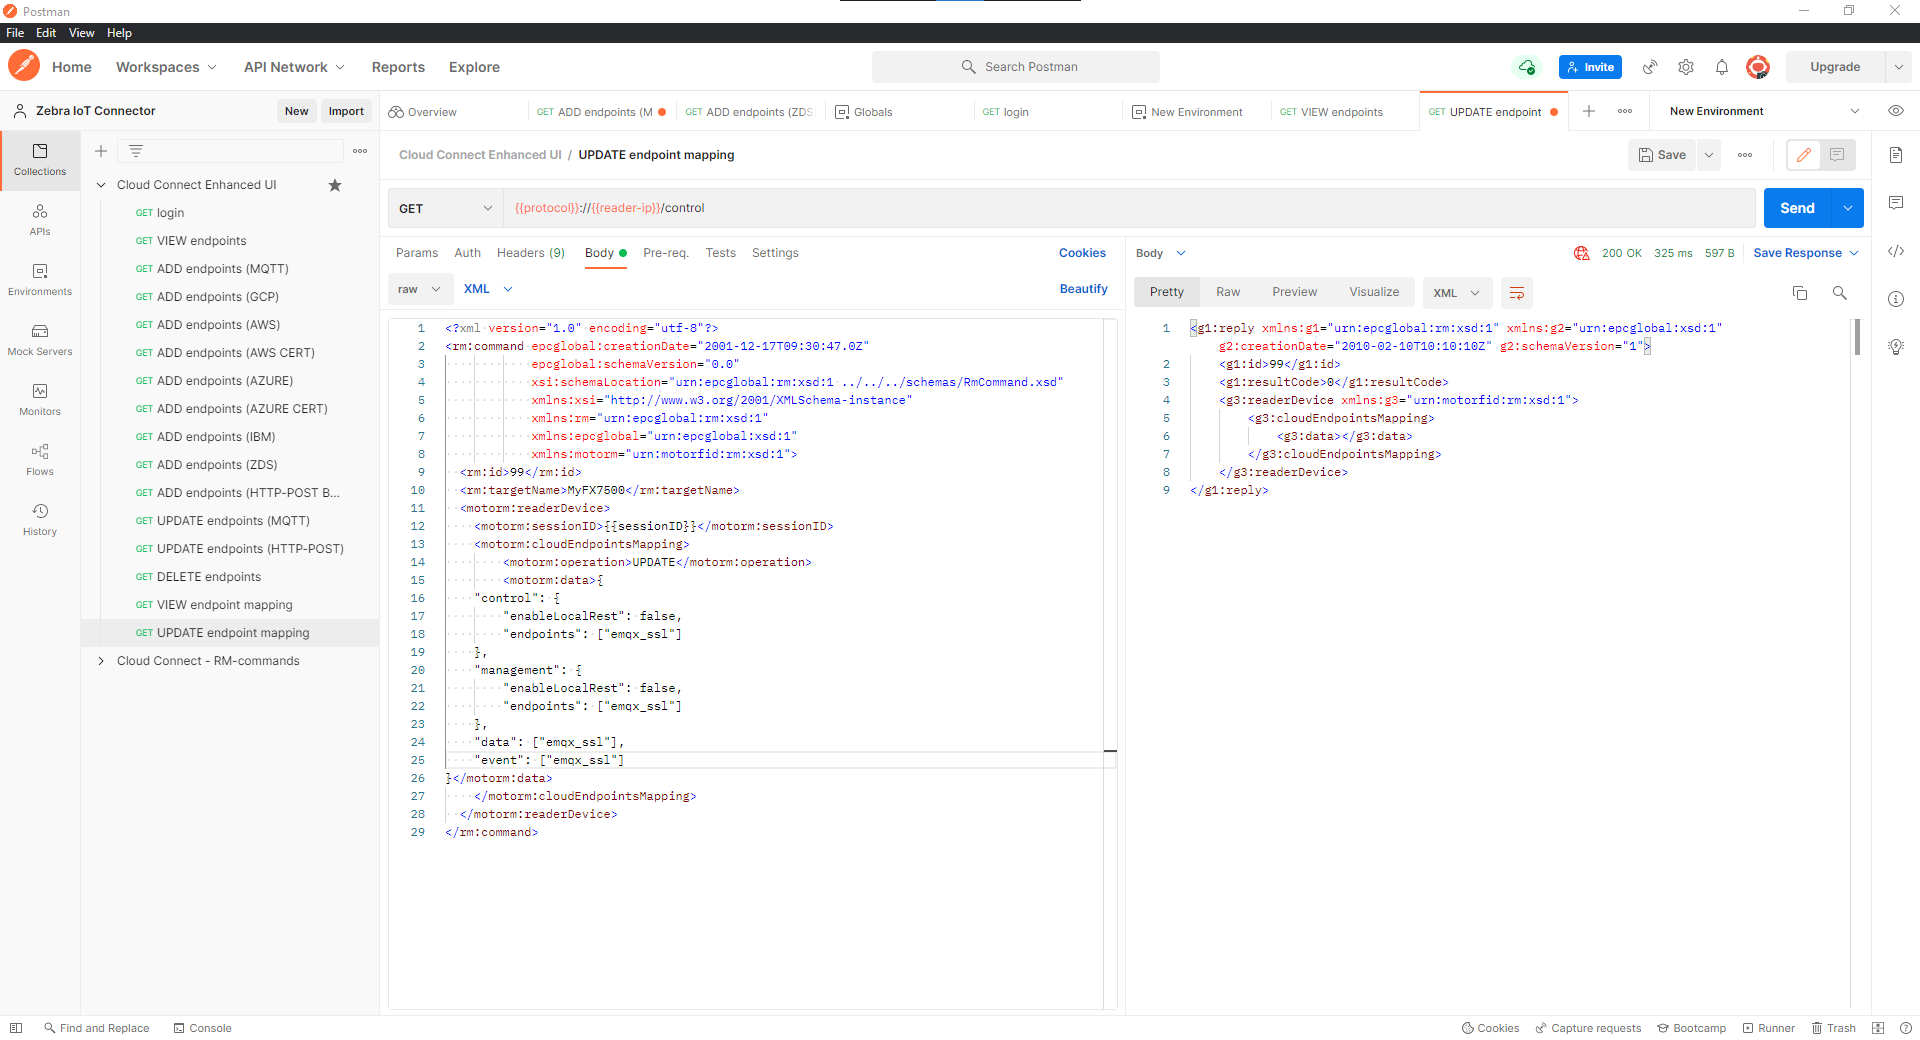
The response
200 OKindicate the endpoint got added successfully.Status other than
200indicate error and response contain the failure reason and check reader syslog to get more info on error.
Connect to Cloud
Goto
isEnrolledToCloudand check if reader is enrolled for IoT connect or not.

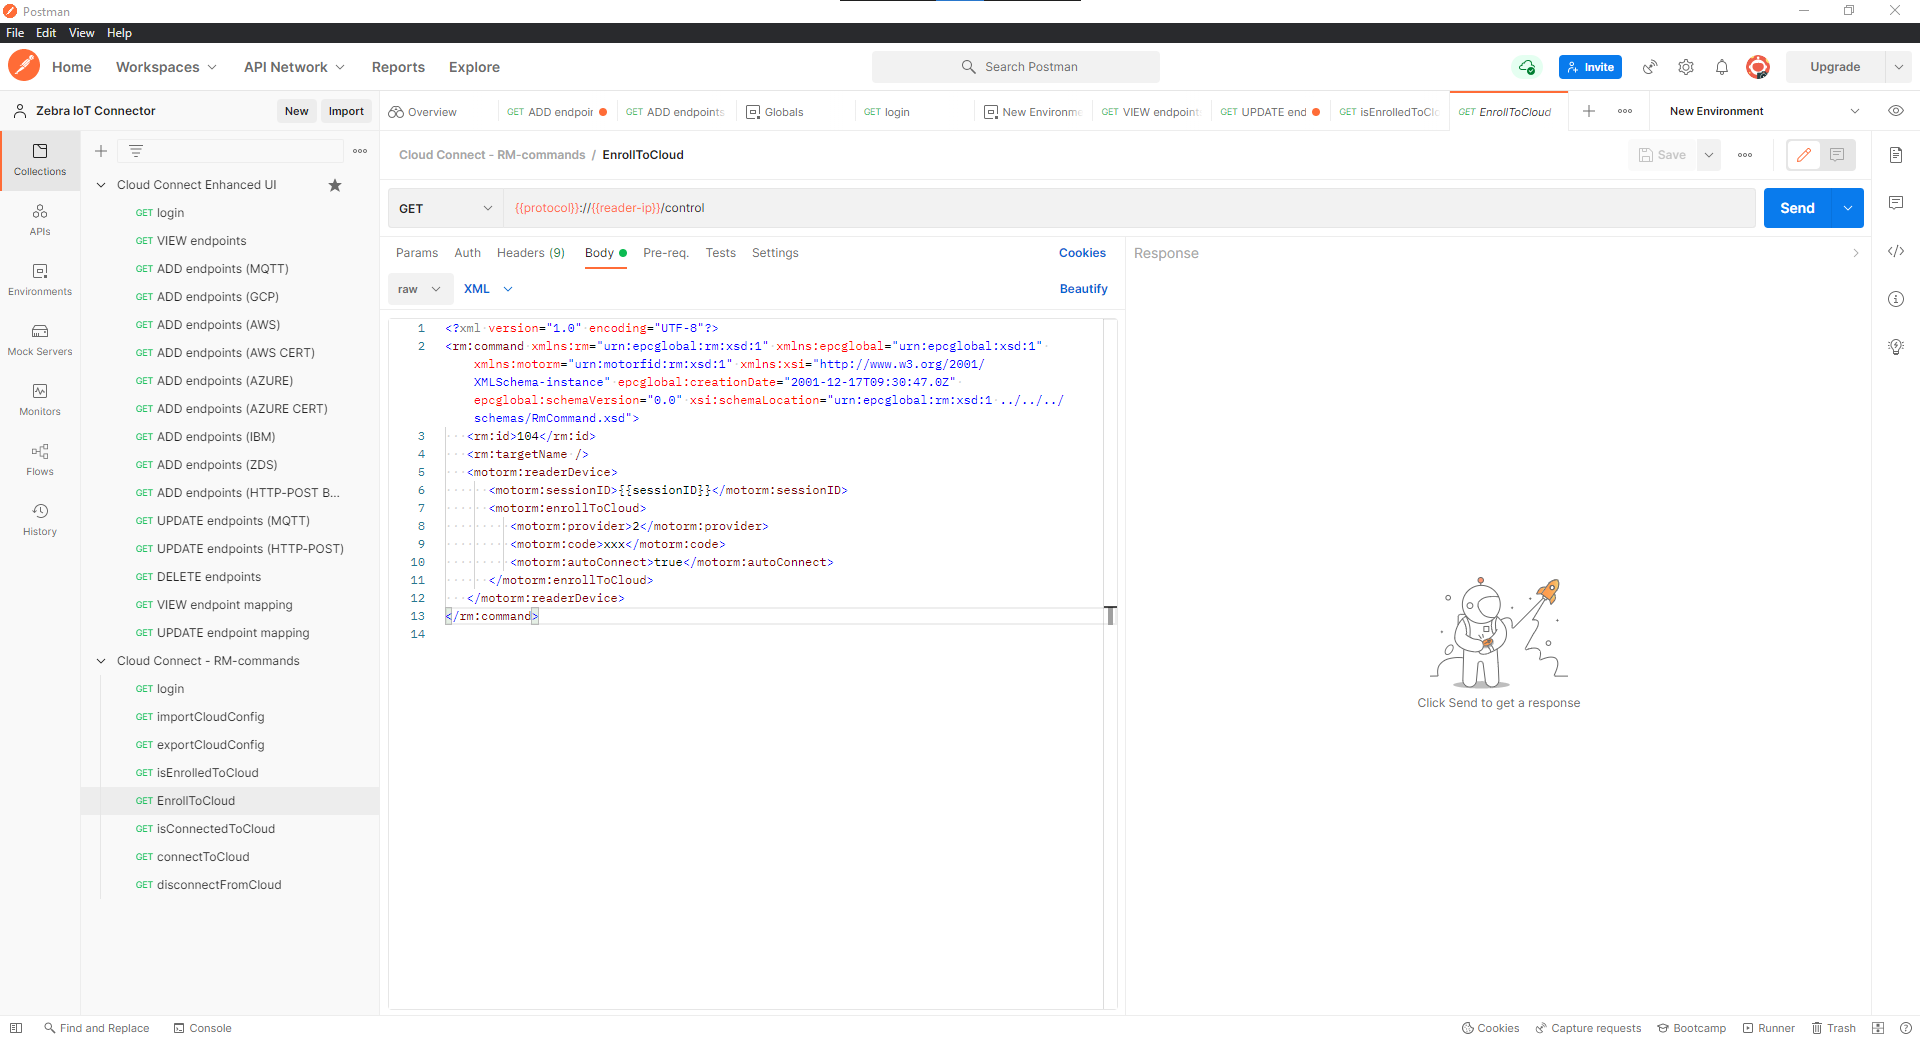
If device is not enrolled currently, Send
EnrollToCloud API.
If device is already enrolled, Send
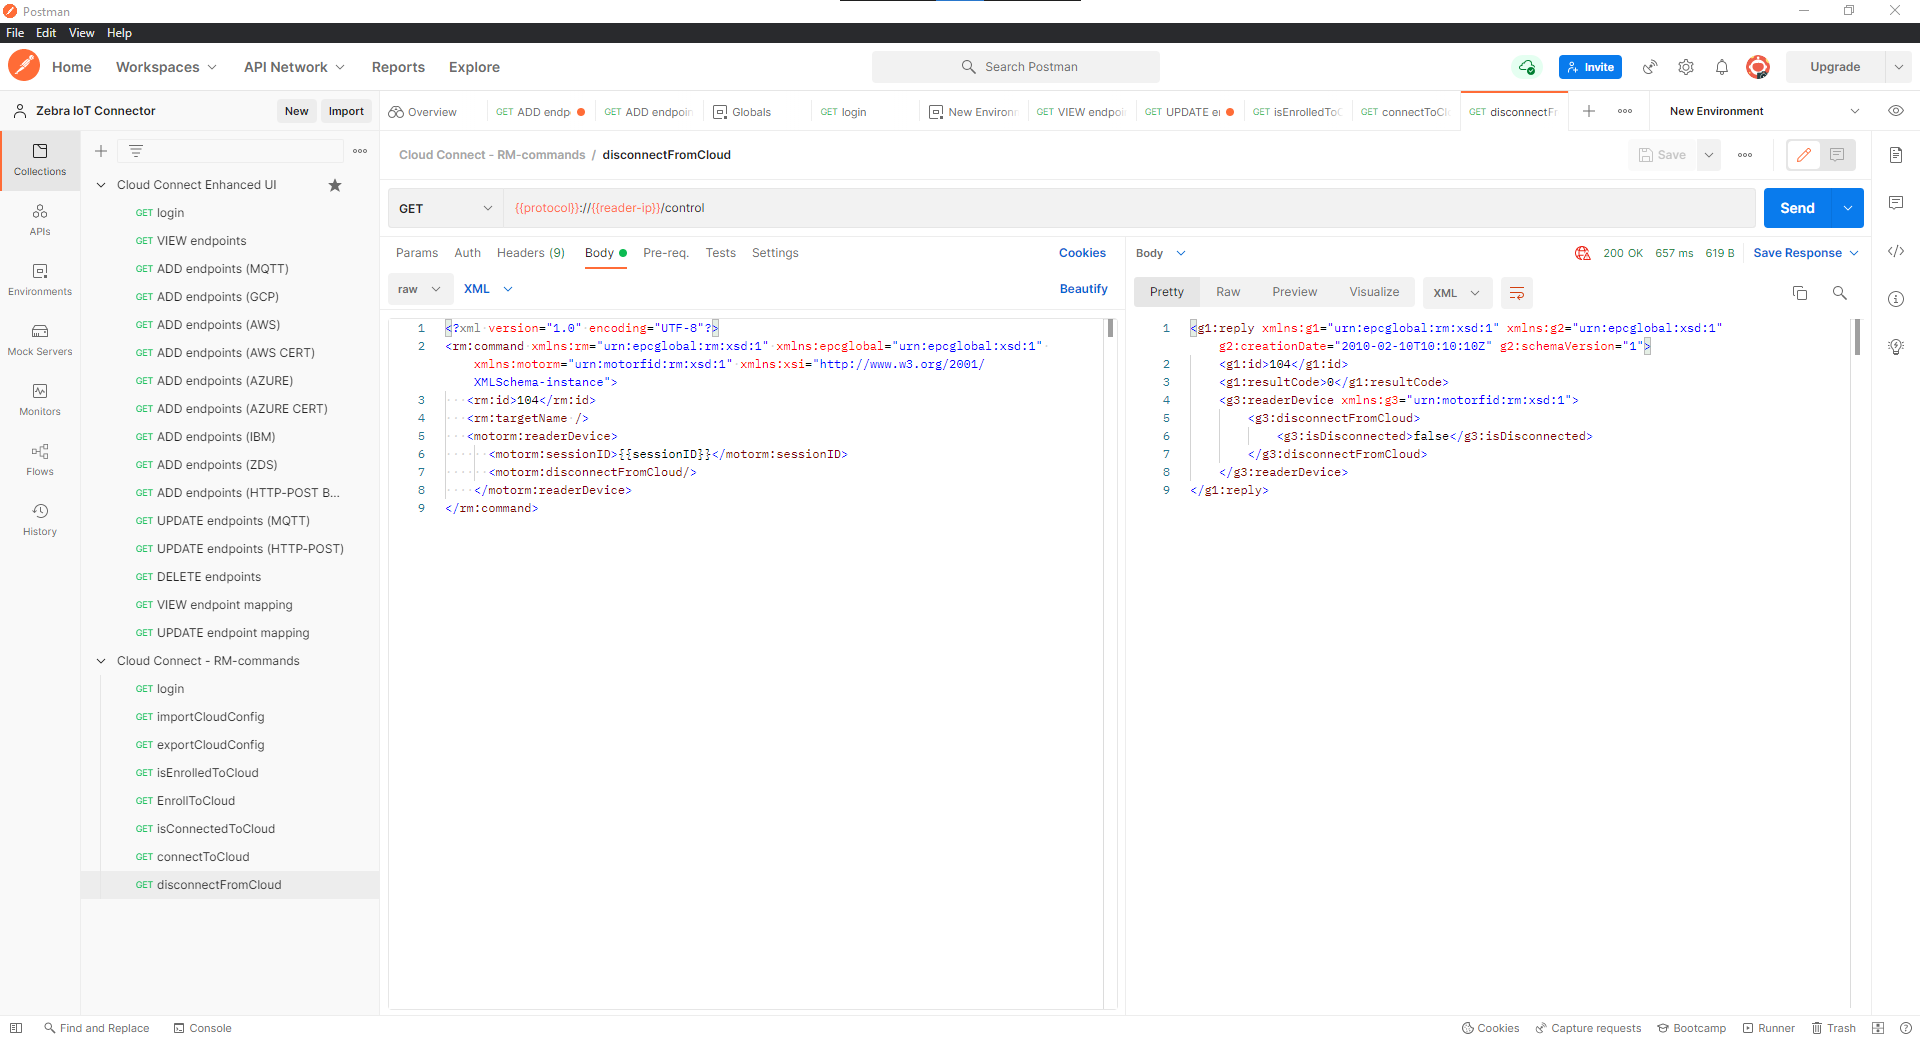
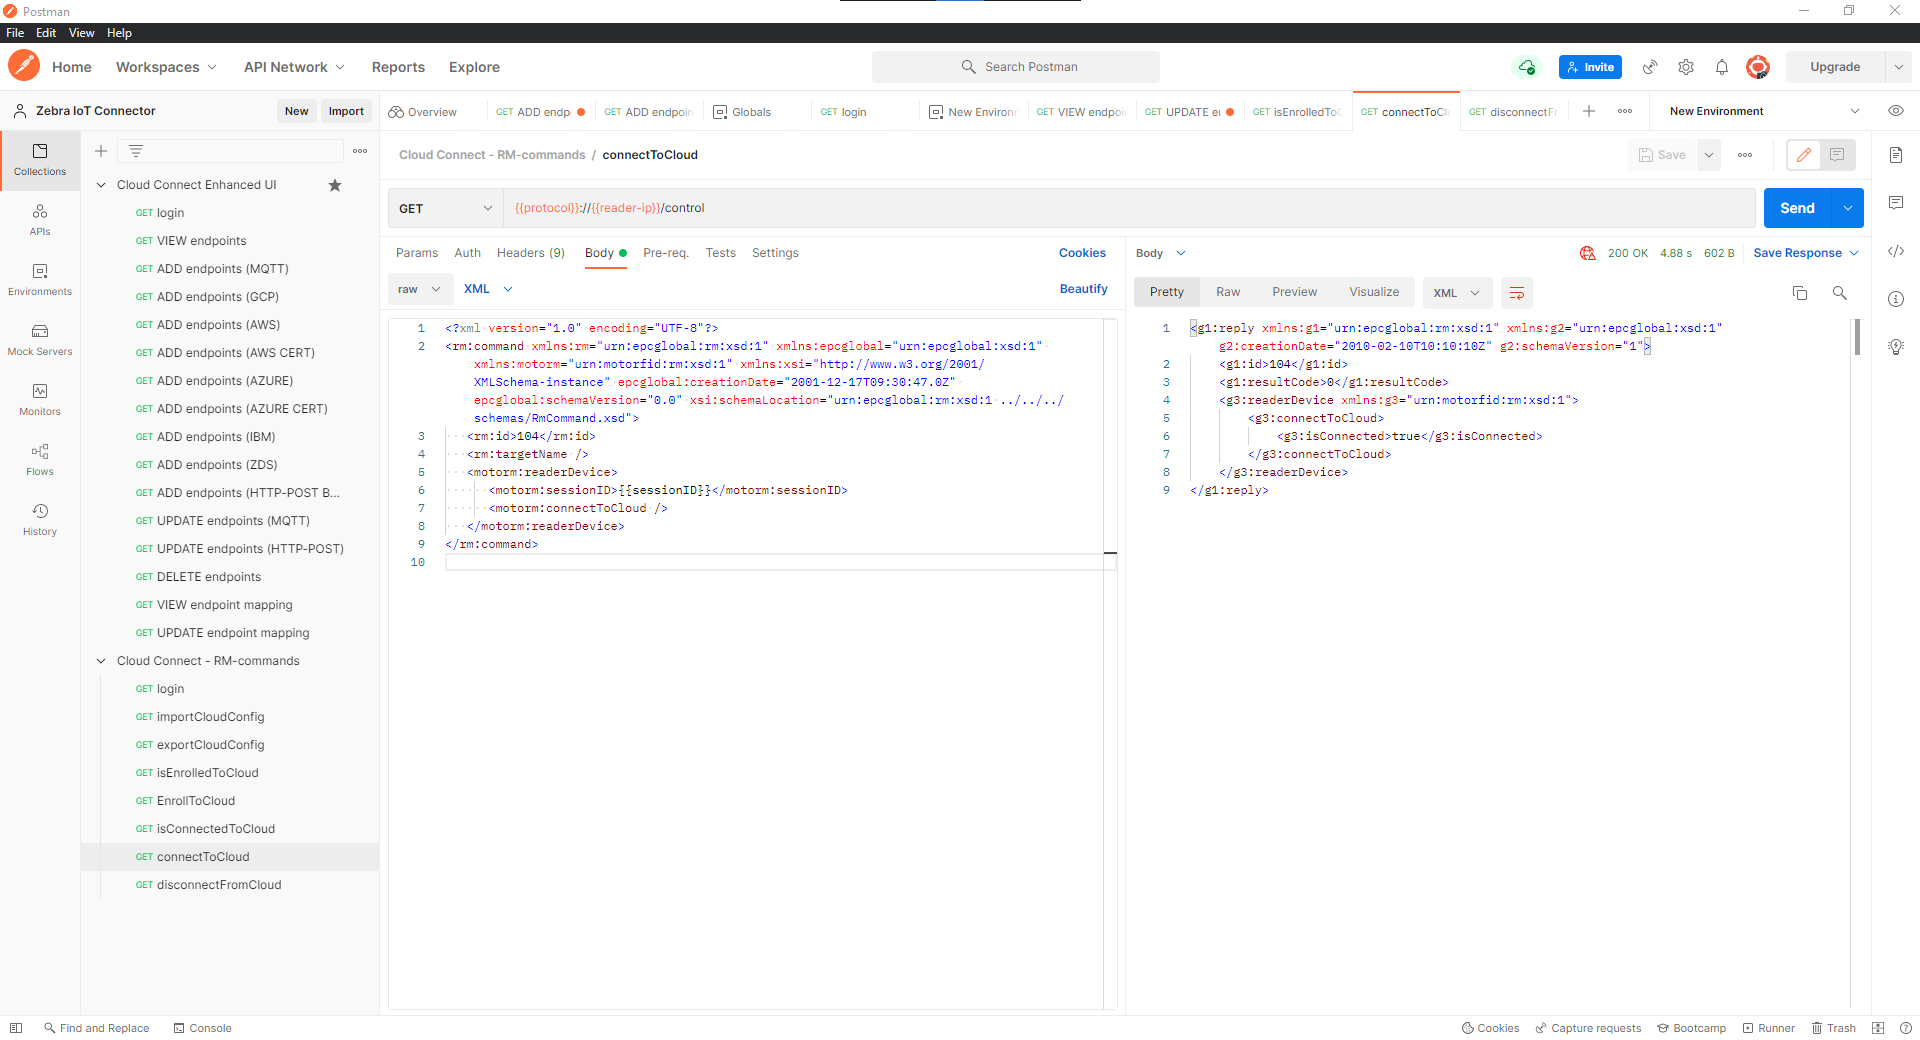
disconnectFromCloud APIandconnectToCloud API.
disconnectFromCloud API:
connectToCloud API:
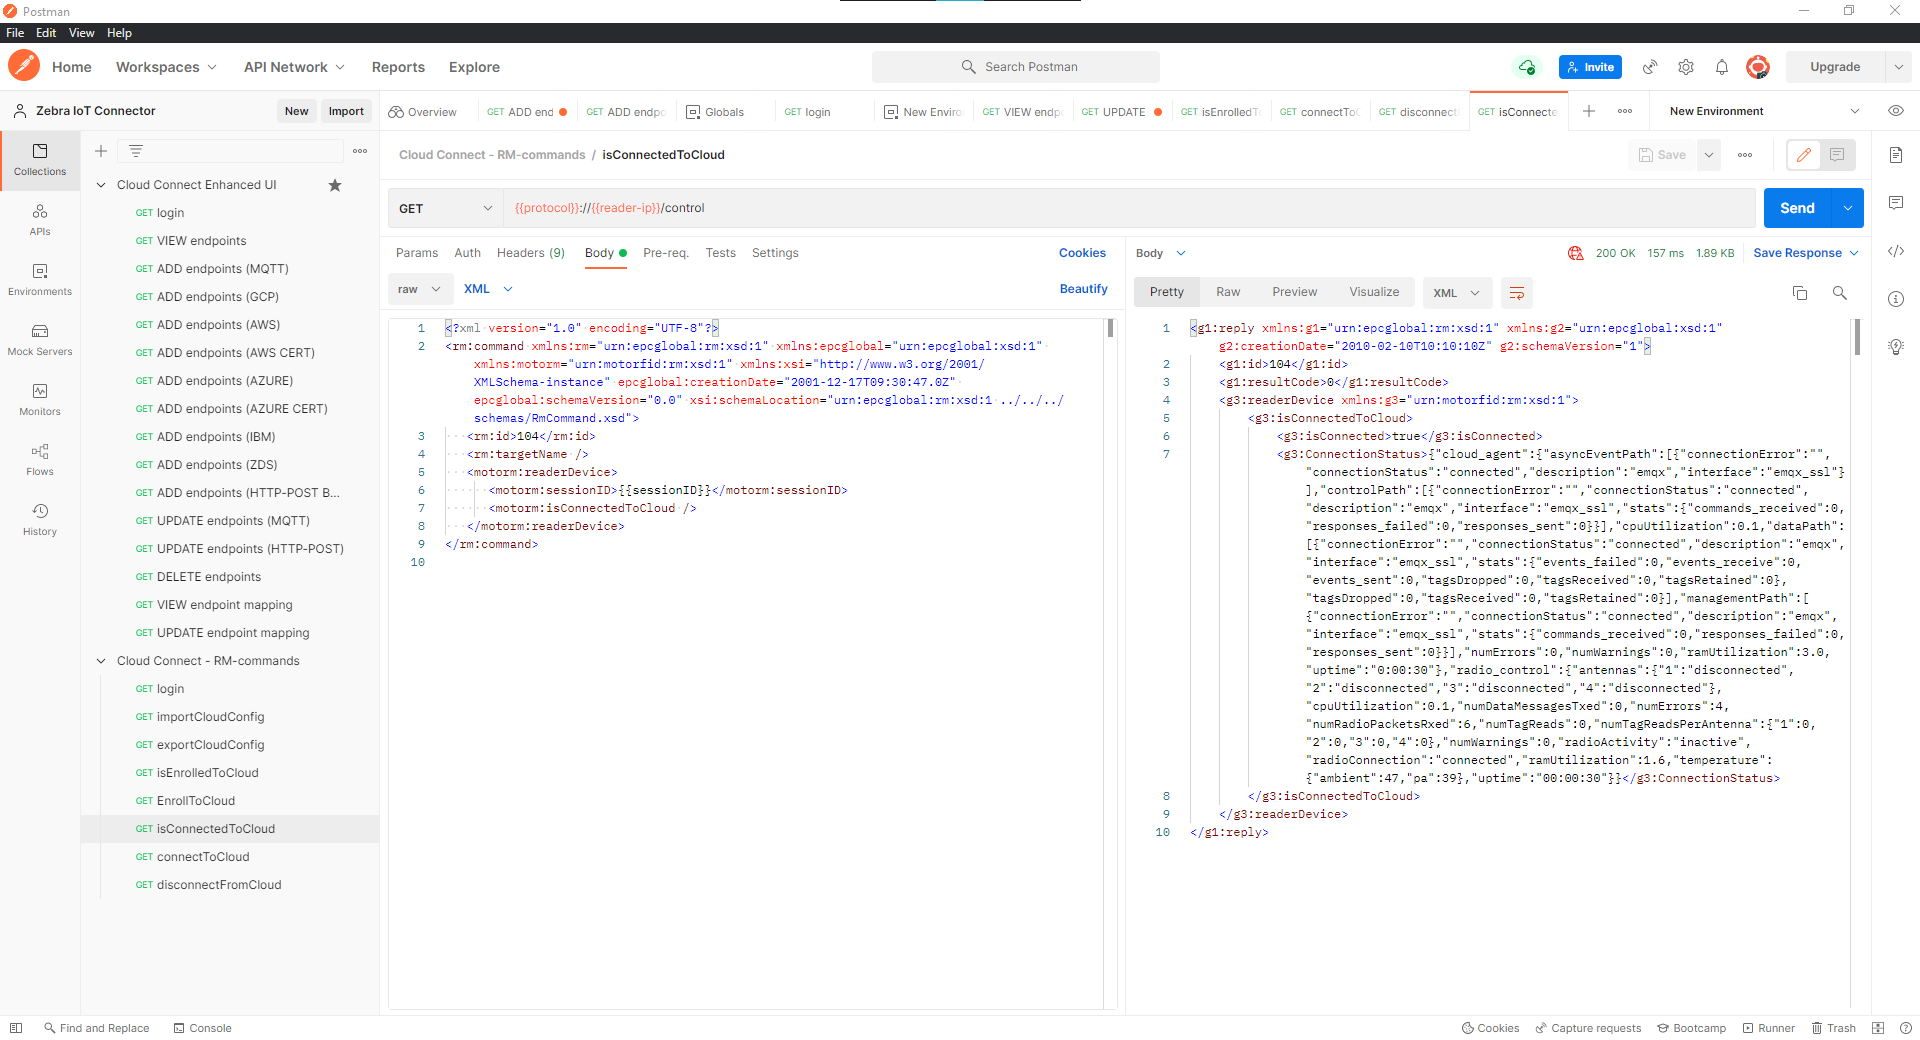
Verify Cloud Connection
Check Cloud Connection Status using
isConnectedToCloud API.