Azure IoT Hub Setup
This page guide user to setup Azure free account with IoT Hub and Create a device under Hub.
Create device self-signed certificates
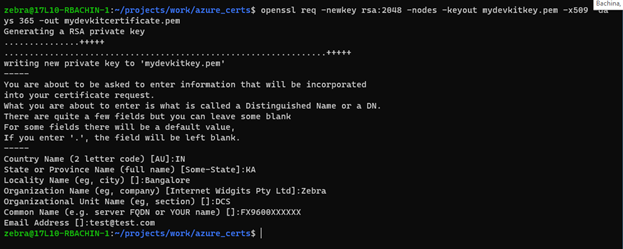
Generate the IoT device’s x509 Certificate and the Private Key Certificate by using the below OpenSSL command from a PowerShell window or Linux terminal
Open PowerShell or Linux terminal and navigate to your desired working directory and run the following command.
$ openssl req -newkey rsa:2048 -nodes -keyout mydevkitkey.pem -x509 -days 365 -out mydevkitcertificate.pem
mydevkitkey.pem: is a Private Key.
mydevkitcertificate.pem: is the actual x509 certificate file.sample code is shown below:
Capture the x509 certificate Fingerprint either
SHA1orSHA256type.SHA1:
$ openssl x509 -in mydevkitcertificate.pem -fingerprint -noout.
SHA256:
$ openssl x509 -in mydevkitcertificate.pem -fingerprint -noout -sha256
Important
Copy the fingerprint hexadecimal number with 40 lengths [for SHA1 type].
Remove the
:from the fingerprint and it will look as shown below.3989467851D9C76811C3B1DF939AE0A103E838CA
Copy the Microsoft DigiCert Baltimore Root cert as
ca.pemfile - used globally. Make sure to remove the double quotes and the line feeds.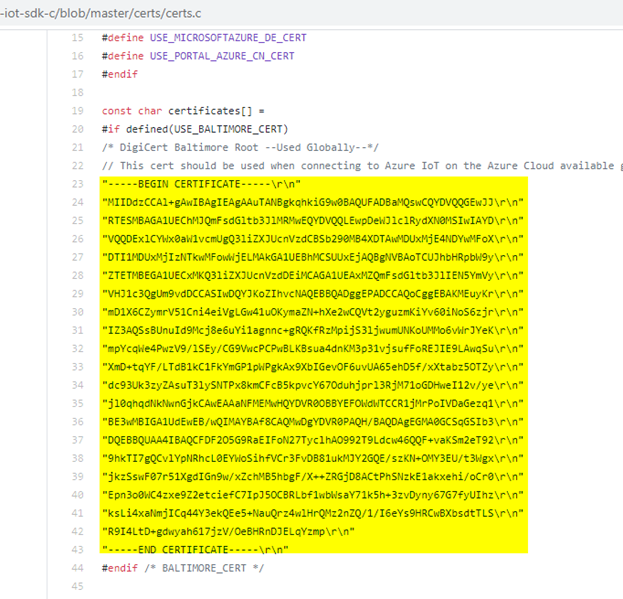
Any one of the certificates provided in the above link can be used as a ca certificate.
Important
Some certificates may be revoked or outdated. In such cases, please attempt to use another certificate from the list.
Create the new IoT Hub and Add device to Azure Portal - IoT Hub
Create an Azure account following the steps mentions @ https://azure.microsoft.com/en-in/free/ (Ignore this step if already have account).
Login to Azure Portal.
Create an IoT hub using the steps mentioned in @ https://docs.microsoft.com/en-us/azure/iot-hub/iot-hub-create-through-portal
Create Device.
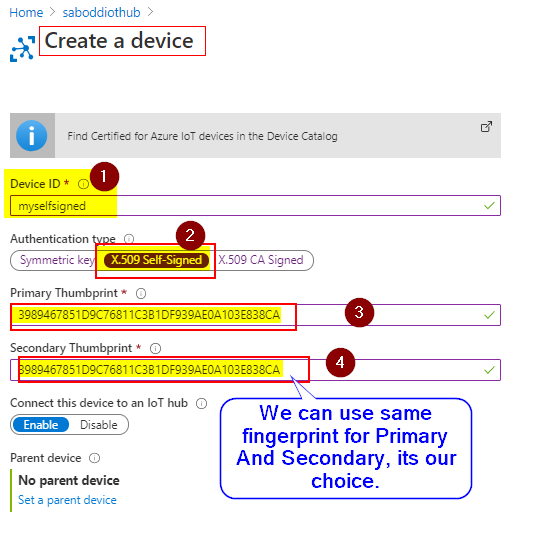
For
Device IDuse the reader hostname or the Common name used while generating certificate.Select x.509 self-signed as authentication type.
For
Primary Thumbprintuse fingerprint generated Create device self-signed certificates.