Inventory Control Settings
This section will describe how the FxConnect Inventory control parameters can be translated to IoT Connector settings.
Inventory Control in FxConnect
The following screenshot shows the FxConnect Inventory Control parameters.

The following table lists the parameters and how they can be configured in the IoT Connector.
FxConnect to IoT Connector mapping of Inventory Control parameters. Parameter
FxConnect
IoT Connector
Start Trigger
Supports
Immediate,Time Delay,GPI Trigger,Periodic Triggeronly supports
ImmediateandGPI Triggermodes of Start TriggerStop Trigger
Supports
Time Delay,GPI Trigger,Tag Observation,N roundsSupports
Time Delay,GPI Trigger,Tag Observation,N roundsSession
Supports
S0,S1,S2,S3Supports
S0,S1,S2,S3Periodic Reporting
Sets the duration with which a tag is reported.
Supported as ReportFilter in Operating Mode
Autostart
Autostarts the FxConnect operation on startup
Supported as AutoStart for
IoT Connector.
Migrating Inventory Control Settings
The following table illustrate the IoT Connector operating mode that must be configured on the reader to effectively migrate the FxConnect configuration.
Operating Modes for FxConnect Inventory Control parameters. FxConnect Parameter
Value
Operating Mode
Start Trigger
ImmediateStart Trigger
GPI Trigger, Port1, stateHighStop Trigger
Time DelayStop Trigger
GPI TriggerStop Trigger
Tag ObservationStop Trigger
N roundsSession
Supports
S0,S1,S2,S3Periodic Reporting
Sets the duration with which a tag is reported.
Autostart
Autostarts the FxConnect operation on startup
Check the Auto Connect checkbox in the Zebra IoT Connector > Connection Page.
Configuring Operating Mode in IoT Connector
In IoT Connector, the equivalent for Inventory Control is called the Operating Mode. For more information on Operating Modes refer this section.
To configure the Operating Mode via Local REST interface, make sure that the Local Rest Management and Local Rest Control check boxes are checked in Communication > Zebra IoT Connector > Configuration page.
click on Connect button in Communication > Zebra IoT Connector > Connection page.
Download and import the Postman Collection for
Local RestEdit the reader-ip and protocol postman variables appropriately.
Get JWT Token using the Login API as shown below.
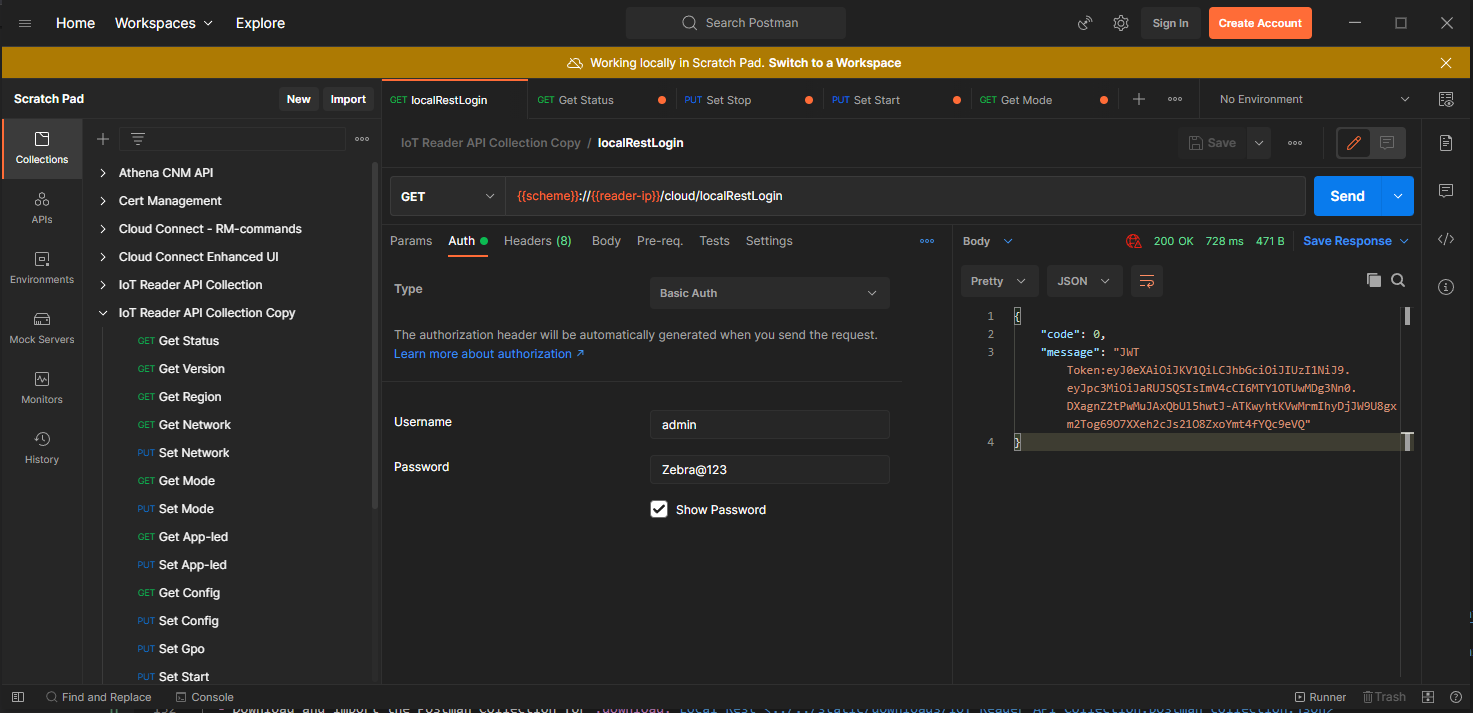
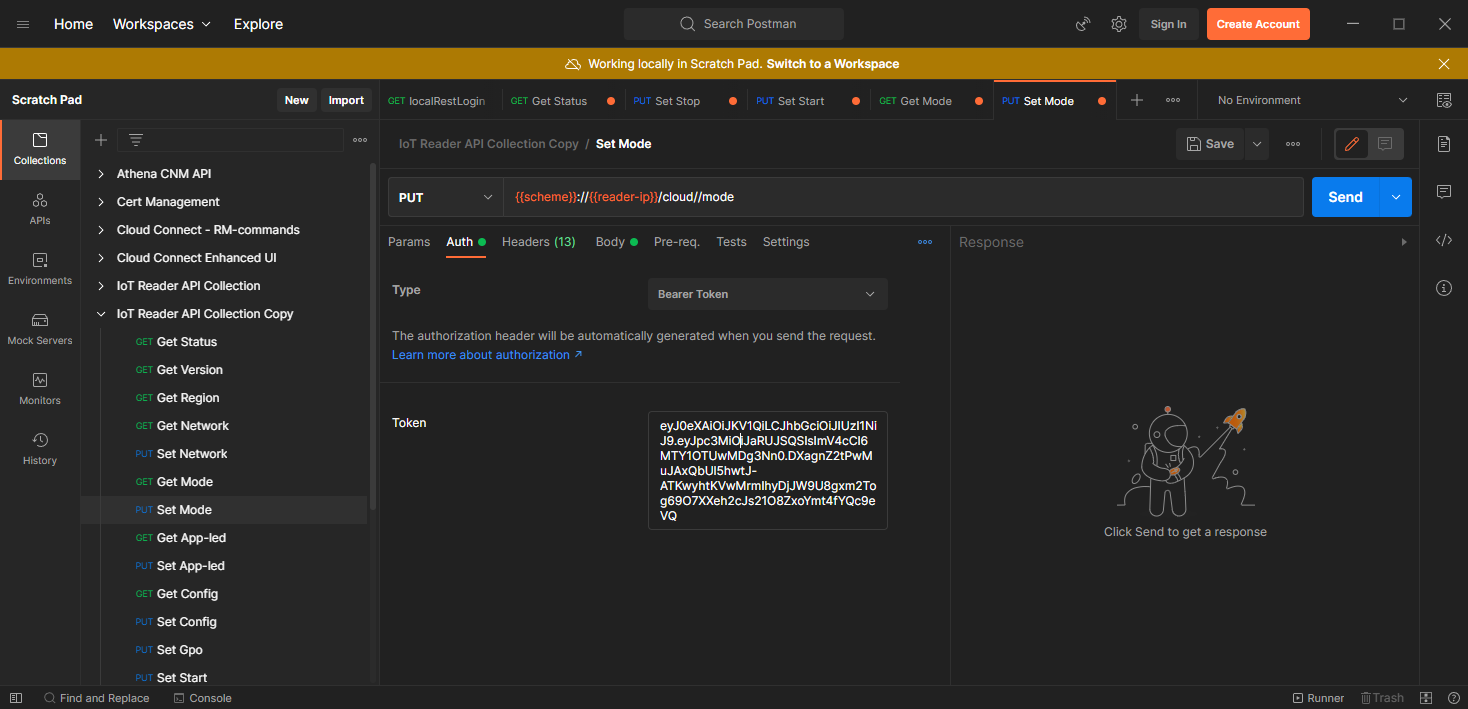
Insert the JWT token in the Authorization header as Bearer Token in PUT Mode API.
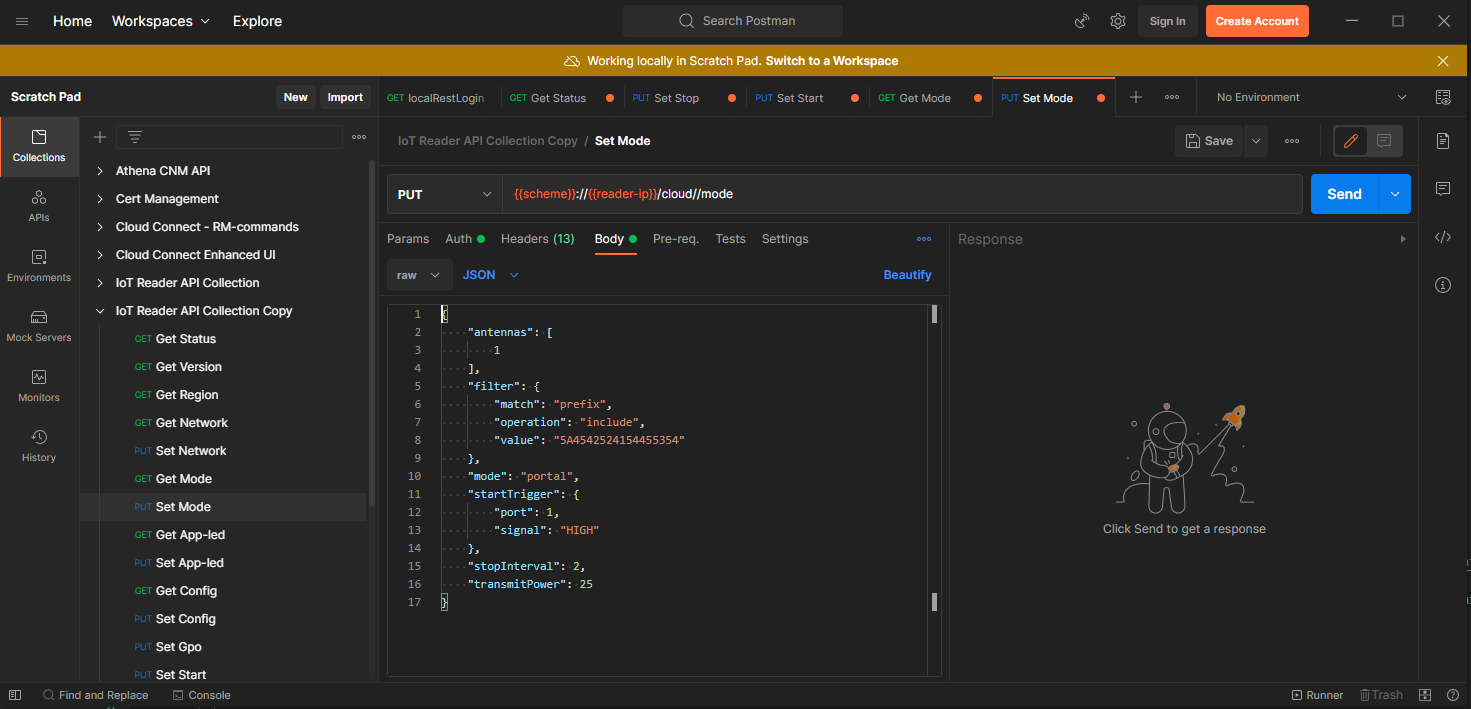
Insert the Body for the Operating Mode as per the table provided in the above section and click on Send.
Example
In this section an example FxConnect Inventory Control configuration will be converted to IoT Connector Operating Mode.

The Above configuration can be converted to the IoT Connector Operating Mode as below.
Operating Mode for the FxConnect Inventory Control shown above.{ "type": "CUSTOM", "radioStartConditions": { "type": "GPI", "gpis": [{ "port": 1, "signal": "HIGH" }] }, "radioStopConditions": { "tagCount": 100 }, "query":{ "session": "S0" }, "reportFilter": { "duration": 5, "type": RADIO_WIDE } }